In my head these are refered to as ‘The Brownie Recipe’ and stored in a polsihed, dark mahogany drawer with a handle the shape of a French man’s moustache.
I took a batch of these to work last week on a day that I managed to get locked out of one building, and locked in another building in the space of 70 minuets. I got back in and back out just fine.
Eating Notes – If you can’t wait for the brownies to cool, they have a molten chocolate cake vibe scooped out the tin fresh from the oven. It’s peng but don’t expect this way of eating or serving to be neat. The rest of the brownies will be set the next day… so, two desserts in one.
Baking Notes – If they don’t set, it means you have underbaked them. They’ll still be great, just stick the whole (cooled!) tin of brownie soup in the freezer overnight. Set it on the counter the next morning to defrost and you’ll be able to slice your brownies. Store the tin of brownies in the fridge once defrosted.
Ingredients
300g dark chocolate
250g unsalted butter
400g soft light brown sugar
5 medium eggs
1 generous tsp vanilla extract
1 tsp salt
100g plain flour
50g cocoa powder
Method
Preheat the oven to 180 / 160 fan. Grease and line a 23cm square tin. If you don’t have this sized tin, find one of similar dimensions and keep an eye on it during baking as the timing will be slightly different.
Chop the chocolate and butter into chunks, place in a large glass or metal bowl. Fill a small saucepan with a little water. Set the bowl of chocolate over the saucepan making sure the bottom of the bowl does not come into direct contact with the water when rested over the pan. Heat on a stove top on low/medium, stiring the chocolate until melted. Once melted, set aside.
In a separate bowl whisk together the sugar, eggs, vanilla and salt until combined and a little lighter in colour.
To the egg mixture, add the melted chocolate, sift in the flour and cocoa powder and whisk to combine.
Pour the batter into the prepeared tin and bake for 29 – 33 mins, until the edges are set and a lttle cracked, but the centre still has a wobble. Allow to cool completely in the tin before slicing. Store these brownies in the fridge.
Happy New Year’s Eve! Here is a Christmas recipe for you! This Lebkuchen recipe is from Mum’s German Christmas Baking book, it’s what I used to make the gingerbread house. If you are not Joe, maybe you don’t know what Lebkuchen is? It’s a German Christmas biscuit. There are lots of different kinds, but the one in this recipe is the best. It’s a cross between a cake and a biscuit that is spiced and sweetened with honey. A bit like soft set gingerbread… but with no ginger. Mmm! You’ll never want to eat anything else at Christmas ever again.
This bit has nothing to do with Lebkuchen. We met Becky and Roly for a walk yesterday about a 30min drive away from home. In the car on the way back we were talking about how good it was to see them, and to see people around this time of year. I said ‘I like hearing about other people’s Christmases’, you ‘what, listen to other people’s Christmas and then say nothing about ours?’, me ‘yeah.’, you ‘classic’. Then we laughed. Me ‘it normalises it a bit’, you ‘mm, yeah it does’. That wasn’t us saying no one ever asks about our Christmas (lol, this would be pretty sad), or that Becky and Roly didn’t ask or want to know (they did!), but it was us acknowledging our quietness about the day, that normally we wouldn’t because we wouldn’t be together with the same friends. It was comforting to hear that our friends’ days had their own drama and comforting that this time I wasn’t the only one being quiet about the day because most of the time our Christmas is a little bit too painful, too predictably strange to talk about. The conversation we had in the car on the way back made me very calm and happy. The music was good and your lemon jelly bean car freshener smelt nice.
This dough needs time to rest over night in the fridge, it needs this time to develop its flavour. This will also help the biscuits keep their shape when baked in the oven because your dough will be a bit cold before hitting the oven. Sorry, I hate it when recipes say that, I know you want your Lebkuchen now, I do too.
This makes A LOT of Lebkuchen. haha. But it’s a really forgiving dough that keeps well once baked. You can also keep the dough in the fridge for up to 3 days before baking. So, if you don’t have the oven space to bake all 40 at once, spread out your baking over a couple days.
Ingredients
For about 40 pieces of Lebkuchen
250g honey
250g brown sugar
150g butter
100g ground almonds
400 to 450g plain flour – start with 400g, if you think your dough is too soft to roll out add in the extra 50g
1 teaspoon cinnamon
1/2 teaspoon ground cloves
1/2 teaspoon ground cardamom
1/2 teaspoon nutmeg
1/2 teaspoon all spice – if you don’t have this (I didn’t) replace with ground ginger or any other spice listed above
Zest of half a lemon
1 tablespoon cocoa powder
1 egg
1 teaspoon bicarbonate of soda
2 tablespoons rum or water
Method
Melt the honey, sugar and butter in a saucepan over a medium heat, stirring regularly until the sugar has dissolved into the melted honey and butter. At this point there should be no grainy bits of sugar on the spoon used to stir the mixture.
Pour the melted mixture into a bowl and allow to cool slightly while you measure out the flour and ground almonds.
Add the ground almonds, sifted flour, spices and egg into the melted honey mix and work together with a spoon (or hands) to form a dough. The Dough will not form into a ball, but it will be stiff and quite hard to stir together.
In a cup mix the bicarbonate of soda and rum or water until dissolved. Add this to the dough, and beat mix together until the dough is shiny and and tacky (not really sticky). Don’t worry about the dough being stiff, it’s a mini workout for the ol’ biceps.
Cover the bowl of dough with cling film and leave overnight in the fridge.
The next day heat the oven to 180 and line a couple of baking trays with grease proof paper, or butter. Take the dough out of the fridge for about 15 mins. This will just make it easier to roll out.
Lightly flour your worksurface and rolling pin (or wine bottle) and roll out the dough to about 4mm thick. Cut out your lebkuchen shapes, re rolling the dough until it’s all gone. If your biscuit cutters stick then dip them in flour before cutting.
Bake for 10 mins or until the biscuits are puffed up and the edges look set. They should come out of the oven very soft, this is good! Don’t be tempted to bake them until they are firm, or your lebkuchen will be sad and dry.
Once cool, you can leave them as they are, cover them in lemon icing (mix icing sugar and lemon juice to a runny consistency) or dip them in melted chocolate. The Lebkuchen is your oyster!
Becky and Roly, this post is for you. Happy New Year’s Eve, Love Caitlin xxx
It’s Christmas boiiiii! Happy Christmas to you. You’re in the shower right now upstairs and I’ll say happy Christmas to you when you come down, so, this happy Christmas is to anyone reading. Happy Christmas, I hope where ever you are you’re feelin good vibes today. We actually have quite a few people reading now, for once I’m not counting mum and dad as quite a few.
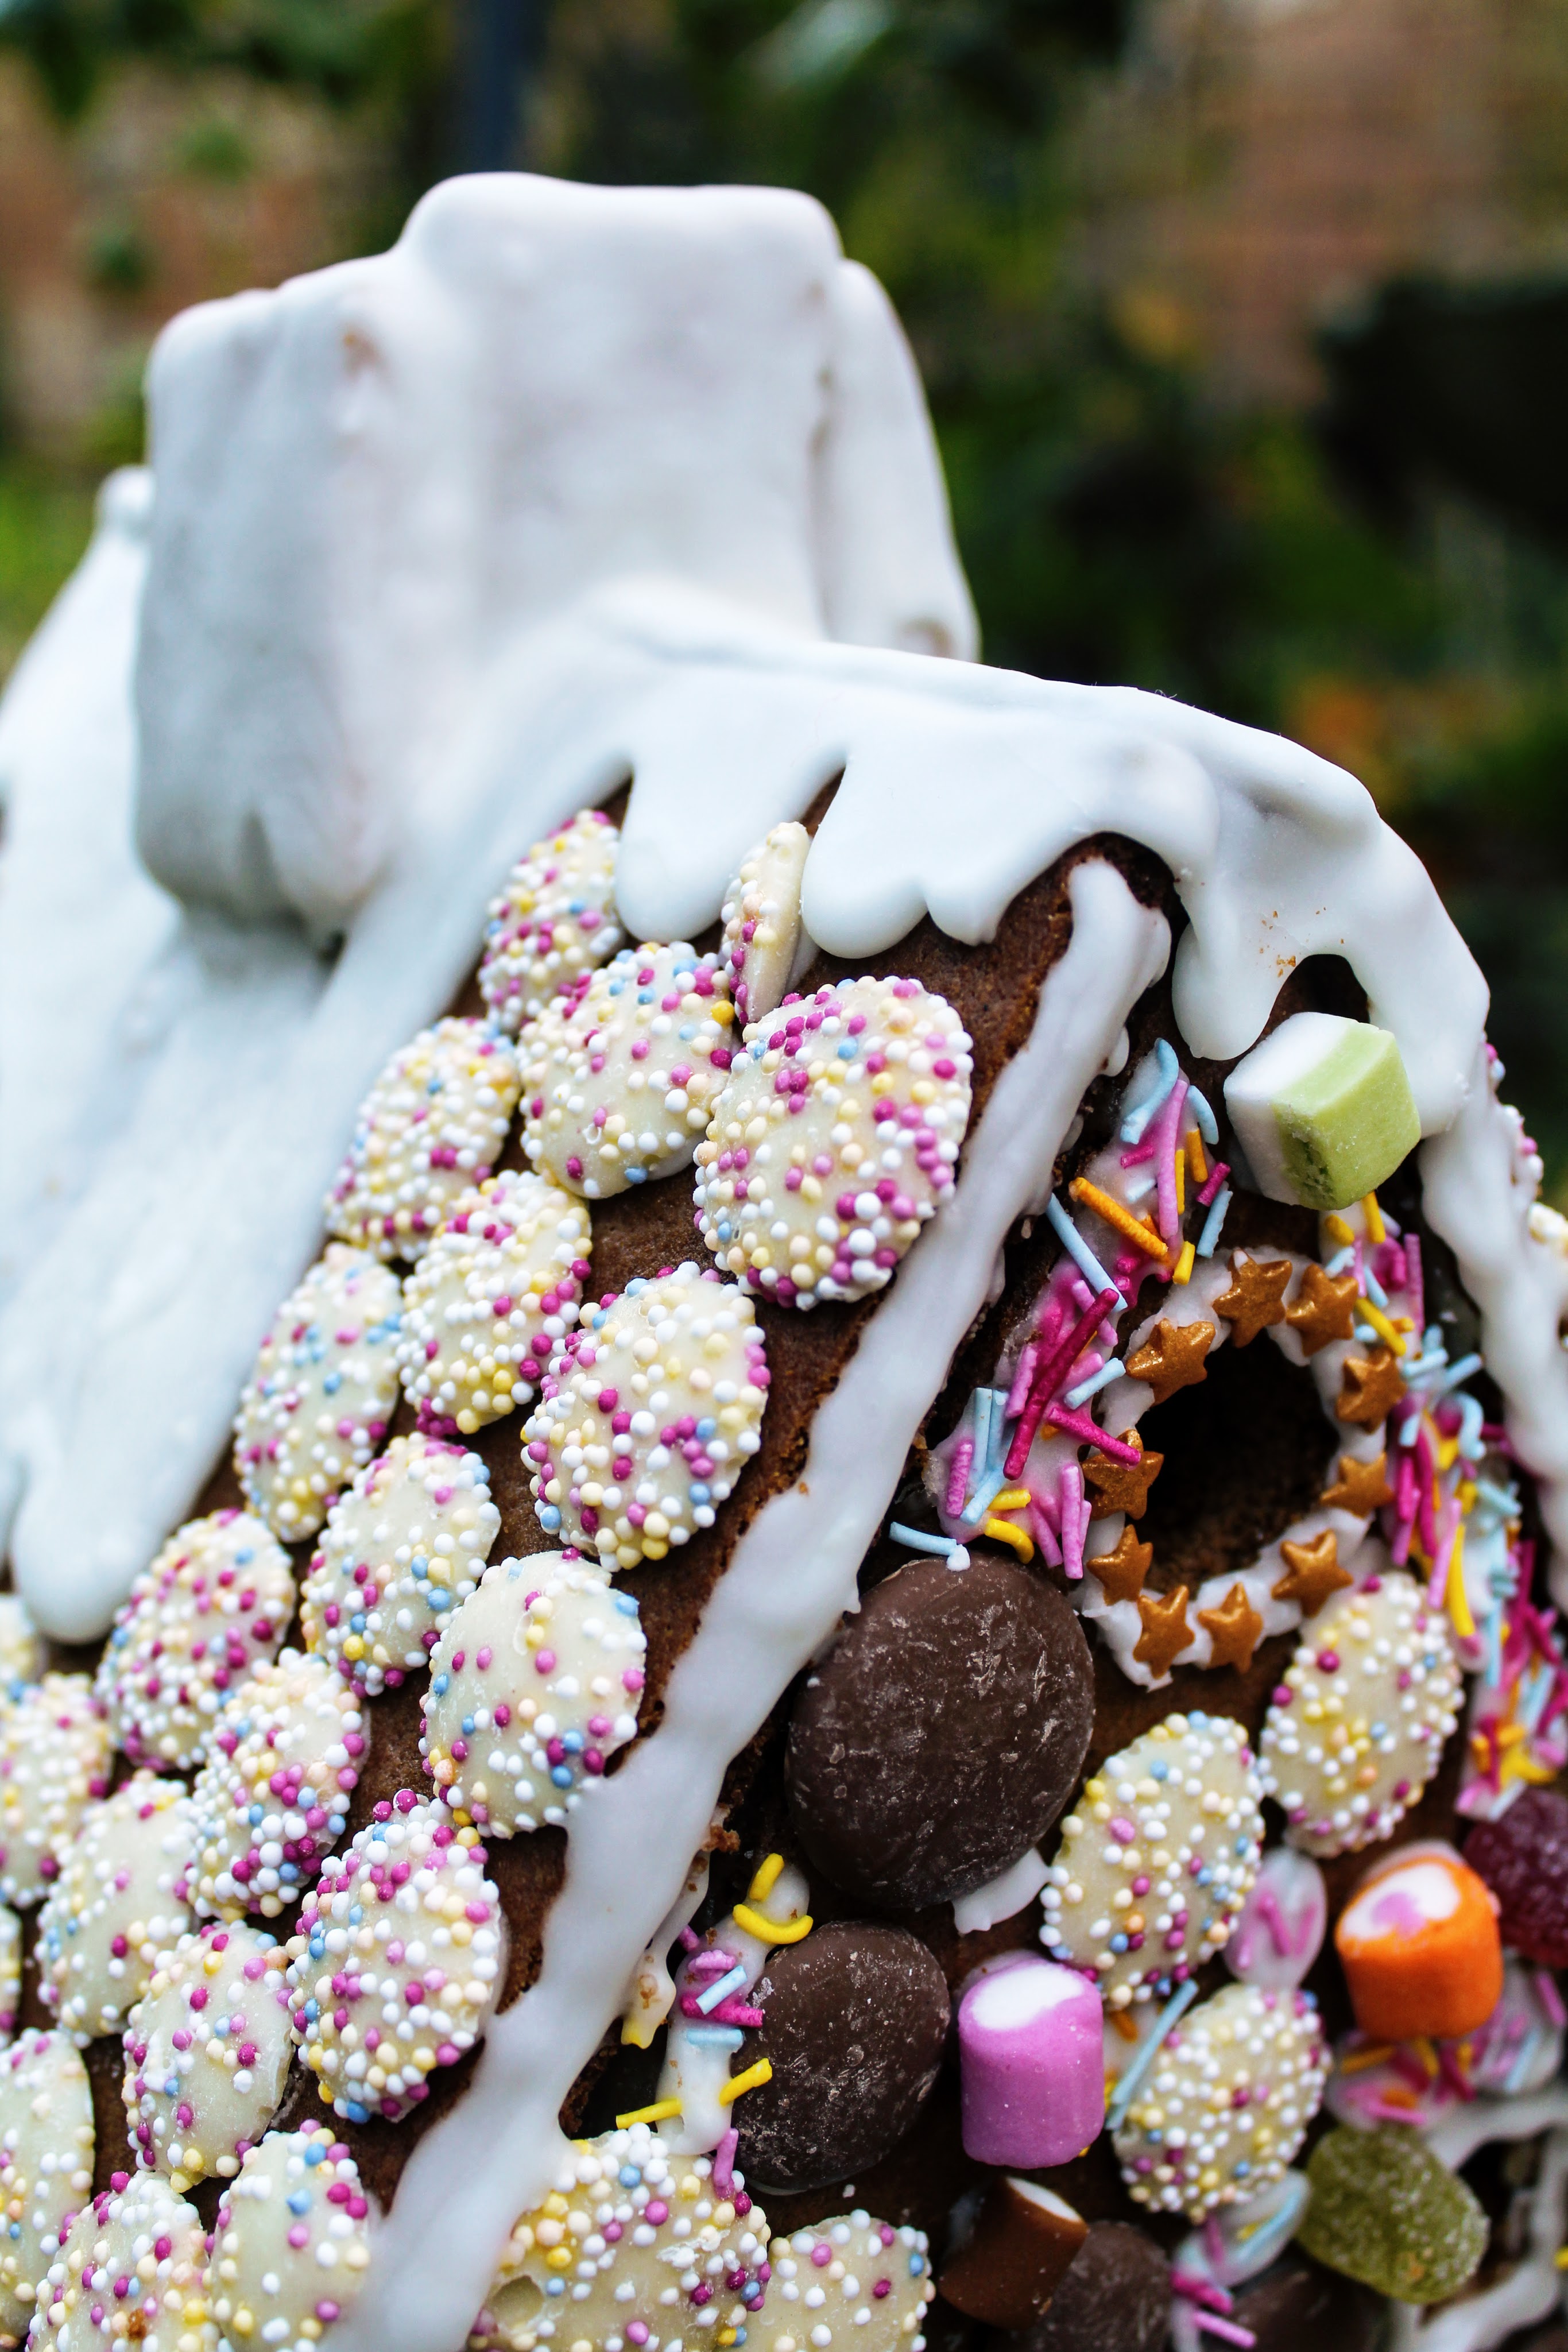
I’ve told quite a lotta people about this gingerbread house and everyone asked for pics so thought I’d put it on here. I’ve decided Im gunna do this every year. Thats the plan.
Seeing as your new fav thing is Lebkuchen (haha) I used a Lebkuchen recipe from mums German Christmas baking book.
I gotta wrap your present now and think mum is trying to get me to dance to Christmas carols on the radio (a great Christmas past time, if anyone wants a Christmas activity. You are welcome) so I’m not gonna write the recipe today in full. I’ll put it up tomorrow because Lebkuchen smells and tastes pretty pretty bloody great. I have it all over my face right now actually! I’ll give you a brief run down of the Gingerbread process.
Step 1: make a derelict looking gingerbread house.
Step 2: get a lot of sweets of different varieties, shapes, sizes, smells, personalities. Don’t leave em out because Joe will come into your house and eat them.
Step 3: make a derelict looking gingerbread house look like it is not derelict anymore! Make it look beautiful with all of the sweets that Joe didn’t eat!
Welcome to my crib MTV
Happy Christmas to you. I hope, at some point today, you have some cake on your face. Love Caitlin xxx
I’m writing this at 2am because I can’t sleep. Yay. Look right into that lovely lovely late night void.
The first insult I ever remember saying was ‘jammy bugger’. I was 8. Quite a profound thing for an 8 year old to say I think. I don’t know why I was saying it or if I was actually calling someone specific a ‘jammy bugger’, but I remember Dads face when I said it. He looked shocked but also…sort of impressed. Dads face was the give away that I had just said an insult. I reckon if he hadn’t pulled that specific face I might never have realise it was an insult. I’d start calling my friends ‘jammy bugger’ as an affectionate nickname. Getting off the bus, instead of ‘Thank you’ to the bus driver, I would add ‘jammy bugger!’ on the end, as a way to demonstrate that I am thankful for the bus ride.
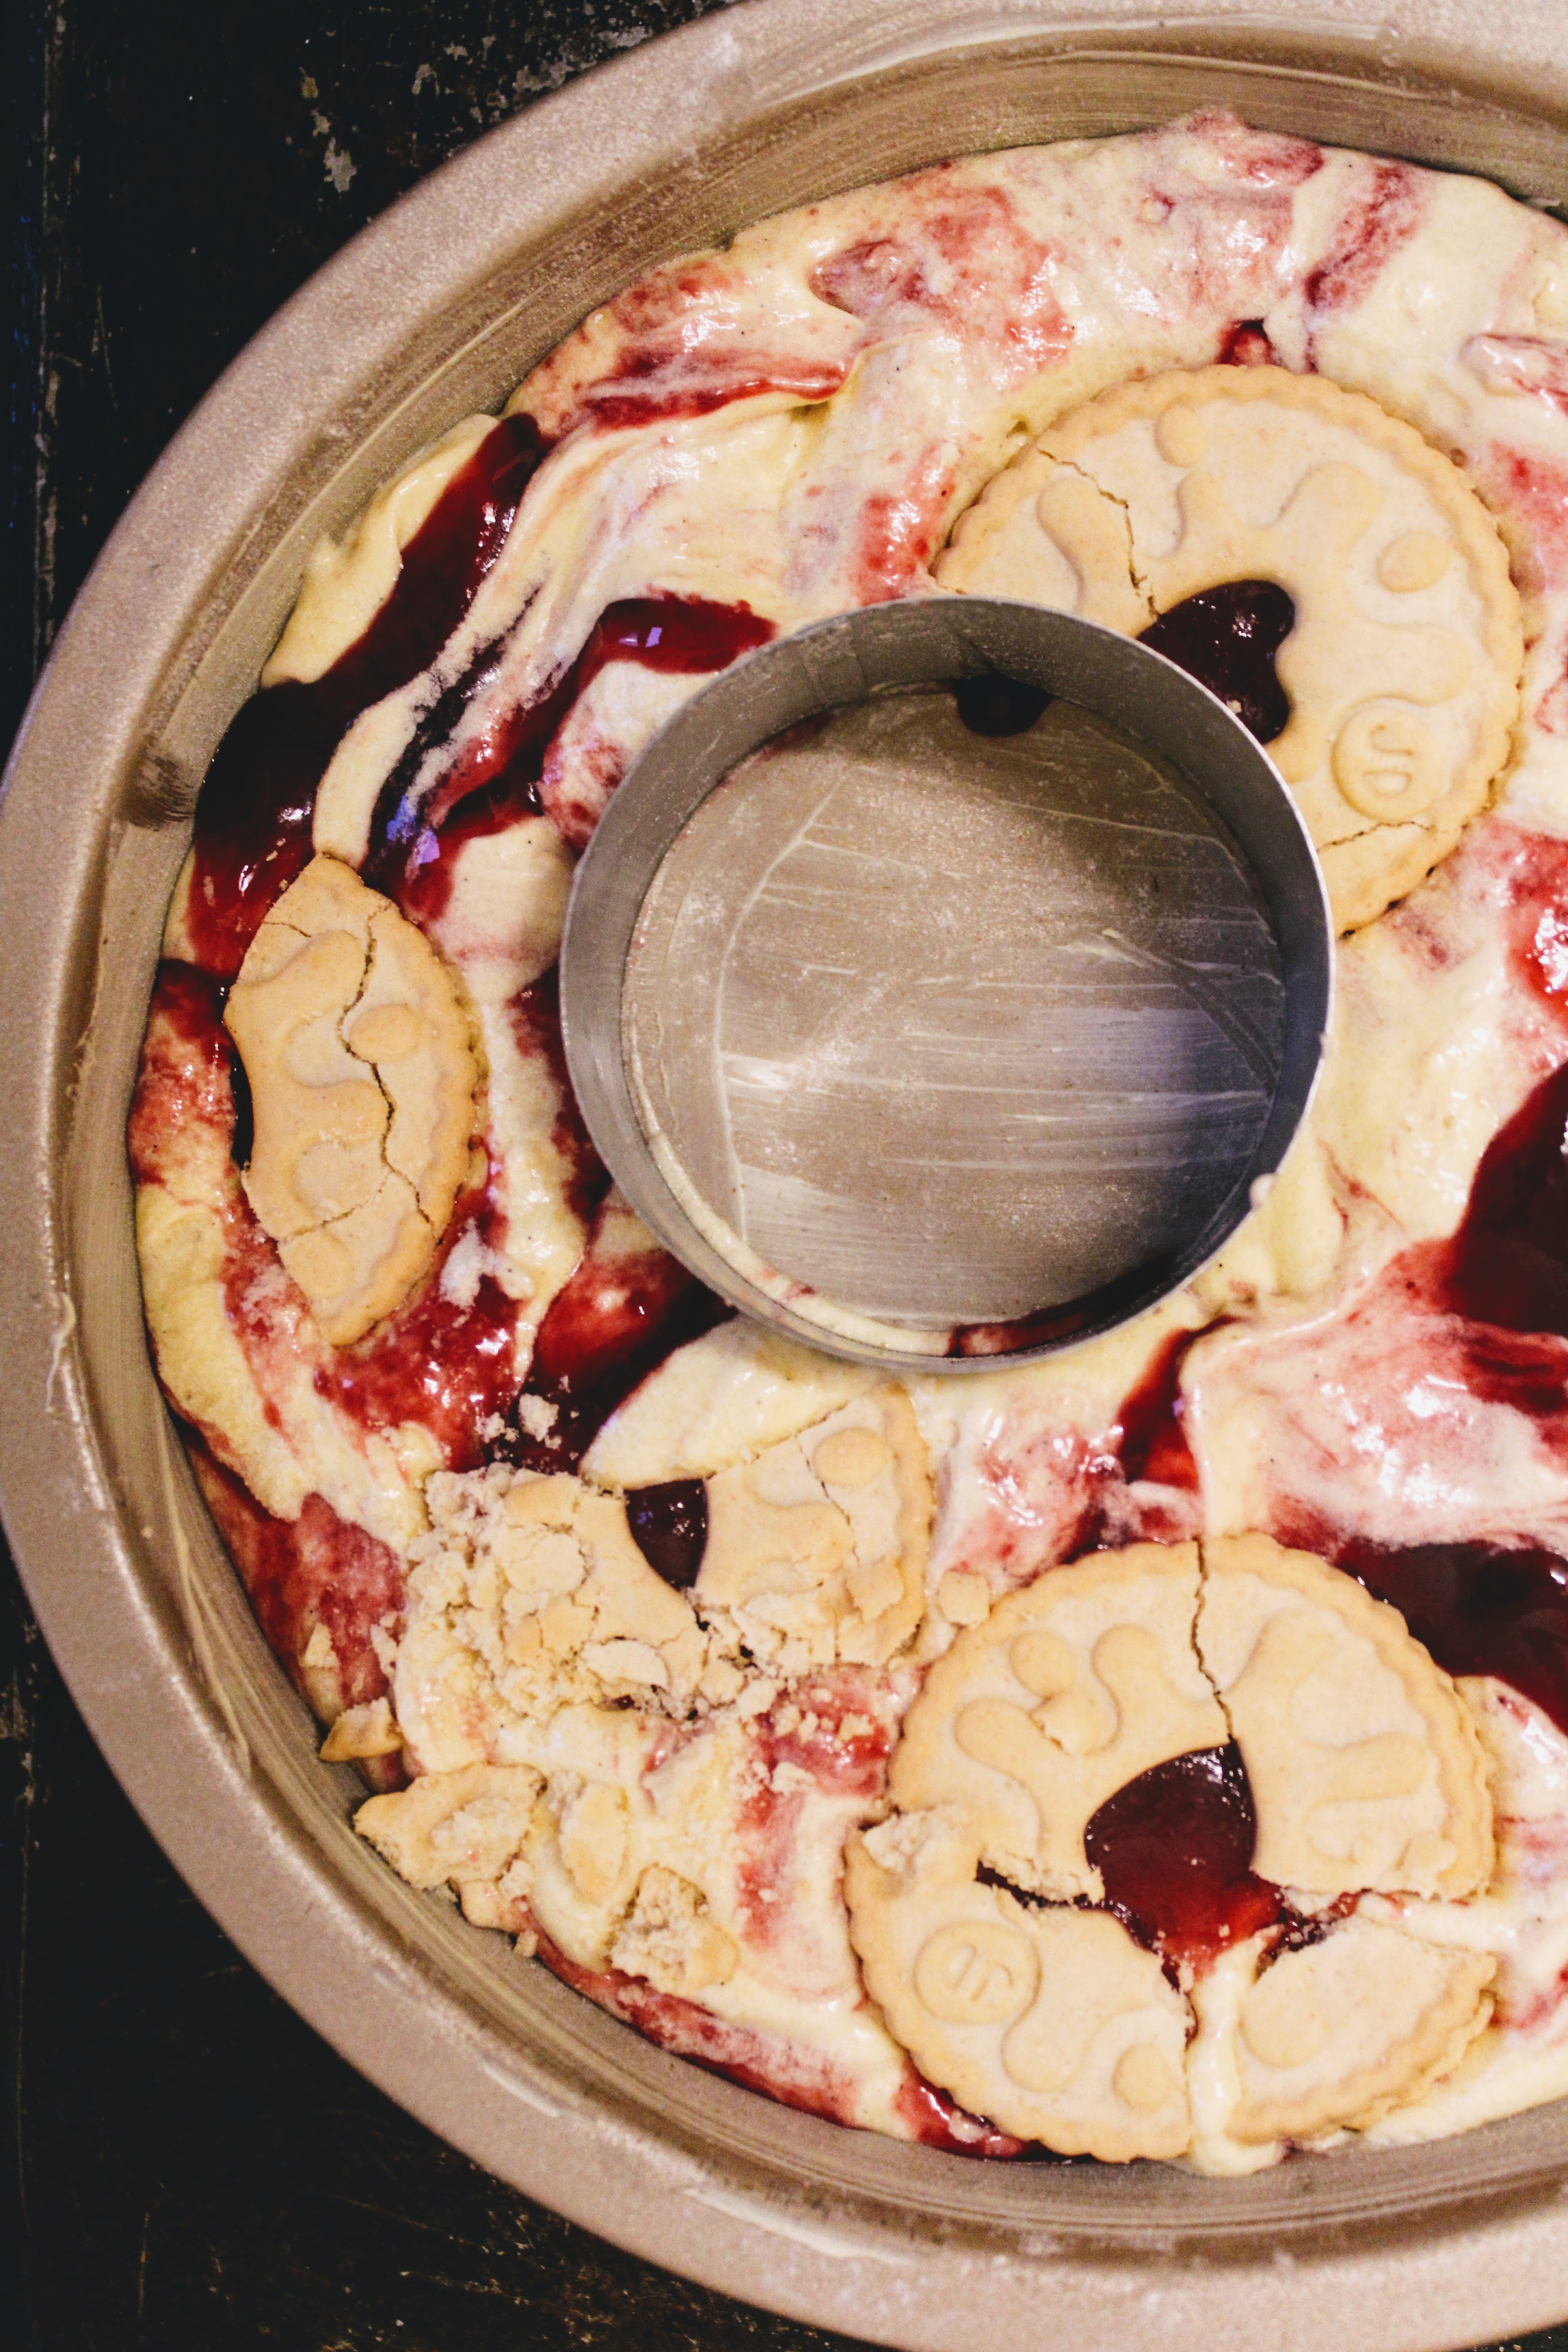
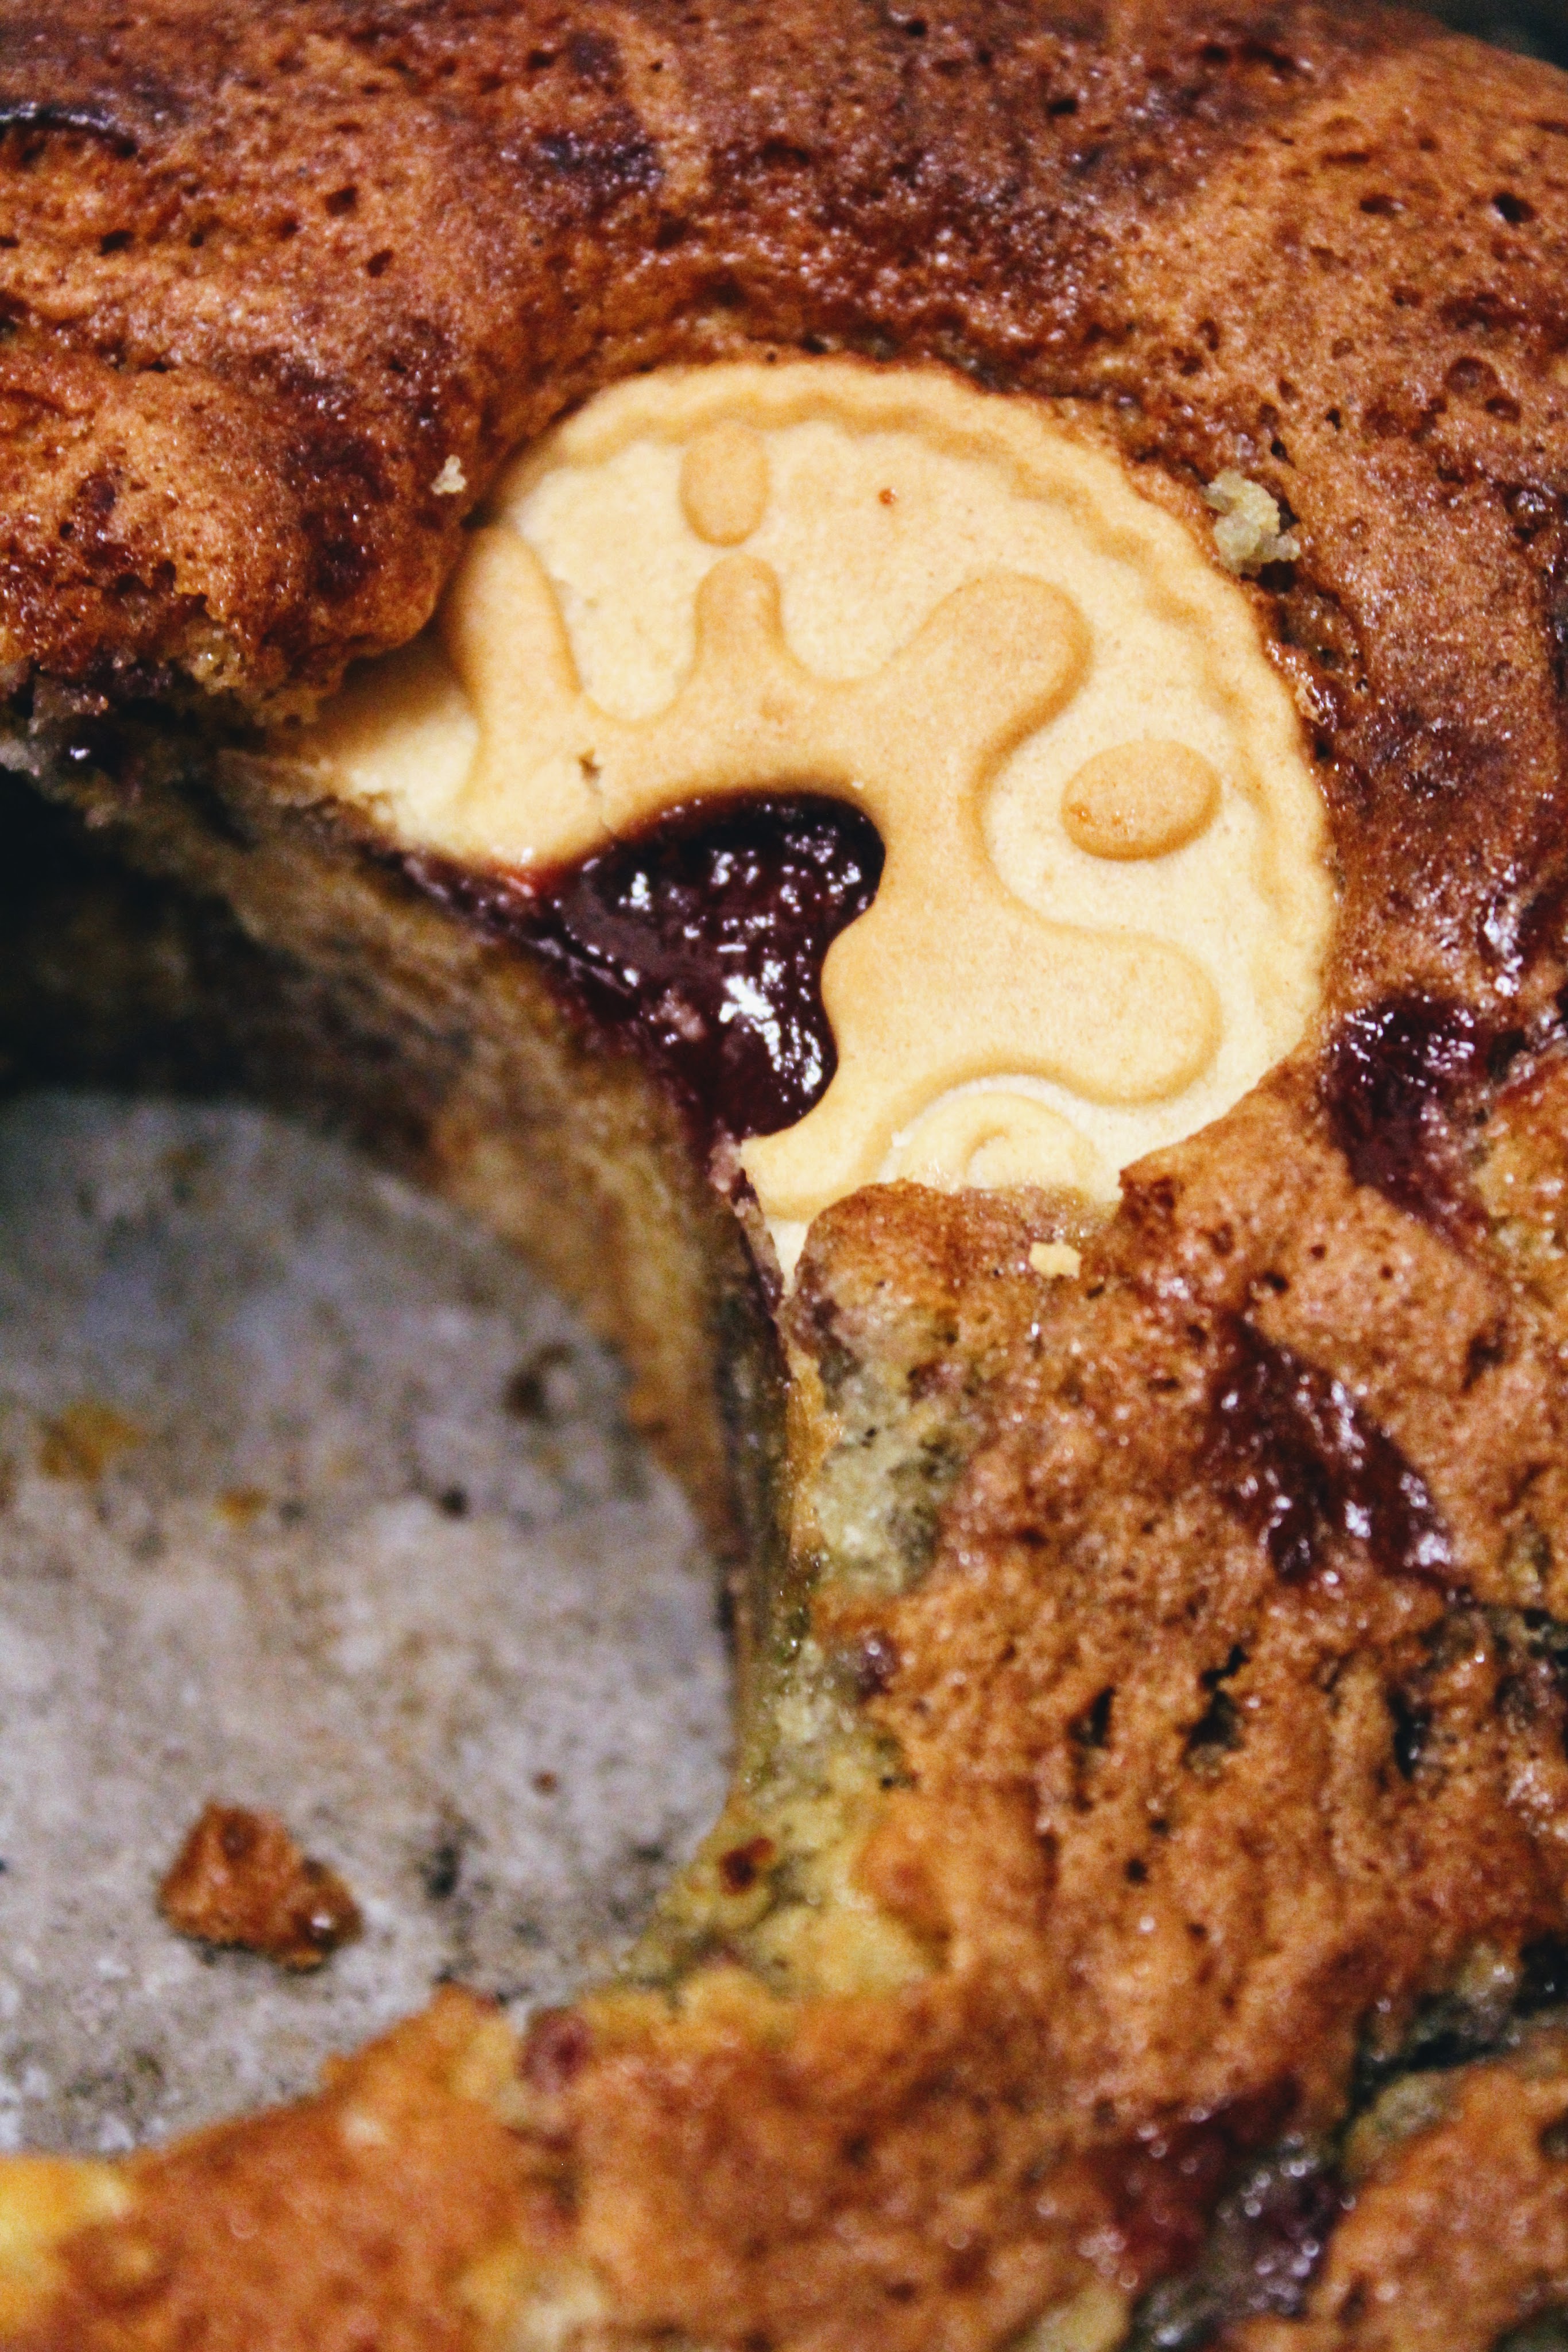
This cake is the easiest cake in the world and it is peng. It makes your kitchen smell like jam roly-poly and it tastes MMMMMM very good. This is my tribute to the 8 year old, jammy bugger, Caitlin.
Ingredients
125g unsalted butter, softened
125g caster sugar
1/2 teaspoon vanilla extract
pinch of salt
2 eggs
125g self raising flour
1/4 teaspoon bicarbonate of soda
For The Jammy Bit
3 tablespoons raspberry jam (with or without seeds)
some Jammie Dodger biscuits
Method
Pre heat the oven to 180 (or 170 fan – think I’m the last to realise fan ovens run hotter than…the other kind of oven). Grease a round tin with butter and lightly dust with flour.
Beat together the butter, sugar, salt and vanilla until light and fluffy. Add the eggs one at a time, beating after each addition. Then sift in the flour and bicarbonate of soda and mix just until combined.
Give the jam a mix to loosen it up. Blob spoonfuls of the jam onto the cake batter and move the batter about a bit to incorporate the jam without mixing it through. You are after pockets of jam marbled through the batter.
Pour the batter into the cake tin, and top with some broken jammie dodger biscuits. I wanted my cake to be a ring shape so I used a round biscuit cutter to make a hole in my cake while it baked. You don’t have to bake a hole into your cake if you don’t want to. Bake for 25 mins, or until a knife inserted into the cake comes out clean.
Hope you like the cake and I fall asleep, Caitlin xxx
I was chatting to Chloe the other day (Fwambwy, I have to call you Chloe in this post so all of our many many many readers don’t get confused). I asked her if she liked apple pie. She said yes. This is why I’m writing up this pie I made the other day, so that she might make it and use up her apples.
Kanhai pretending that he made MY pie
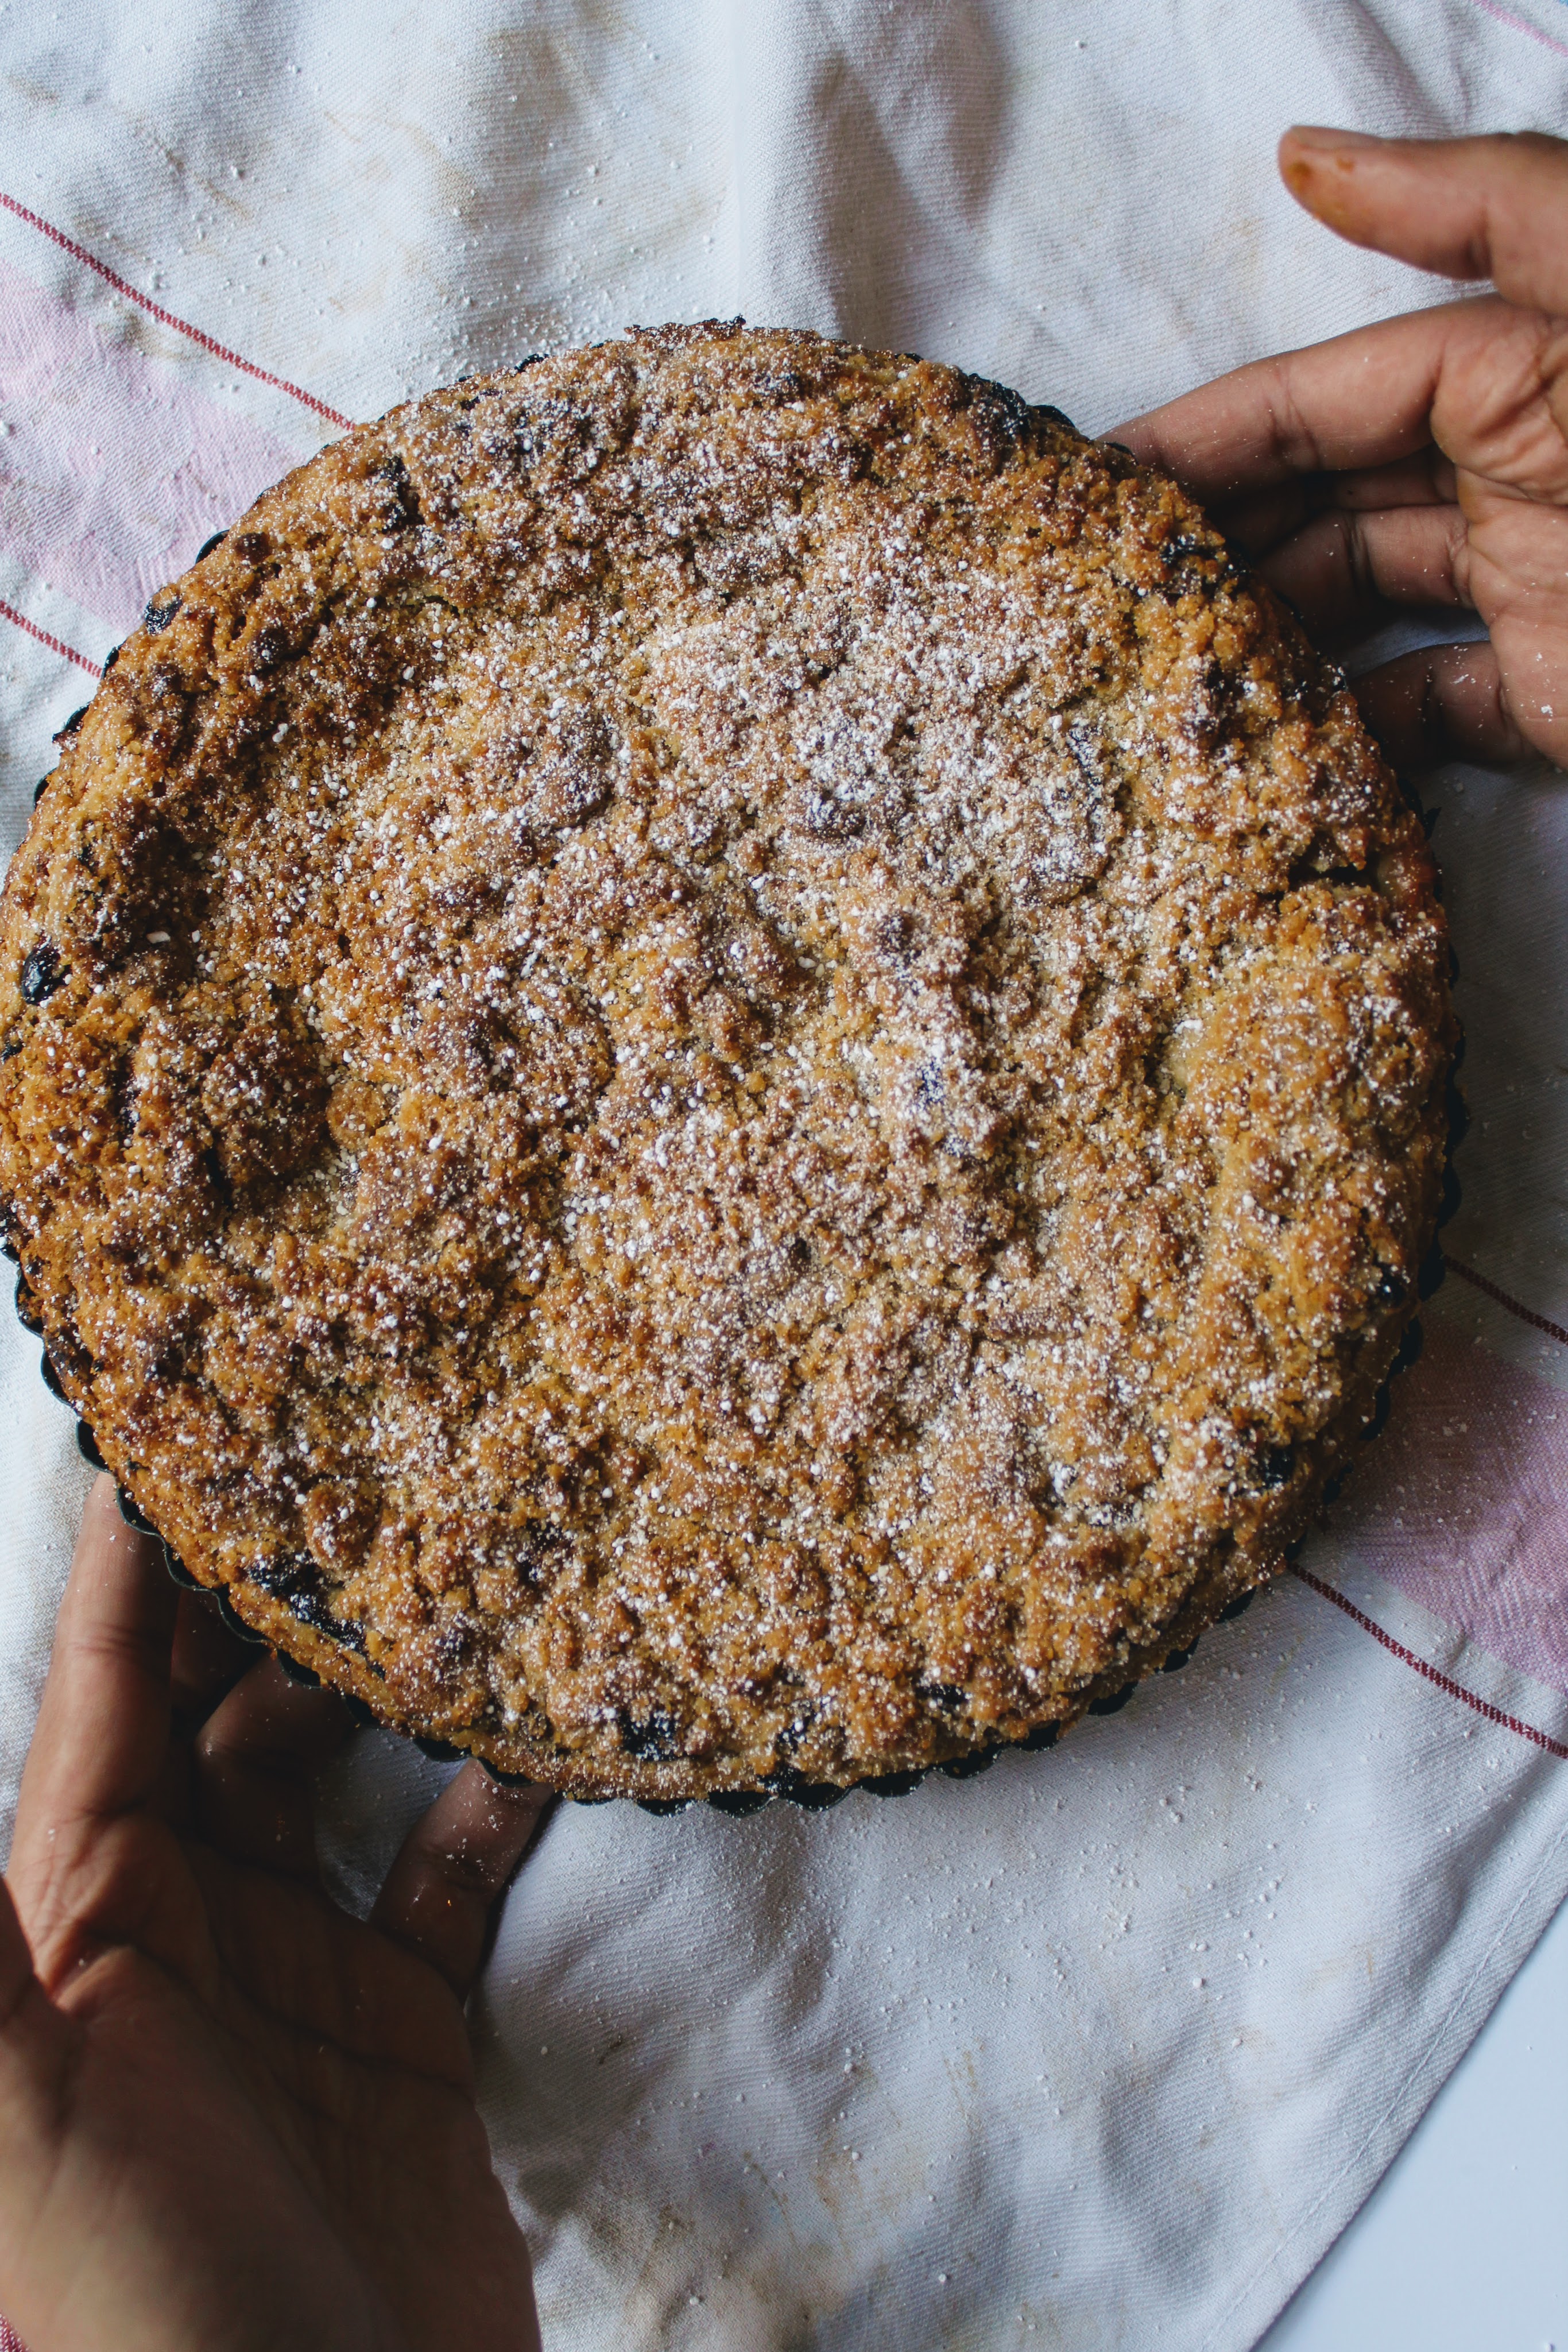
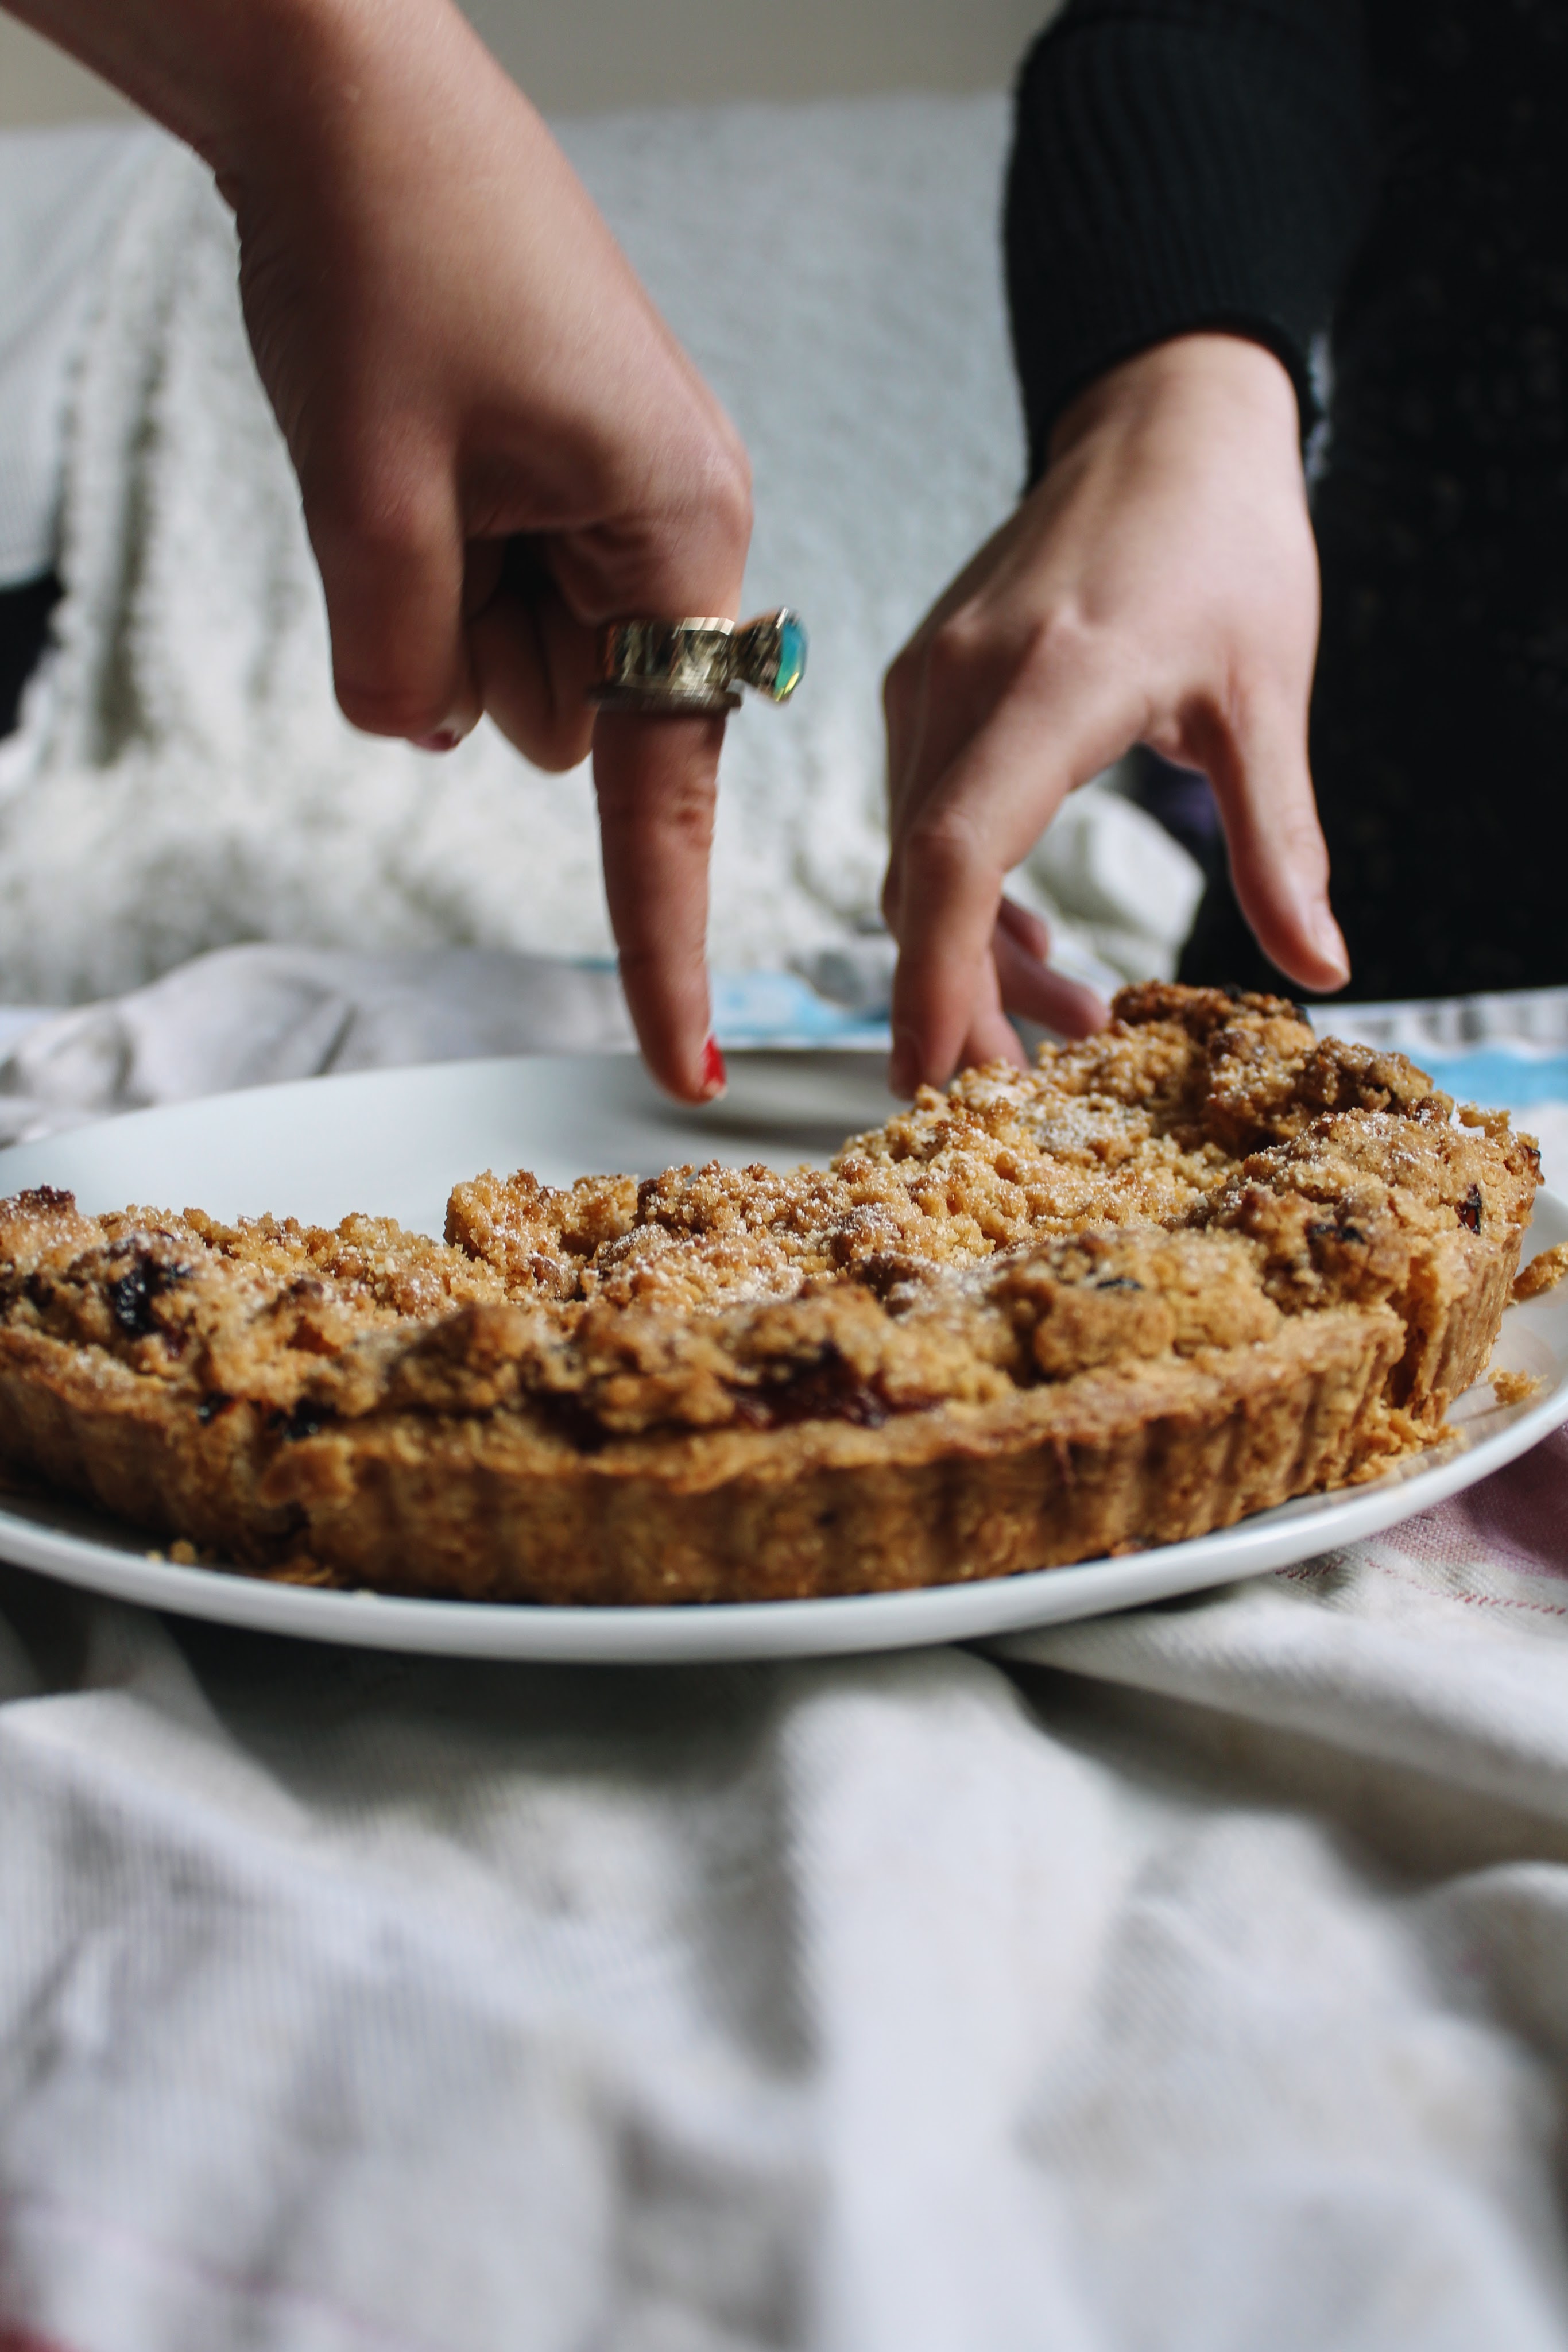
I can’t compete with mums apple crumble but I think my apple crumble pie is very, very good. Kanhai liked it too, I think if he could, he would eat ANY variation of apple crumble for breakfast, lunch and dinner.
Lil note on the crumble topping – I NEVER measure out ingredients for crumble. Its sugar, flour and butter, I really don’t think there’s much that can go wrong. I have written down measurements for the topping though, just so that the method wouldn’t say ‘make crumble’ as the only instruction.
Both the pastry and the crumble topping can be made in advance, you don’t have to make it all in one go.
Jess doing her job, casually picking up some pie but Sue…Sue has her own artistic vision for the shot.
Ingredients
For the flaky pastry, makes one 23cm tart shell
450g plain flour
300g unsalted butter, cold
1 teaspoon salt
150ml cold water
For the crumble topping
125g plain flour
75g sugar
1/2 teaspoon salt
125g unsalted butter, cold
For the apple filling
910g apples, peeled, cored and chopped into chunky pieces
2 tablespoons plain flour
2 tablespoons sugar
1/2 teaspoon salt
2 tablespoons lemon juice
1 teaspoon cinnamon
1/2 teaspoon nutmeg
Method
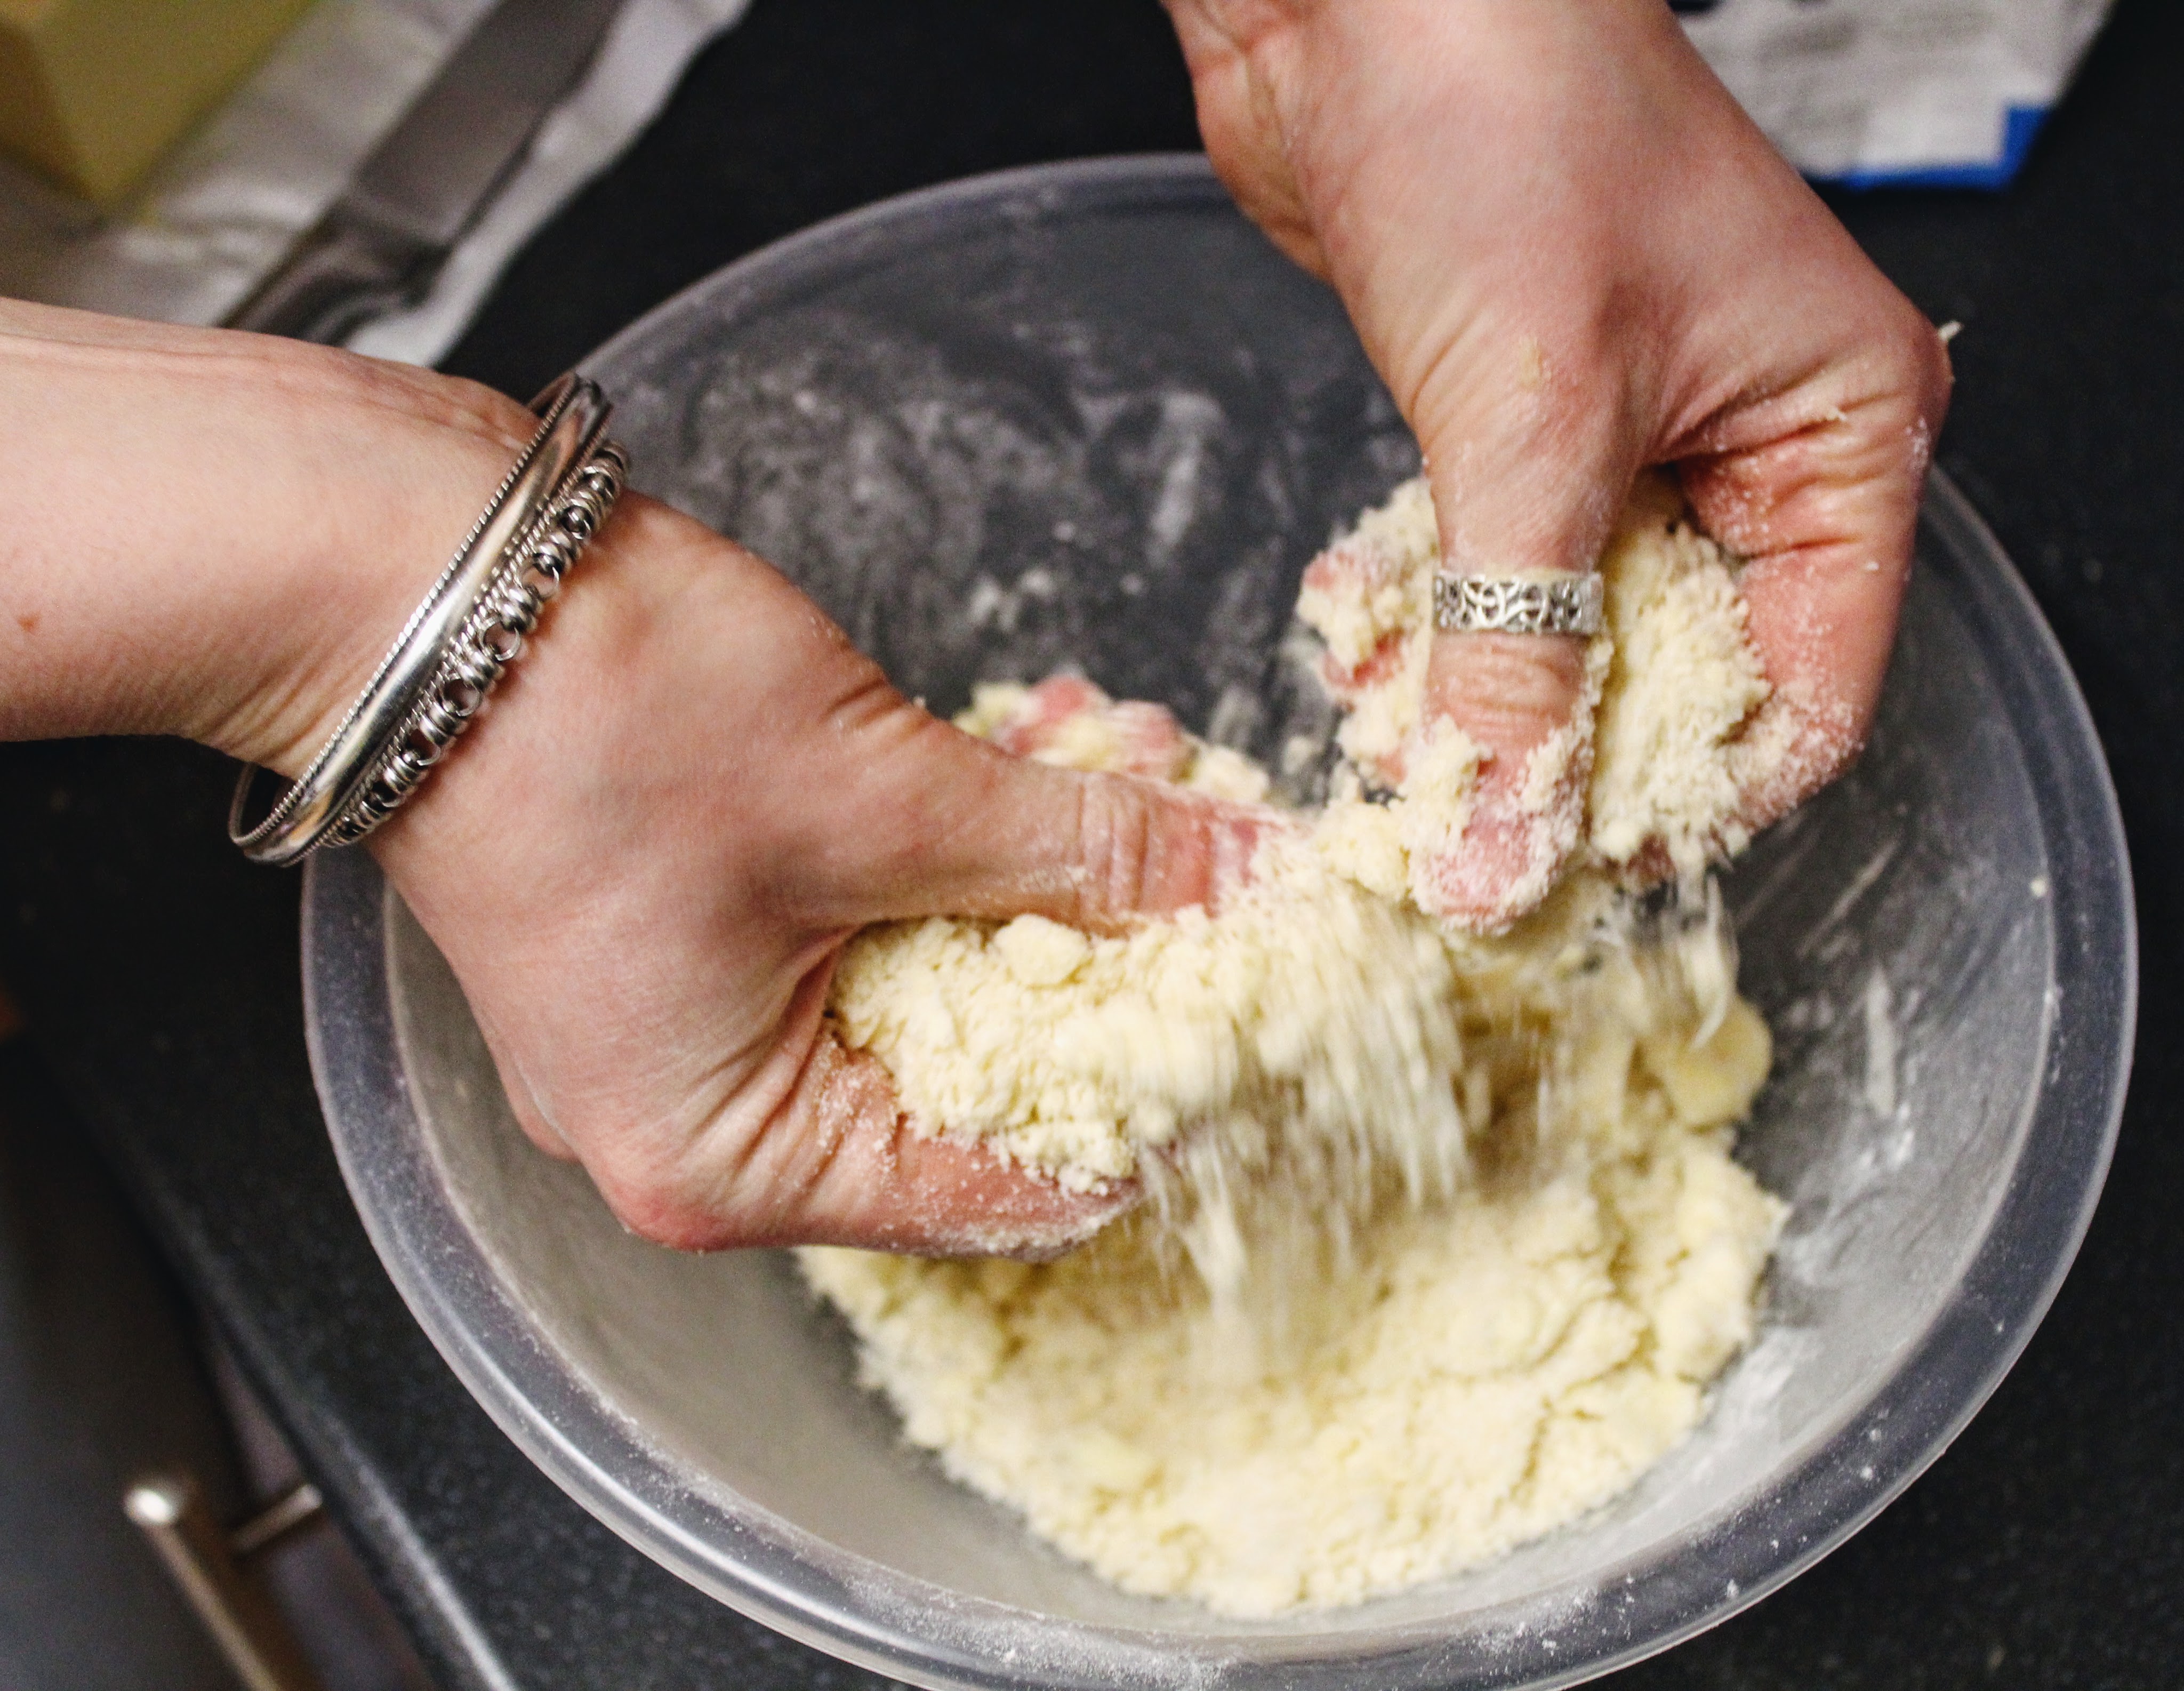
Start by making the pastry. The aim is to mix/handle/work the pastry as little as possible. Clumps of butter visible in the dough and some loose bits of dry floury pastry at this stage this is a good thing. Don’t be tempted to work this into a smooth ball of dough.
In a bowl toss together the flour, salt and cubed butter. Once the butter cubes are coated in flour, gently squash them between fingertips. Keep doing this, picking up clumps of butter and flour and ‘squashing’ them together, until the mixture begins to form big clumps and some of the butter is still in pea sized balls. Add in the water and mix with a fork until the mixture forms a large shaggy mass. Wrap the ball of dough in cling film and put in the fridge for at least an hour (can be over night).
When the pastry has chilled, grease a 23cm tart tin or shallow cake tin (a bit smaller or bigger is all good) with butter. Roll out the pastry on a lightly floured surface, to about one cm thick. Roll the pastry onto the rolling pin, picking it up off the surface and roll out over the tart tin. Gently press the pastry to mould to the tin, any breaks, patch them up with a bit of the pastry dough that hangs over the edge of the tin. Don’t trim the pastry that hangs over the edge, do that when it’s out the oven. Put the lined tart tin in the fridge until ready to fill.
For the crumble topping. Mix the flour, sugar and salt in a bowl. Add the cold butter in cubes. Gently rub the mixture together between fingertips. Keep doing this until the mixture looks like rough breadcrumbs, with some smaller clumps. Cover with cling film and put in the fridge until you’re ready to use it (it can be kept, covered in the fridge, for up to 5 days).
This is what my hands do when they make crumble
This is what crumble looks like
Pre heat the oven to 180 before prepping the apple filling.
Mix together all the ingredients for the apple filling – the apple filling is now made! Taking the crumble and lined tart tin out the fridge, tip the apples onto the pastry base, and top with the crumble. A bit of the mound of apple crumble in the centre always looks good. Put the pie in the fridge for a final 15 mins before baking.
Put the pie on a baking tray and bake for 1 hour, or until the top is golden brown and the apple is bubbling underneath. Once cooled use a knife to trim any excess pasty that hangs over the rim of the tart/cake tin. The pie is easier to cut when it has cooled for an hour ish but you don’t have to wait…
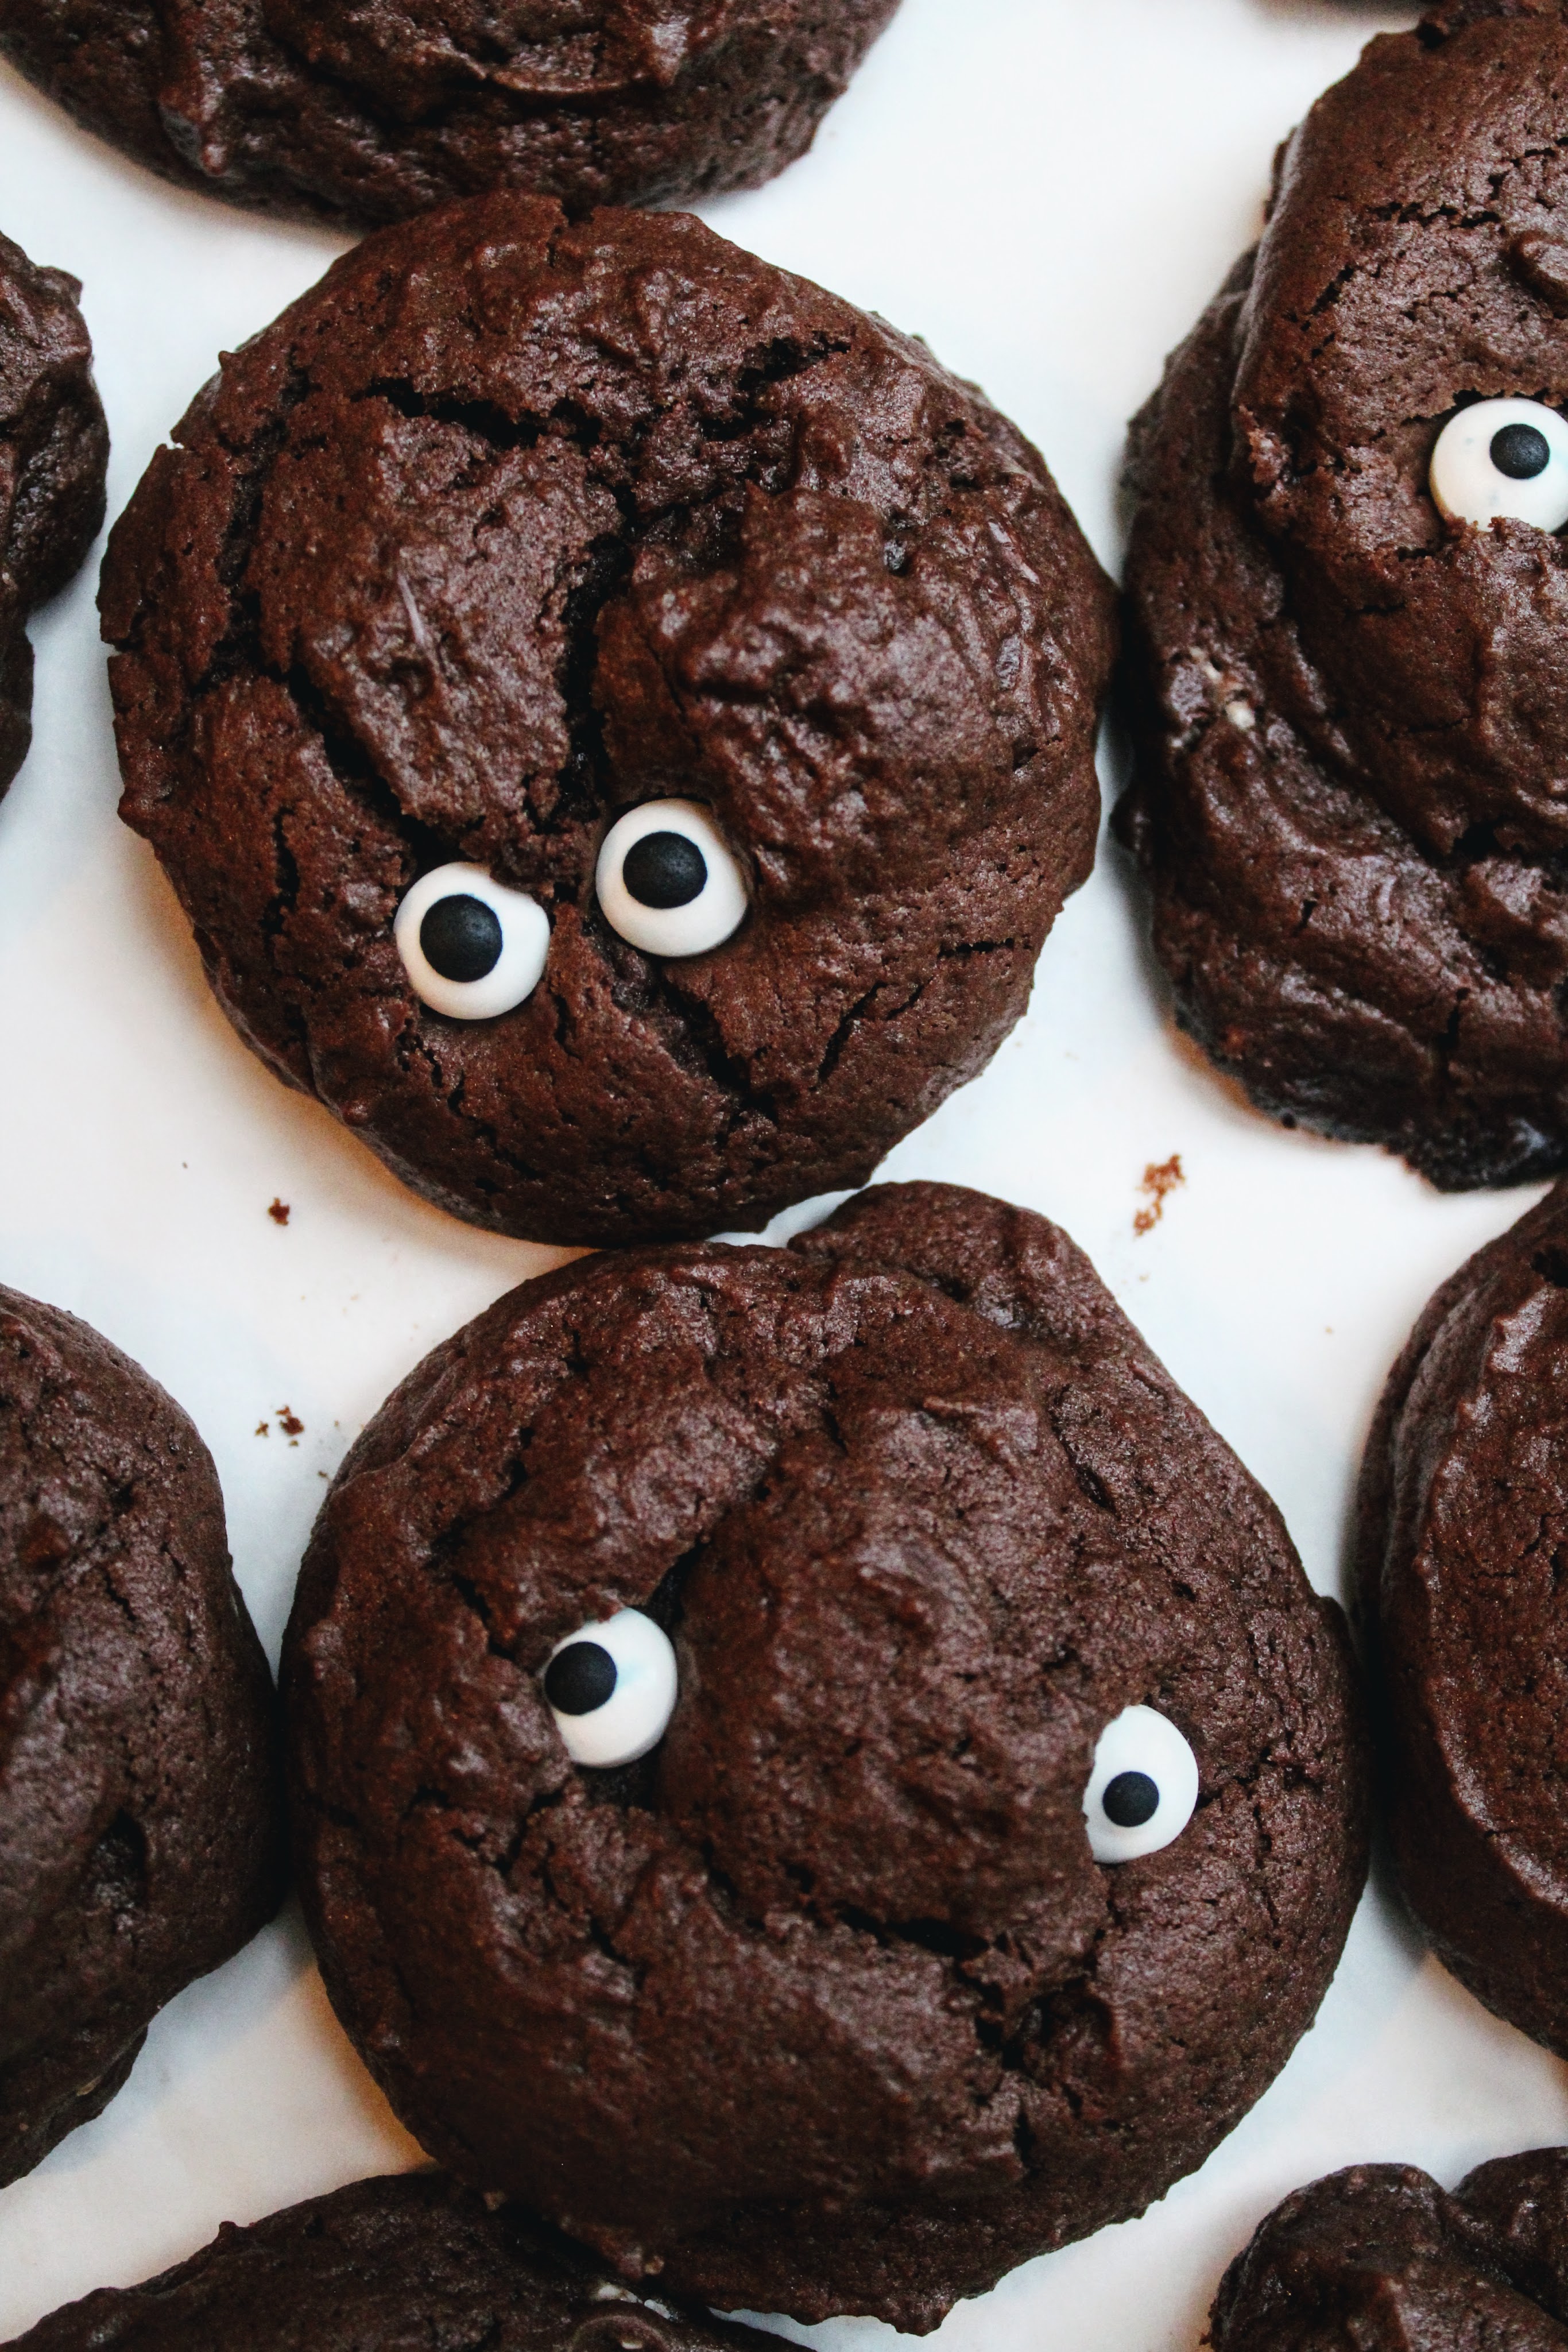
Happy Halloween bboooiii. Here are some monster cookies. You actually helped me make these yesterday haha but now you have the recipe written down. Thought all our followers needed the recipe too. (Ha! Mum, maybe tell a couple of your friends about this blog? I told mine, but they didn’t seem too interested…)
These are FAT chocolate chip cookies. They have a cookie/brownie/cake texture that is gooey and melts in the mouth. I put cornflour in these, the stuff you thicken gravy with, it gives the cookies the melt in the mouth ting – sounds strange, just trust me.
I made theses dairy free so Tiger can eat them. If you want the full dairy effect, swap the same amount of olive oil spread for unsalted butter.
Lil dudes!!
Ingredients
For about 15 cookies
200g chocolate – I used a mixture, if you wanna add in another 100g of chocolate chunks, go for it.
200g dairy free spread – I used olive oil spread.If using butter make sure its unsalted and softened.
100g caster sugar
150g light muscovado sugar – light brown sugar is all good too.
1/2 teaspoon salt
1/2 teaspoon vanilla extract – leave this out if you don’t have it.
1 large egg
200g self raising flour
30g cornflour
80g cocoa powder
Method
Chop up your chocolate into rough chunks. These don’t have to be neat, you want some bigger bits and some small. Set this aside.
Use a wooden spoon or electric beaters to cream the dairy free spread and sugar together until light and fluffy. Add in the egg, salt and vanilla extract and give it another good mix together. Don’t worry if the mixture has curdled at this point.
To the sugar mixture sift in the flours and cocoa powder then mix this in. Add the chocolate chunks and give the cookie dough a final mix.
Cover the bowl with clingfilm and put in the fridge for 20mins. Sounds annoying, but it means the cookies won’t melt and flatten out when they hit the heat of the oven. This means your less likely to burn the cookies and they will have a fatter (this a thing?) texture.
While the cookie dough chills pre heat the oven to 180. Line a couple baking trays with grease proof paper.
When the cookies are ready to be baked, spoon out the dough in small mounds, making sure to leave them a lil bit spaced apart on the tray. Use one heaped tablespoon amount of dough for each cookie, or you can use an icecream scoop. Bake these for 12-14 mins, they will be squashy when they come out the oven, this is what you want.
This guy is my fav guy. Seems like a Quentin to me.
Enjoy the cookies man and have a good Halloween. Caitlin xxxx
(I’m writing this on the train to Glasgow, the wifi is pretty shit and I have diarrhoea. Apart from that, my Halloween is going really well.)
I made this cake for my friend Mátés birthday the other week. OH MY GOD its really good. Máté said he likes anything with coffee and caramel so I combined the two in cake form. How inventive of me.
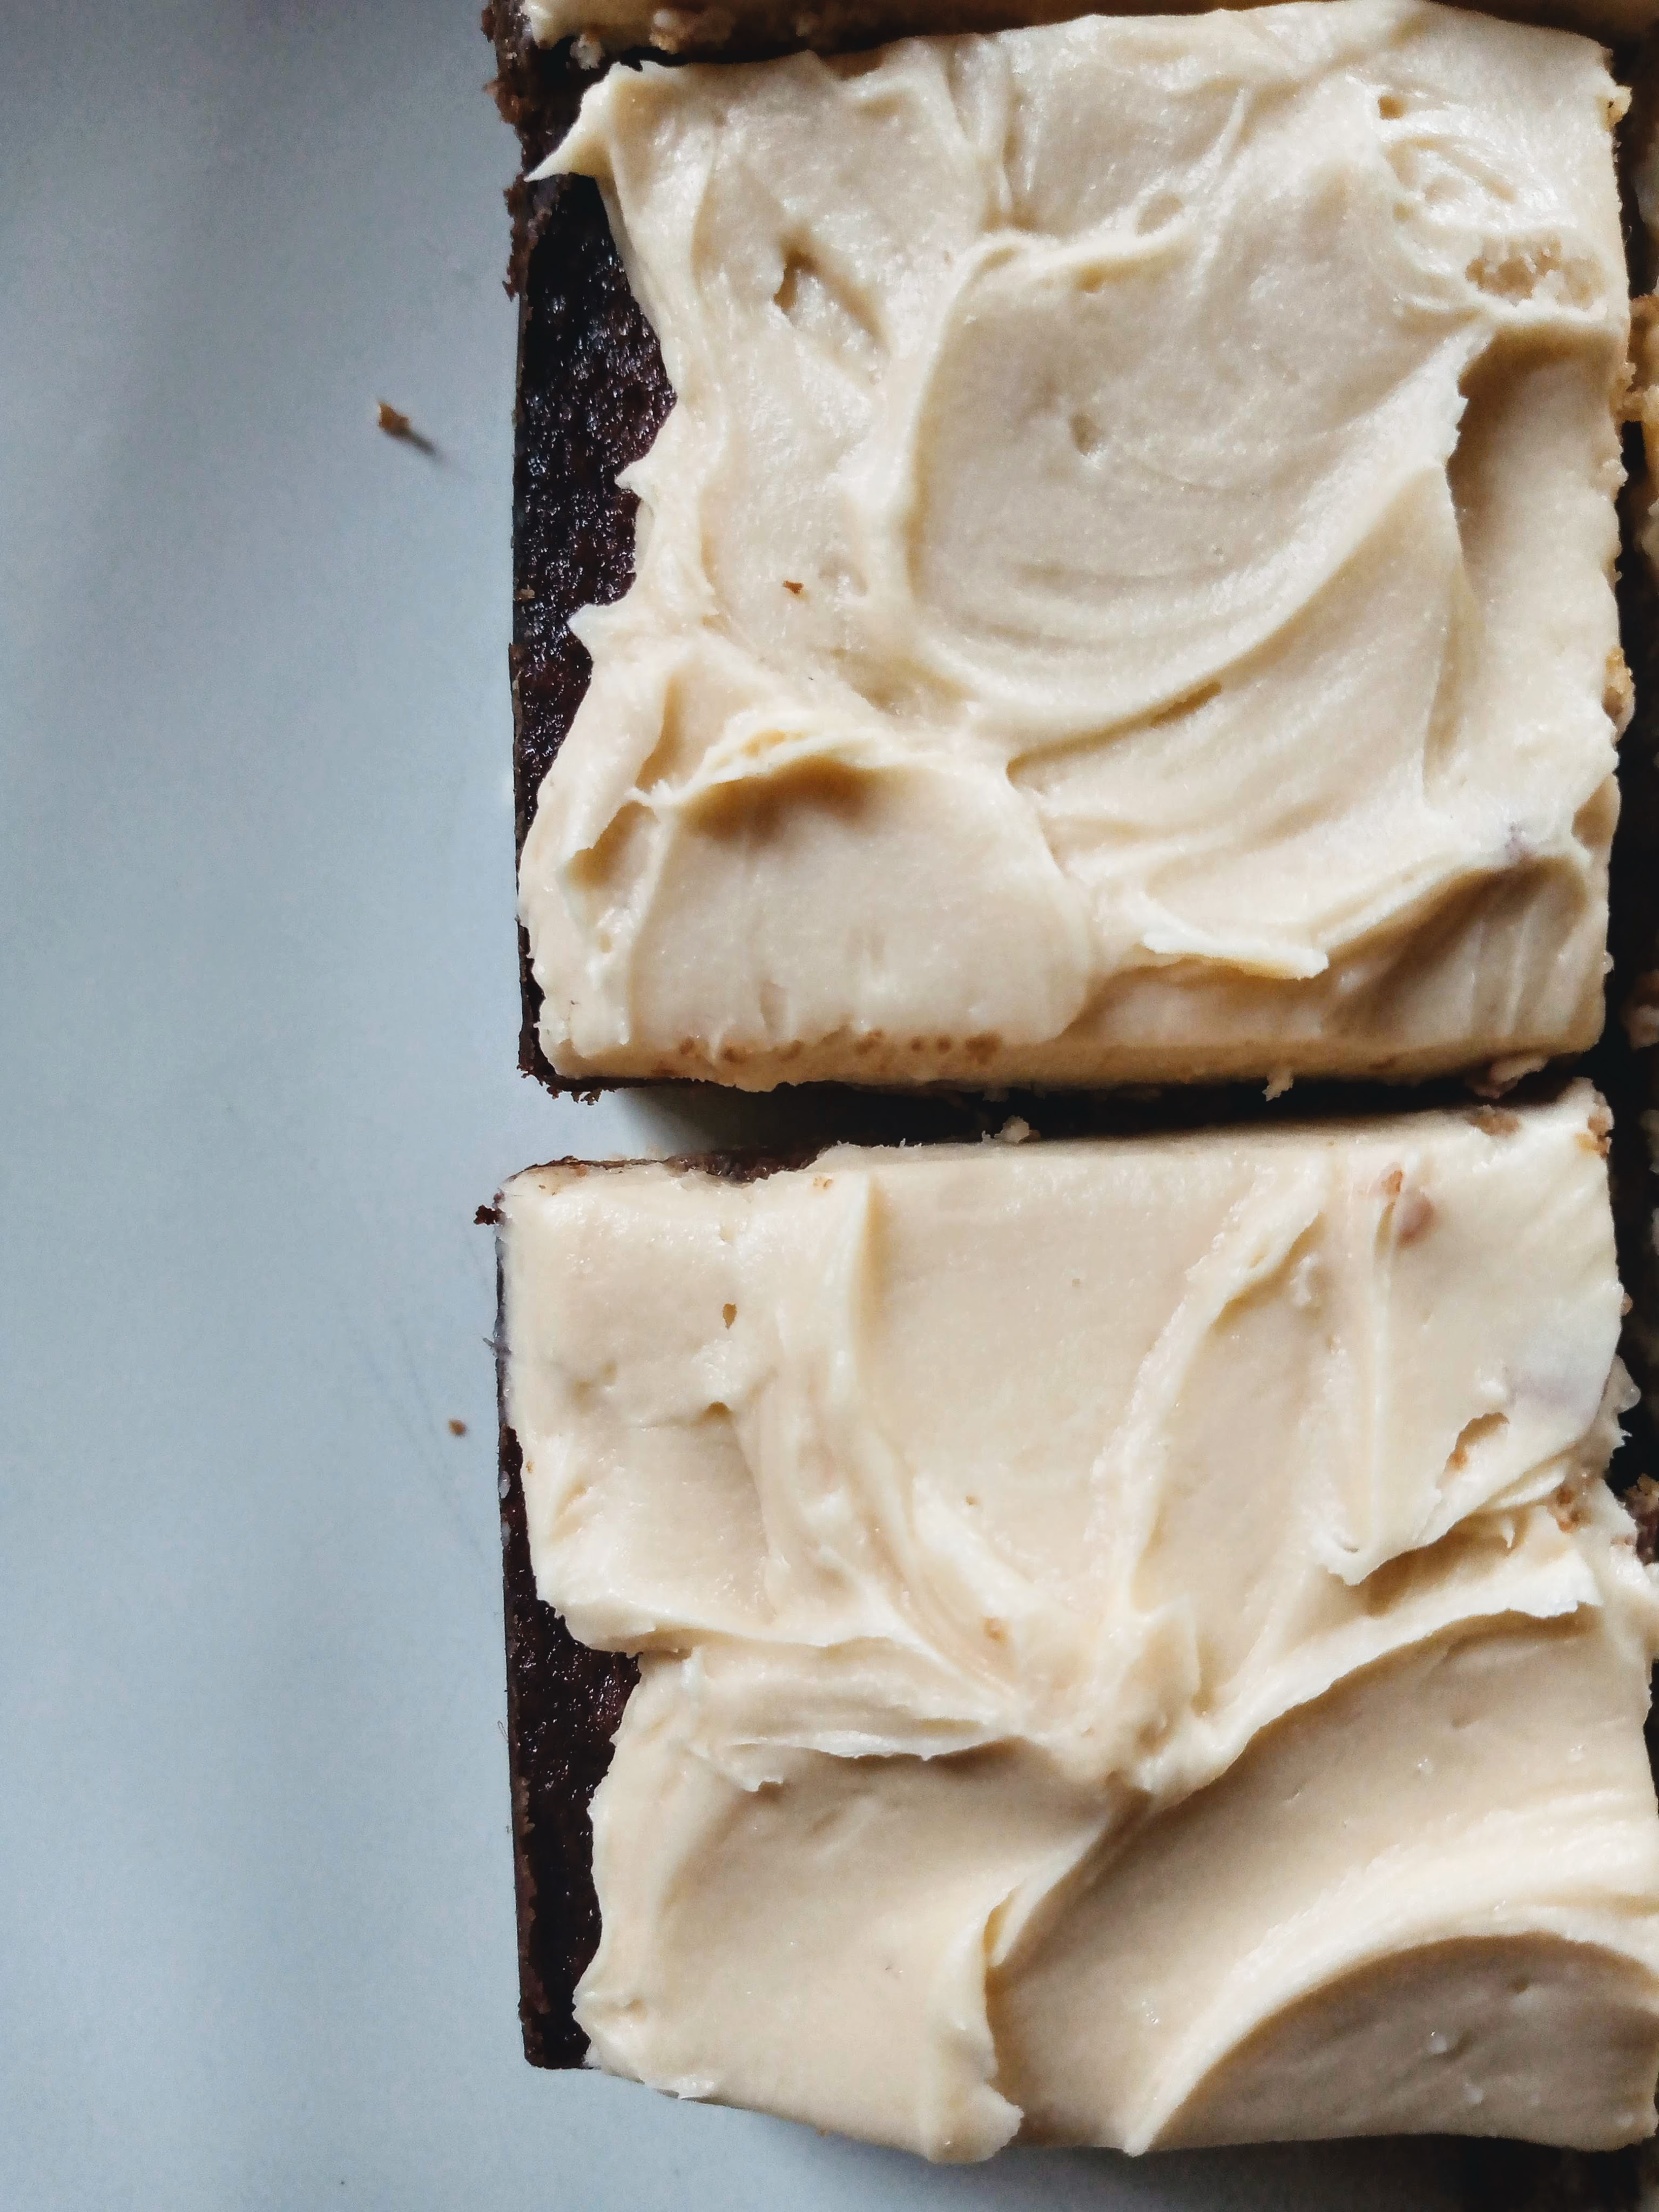
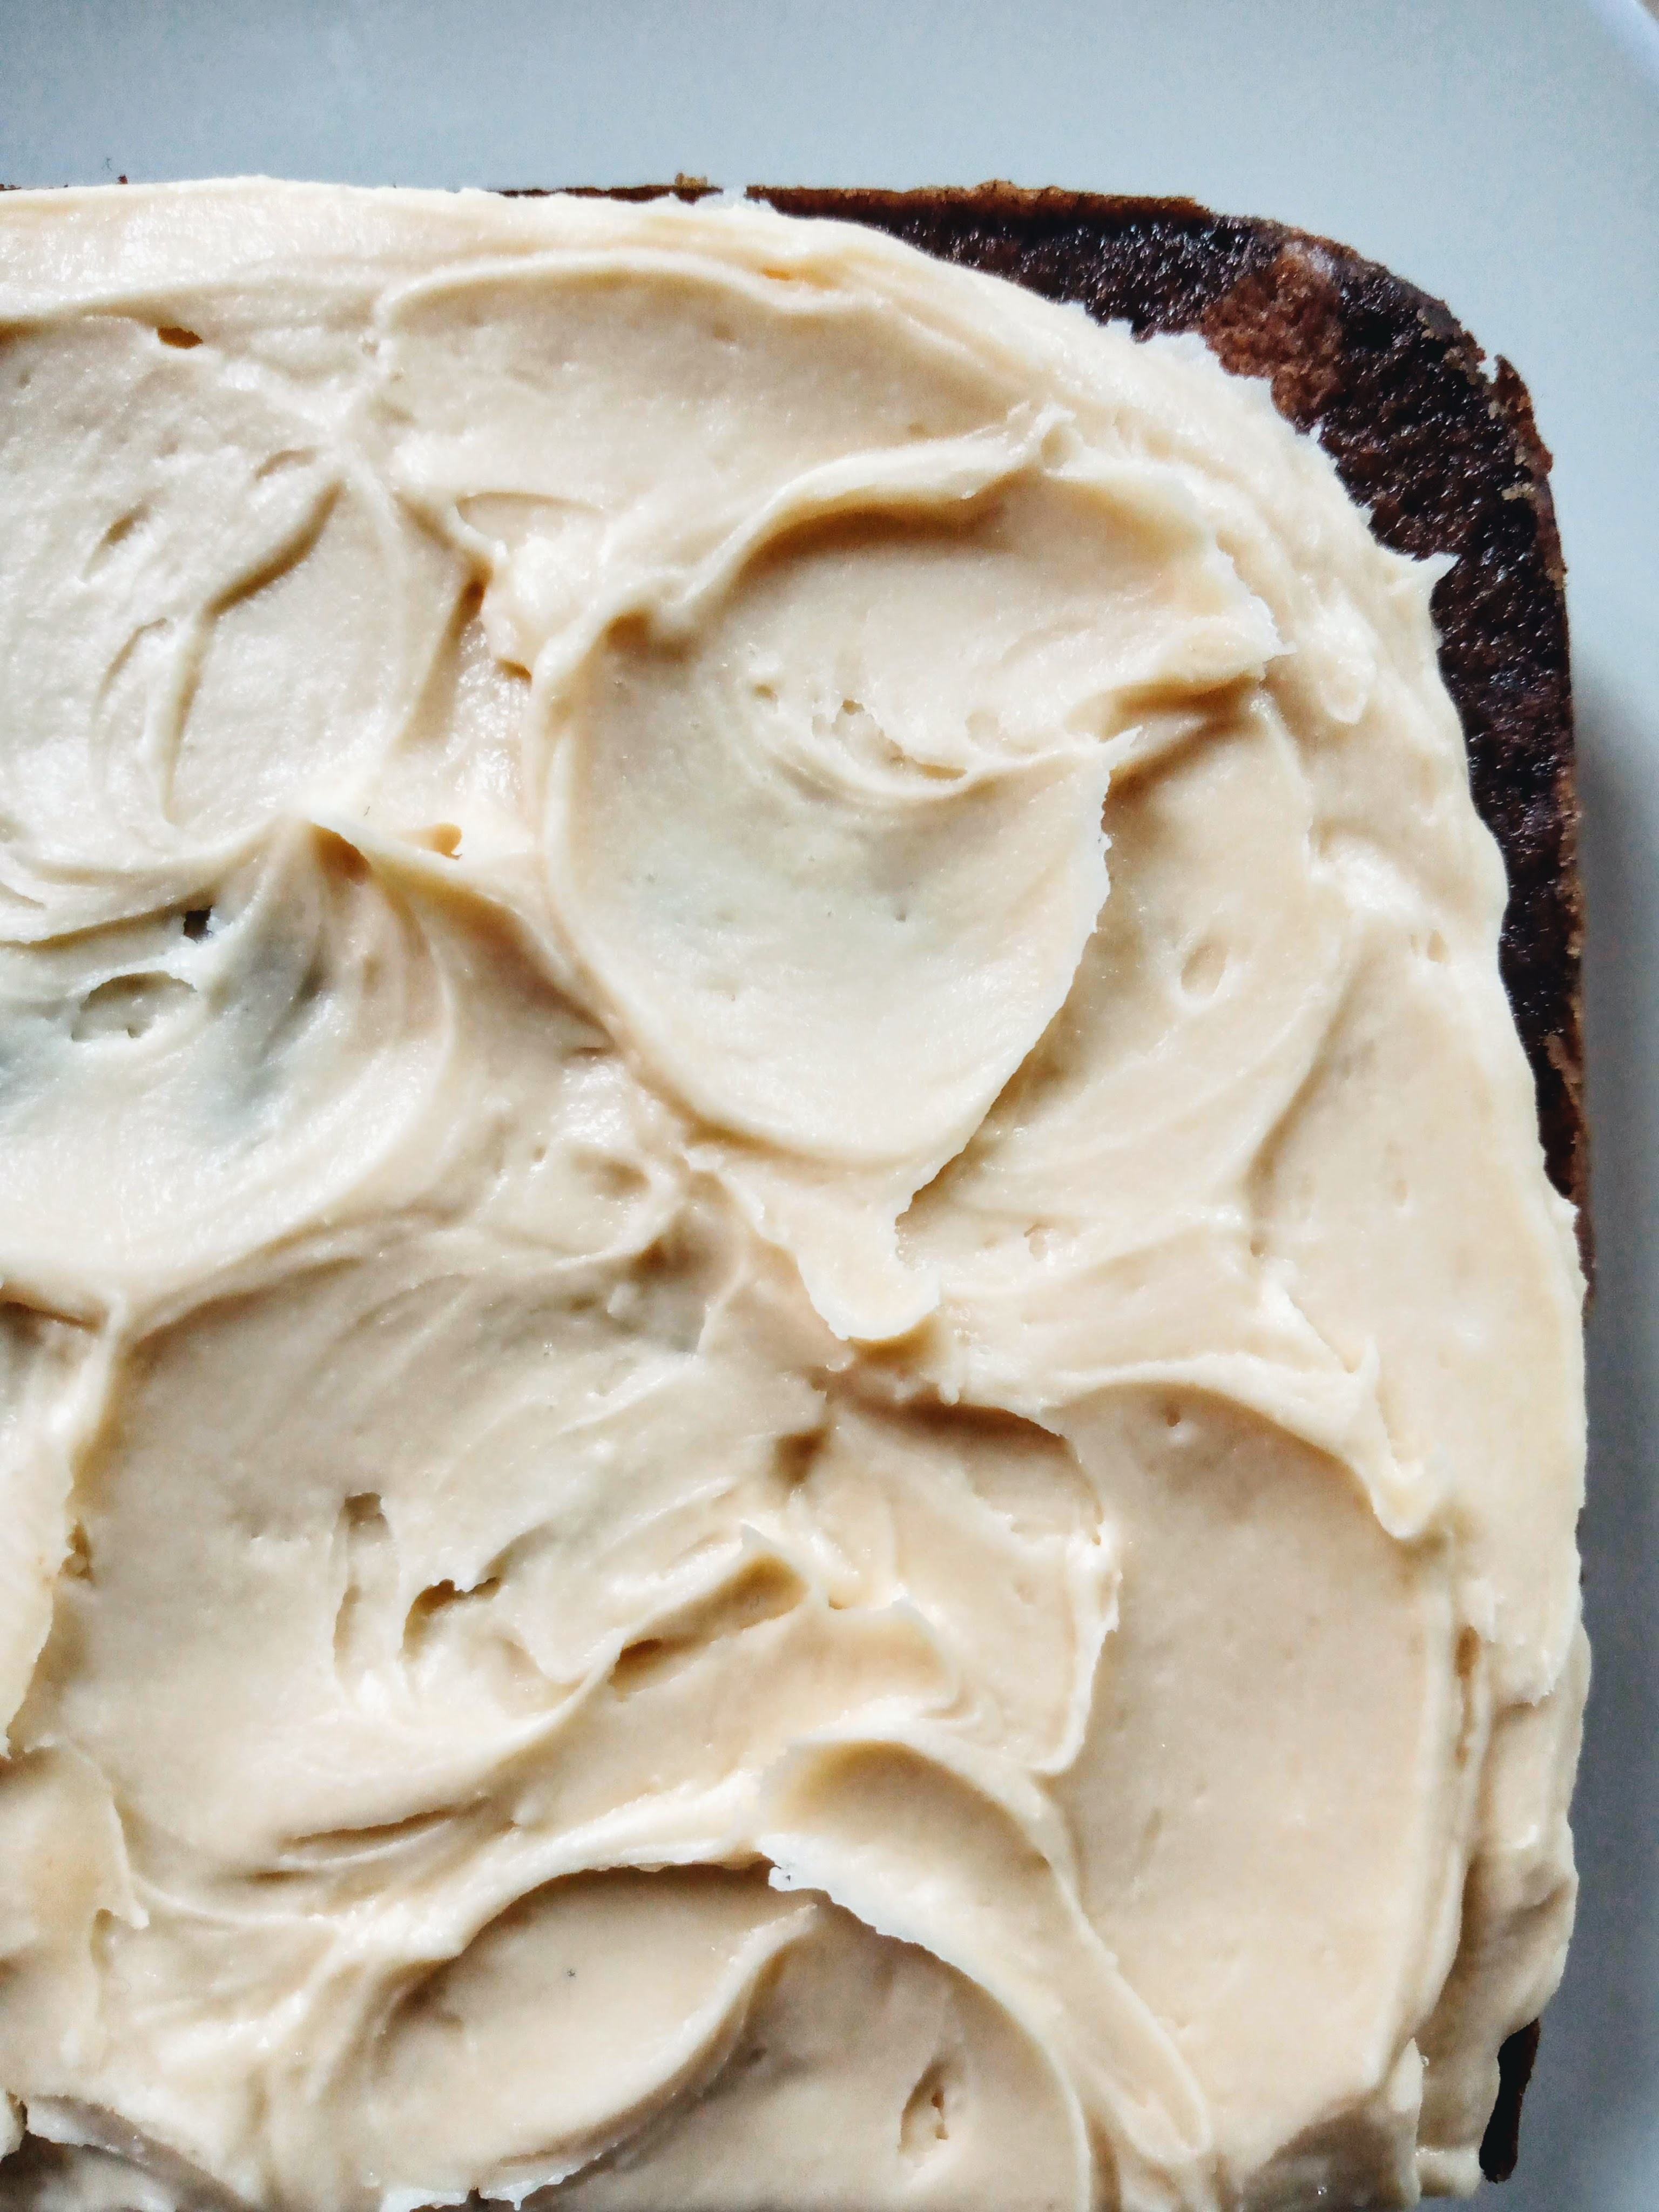
It’s a marbled sheet cake, one flavour of sponge is vanilla, the darker sponge is coffee and caramel. To top it off is a salted caramel buttercream. If I was making this cake for your birthday, I would get rid of the cake bit and stick candles in a thick layer of caramel buttercream. lol it’s very good. Here are some picture of buttercream for you to enjoy.
To get the caramel in the cake and buttercream I made a caramel sauce. Mmmm. Its surprisingly easy to make. You can mix it into buttercreams, cake batter, whack it on your tooth brush in the morning, use it to stick things to your head. Endless possibilities.
From this recipe you will get about 250ml of caramel sauce so you’ll have leftovers. You are welcome. This doesn’t have to be made on the day you make the cake, it can be made up to 3 days in advance.
Caramel sauce is my favourite kind of sauce
Ingredients
To fit in a square or rectangle baking tin. Mine is 20cm by 24cm. You can use whatever you have. Keep in mind depending on the size of your tin, you may need to adjust the baking time for your cake.
Caramel Sauce – Makes about 250ml. This will last in an airtight container in the fridge for up to three days.
125g sugar
50ml water
100ml double cream
30g unsalted butter
1/2 teaspoon vanilla extract
Generous pinch of salt
Cake
200g unsalted butter
170g sugar
3 eggs
200g self-raising flour
Splash of milk
3 teaspoons instant coffee granules
2 tablespoons boiling water
Note on measurements – If you don’t have a measuring jug, 1 ml and 1 gram is roughly the same weight so you can measure any of the liquids in your weighing scales.
Note on coffee – I ask for instant coffee in the ingredients but any strong coffee will do. As long as you have 2 tablespoon worth of strong coffee to pour into the half the cake better all is well.
Salted Caramel Buttercream
I never weigh my ingredients for buttercream. I go by texture and taste. If you want some measurements to start off with here you go. (Go on Joe live outside the bubble and don’t use the measurements.)
140g softened unsalted butter
280g icing sugar
1/2 teaspoon vanilla extract
Generous pinch of salt
1 tablespoon caramel sauce
Method
Caramel Sauce
Measure out the cream and butter and set aside.
Put the sugar and water in a small heavy based saucepan. Over a medium heat stir the sugar until it has all dissolved into the water, the water will look a bit cloudy. Once the sugar has dissolved stop stirring! Now let the caramel do its thing.
Keep the sugar and water mixture heating over a medium heat, letting it bubble away until it has turned an light amber colour. This will take about 4/5 mins, but keep an eye on it, caramel can go from golden amber coloured to burnt very quickly. One rule for making caramel is not to stir the mixture as it is heating, this will crystallise the sugar. If you want to give the mixture a stir, you can swirl the sauce pan from the handle.
Once the caramel is a colour you are happy with remove it from the heat. Quickly pour the cream into the caramel in one go, it will bubble up, and start stirring the cream in immediately. Now stir in the butter, salt and vanilla extract. Once everything is incorporated you have made caramel sauce!
Here is a lil
bit of my art do
you like it?
Cake
For the cake pre heat the oven to 170. Grease and line the baking tin.
Make your coffee. I use 3 teaspoons of instant coffee and 2 tablespoons of boiling water. Set this aside for later. In a bowl cream together the butter and sugar until pale and fluffy. Weigh out your flour and set this aside.
Beat one egg at a time into the butter mix. Add a spoon of flour with each egg addition to stop the mixture curdling. Add the salt and vanilla extract and give all this a good mix.
Sift in the remaining flour and gently fold this into the cake batter. Separate the batter into two bowls. There should be about half the batter in each bowl.
In one half of the batter, add a splash of milk and mix this gently in, trying not to mix it too much. For the other half of batter gently mix in the 2 tablespoons of coffee and 2 tablespoons of caramel sauce.
Dollop the 2 cake batters in big blobs around the cake tin. Give the whole tin a bit of a shake from side to side to level out the top. Using a knife or skewer draw 2 figure of 8 patters through the cake batter. This will create the marble effect (this is my fav bit).
Bake for 30 mins or until a knife inserted into the cake comes out clean. Allow the cake to cool for 10 mins before taking it out of the tin.
Salted Caramel Buttercream
You can eat away now….or you can make the buttercream. Make sure you butter is nicely softened, you can give it a very short burst in the microwave to soften it a bit, just make sure not to melt the butter.
Using a wooden spoon or electric mixer beat your butter until pale and fluffy. Sift in the icing sugar, give it a gentle stir and then go back in the with electric whisk or give it a good mix with the wooden spoon.
Add in the vanilla extract, salt and caramel sauce. Beat the buttercream until light and fluffy. Once the cake is cooled SMUTHER it in the buttercream.
Have a good cake Joe and Happy Birthday Máté. Caitlin xxx
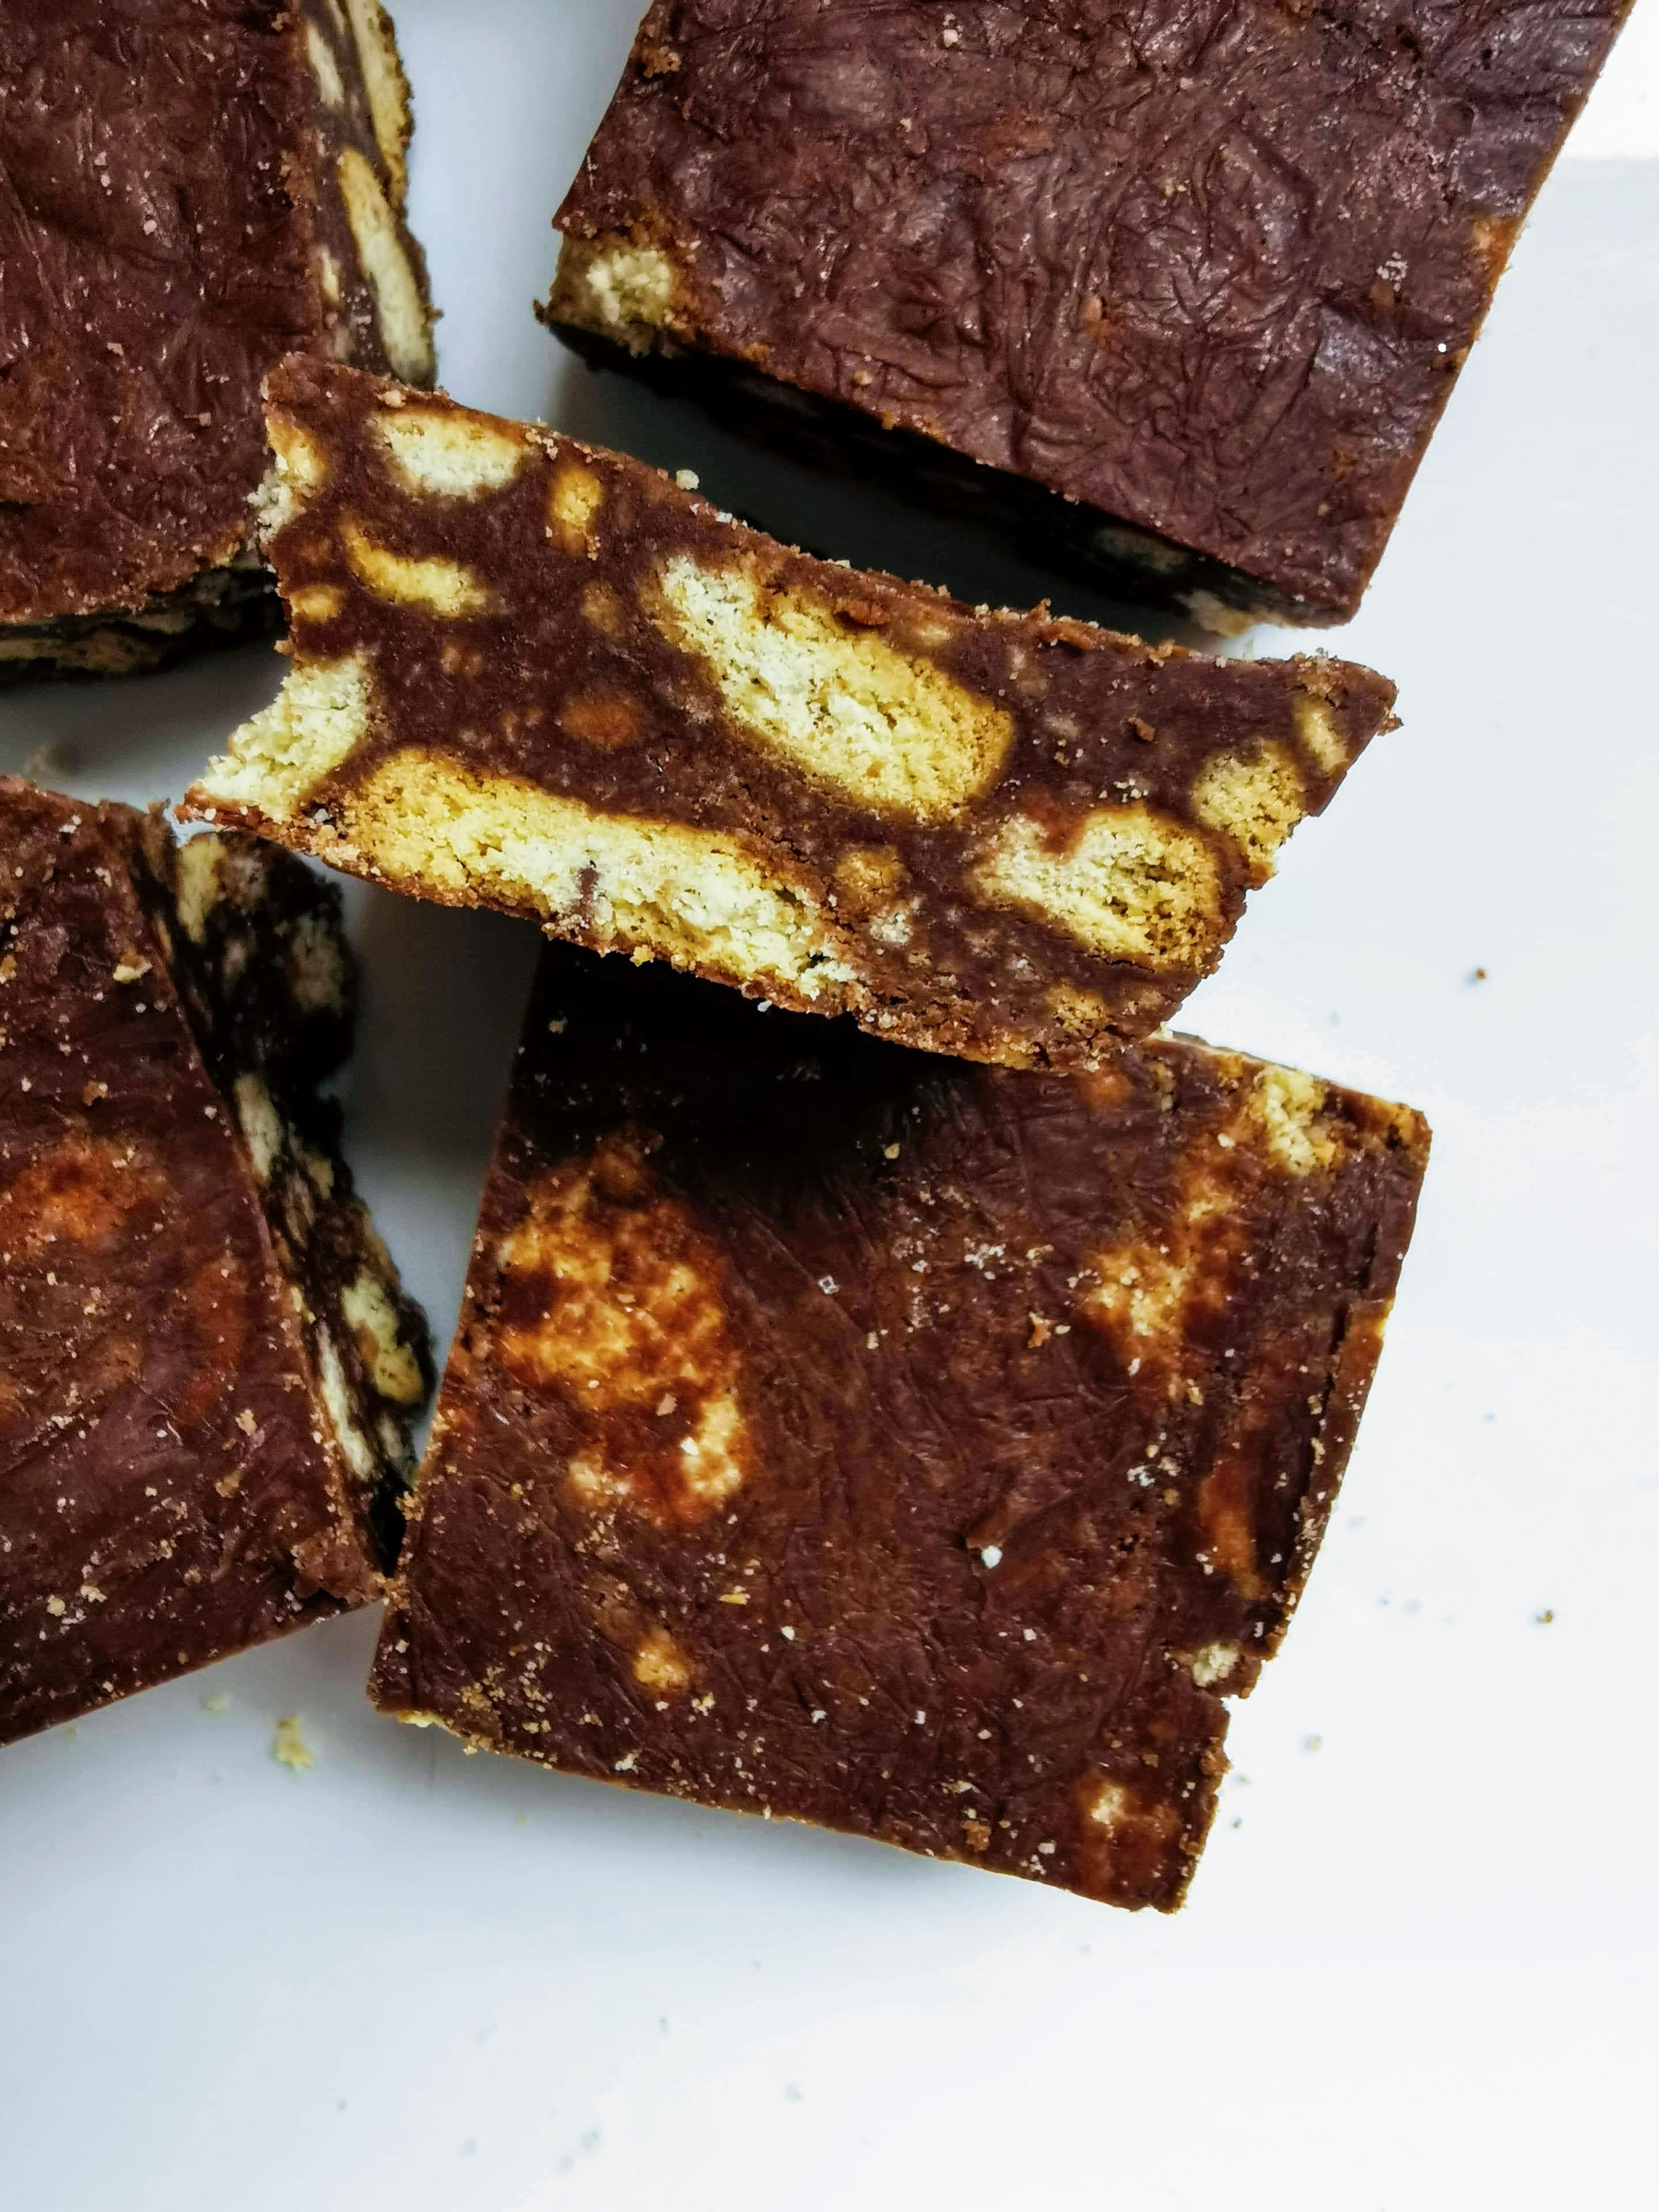
Tiffin is a lil bit of a special one. One of my favourite things about Tiffin is the name, so I’ll try and use the word ‘Tiffin’ as many times as I can in this post.
Tiffin takes 10 mins to make and you don’t even have to bake it. Wow. What more could you need.
Ingredients
300g digestive biscuits
50g butter
200g chocolate – I use one dark, one milk chocolate
3 tablespoons golden syrup
Pinch of salt
Tiffin Method
Line a baking dish with tinfoil, mine is 27cm by 15cm. Any size will do, the bigger it is the thinner your Tiffin will be.
Use your hands to crush the digestives into a bowl. You want some bigger pieces and some sand consistency. Set this aside.
Melt the butter, chocolate and golden syrup. I use a microwave, taking it out every 15 seconds ish to give it a mix, this will make sure the chocolate mixture doesn’t burn. You can also use a bain marie (in a bowl set over a pan of simmering water) for this step.
Pour the chocolate mixture over the digestives, add the salt and mix this all together.
Once the biscuits are coated in chocolate, tip this into your lined baking dish. Using the back of a spoon, press the mixture down firmly so that you end up with a compacted slab of tiffin. If you press down with the spoon and move it quickly back and forth over the top of your tiffin, you’ll get a shiny top!
Whack it in the fridge, it will take about 2 hours to set completely. Once your tiffin is set, cut into squares or eat the whole slab in one go.
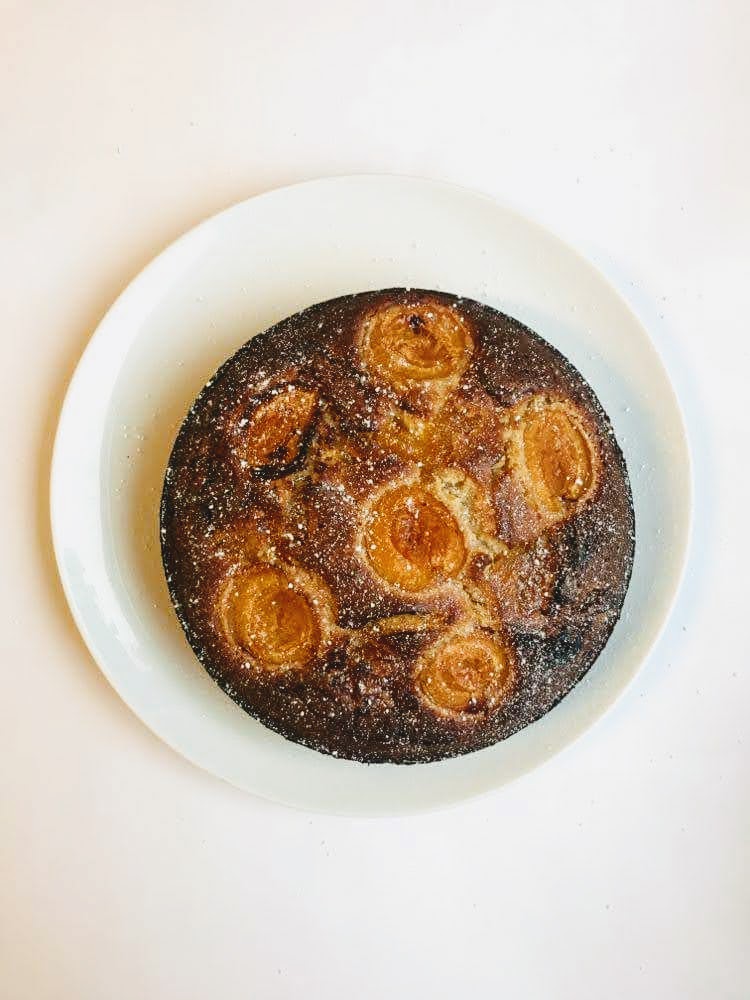
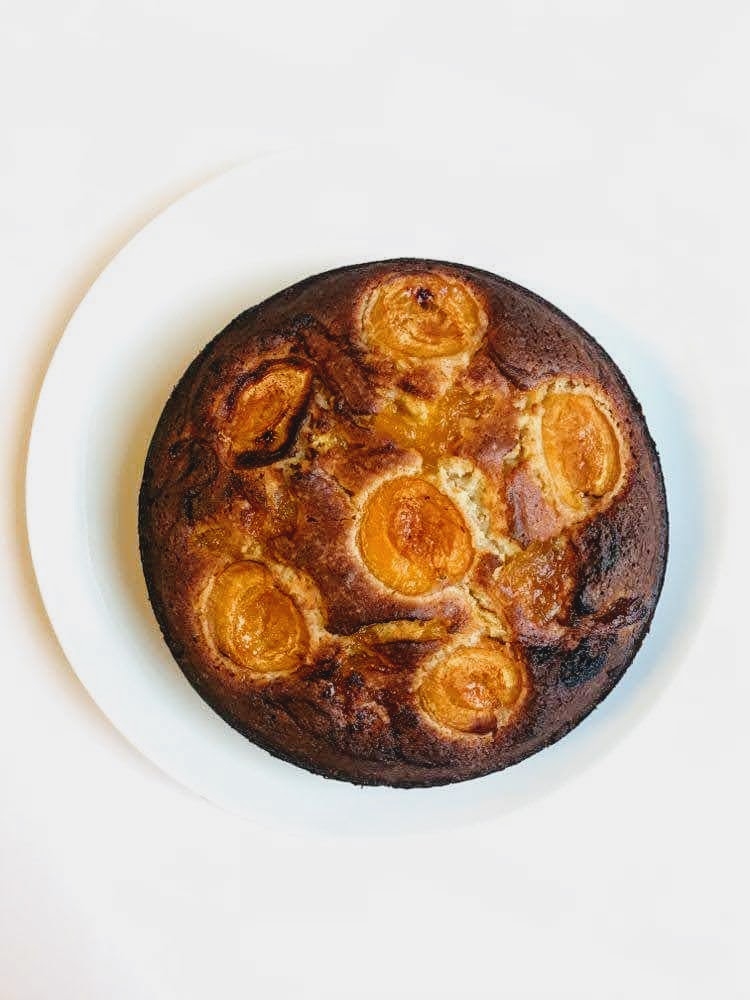
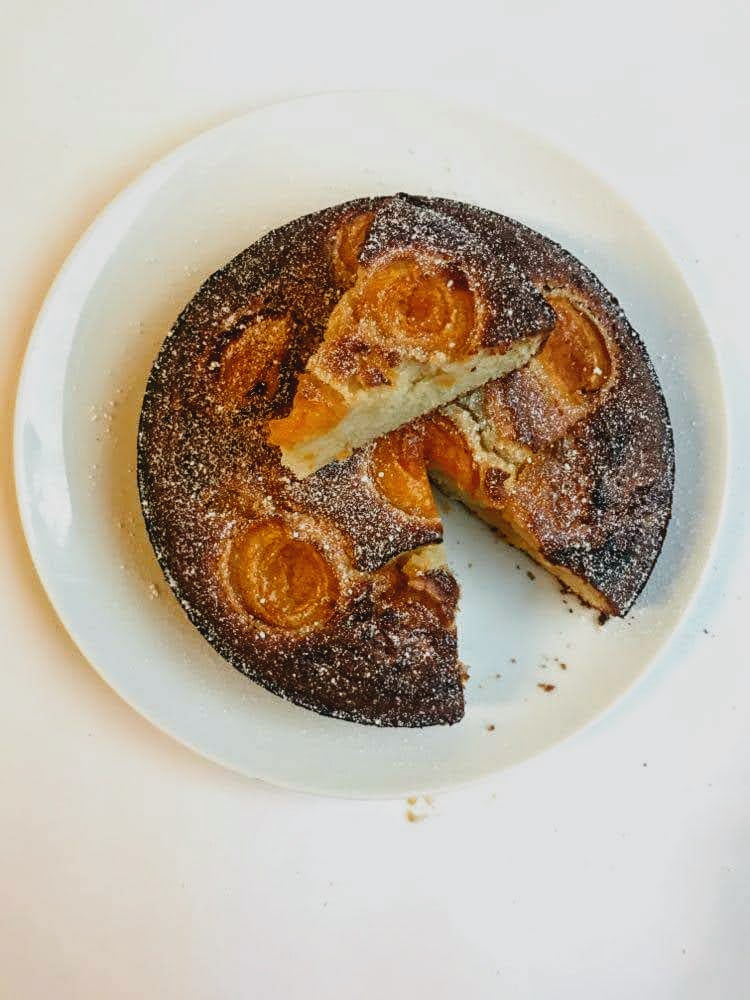
Here is the first cake I made in Glasgow. I was working on this recipe a couple of months ago and wanted to test it out again – can confirm, it worked.
Apricots and olive oil might sound like a strange pair but the flavours work really well together. There’s no butter in this cake, the olive oil is used as the fat. But, you want the olive oil for its flavour rather than to make the cake dairy free. Tiger (my flatmates name is tiger. She’s not a real tiger) can’t eat dairy so this is a cake that she can have! Woo! I think she liked it. I presented it to her on a plate, she growled a bit, picked the cake up with her mouth, dropped it on the floor and started eating it. I have never seen someone eat a cake so well – that’s my Tiger!
Ingredients
For the Apricot Compote
250g pitted apricots
50ml water
75g apricot jam
For the Cake Mix
100ml olive oil
100ml milk
1/2 teaspoon vanilla extract
2 eggs
100g ground almonds
125g plain flour
1/2 teaspoon baking powder
pinch of salt
180g sugar
If you can’t get hold of apricot jam, which is quite expensive, substitute it with 1 tablespoon of honey and 1 tablespoon of sugar. If your apricots are very ripe, add less sugar and honey.
LOL. I have a confession. I’ve just realised that there’s milk in this recipe. In case you didn’t know, milk is a form of DAIRY. I’m pretty pleased with my lil story about tiger, My dairy free friend, so I’m not editing the introduction to this post. Tiger, I am sorry that I made you eat dairy without you knowing it and I hope this dairy didn’t give you the shits.
Method
Pre heat your over to 180. Butter a round cake tin (mine is 20cm) with the most dairyist butter you can find.
In a small saucepan, heat your water, pitted apricots and jam (or sugar and honey) over a medium heat. Let it cook for about 5 mins, stirring occasionally, until the water has evaporated and the mixture is a loose consistency. Turn off the heat and set aside. If you want some whole apricot pieces topping your cake, like in the picture above, set some apricot halves aside for you to place on top of the cake before it goes in the oven!
Lightly whisk together the olive oil, milk, vanilla extract and eggs.
In a separate bowl mix the rest of the ingredients together – ground almonds, flour, baking powder, salt and sugar.
Combine the wet mix with the dry mix, stirring until you have your cake batter.
Pour the batter into the prepared cake tin. Spoon the apricot compote over the batter in blobs. Using a skewer or knife draw a couple of figure of 8 patterns in the cake batter. What your doing here is marbling the compote into the batter. The less figure of 8s you do in the batter the clearer the marble pattern will be in the final cake.
Bake for about 35-40 mins or until a knife inserted into the cake comes out with not wet batter.
There’s a blue, rectangle button in the top right hand corner of my screen on the dashboard for this site. It has the word ‘Write’ on it. I’ve just pressed it and now I’m filling up this empty screen with words and, hopefully, a recipe. I haven’t pressed that button for a long time. But I’m back!
Let’s give our readers a lil update (I reckon we have a solid 18 now). I’ve moved back to Glasgow for uni and you’ve moved into a new house in London, released a new poetry pamphlet (find it here) and got your contract extended at work for another year. Big. And… Cake On My Face is now on Instagram (find it here), come and say hello!
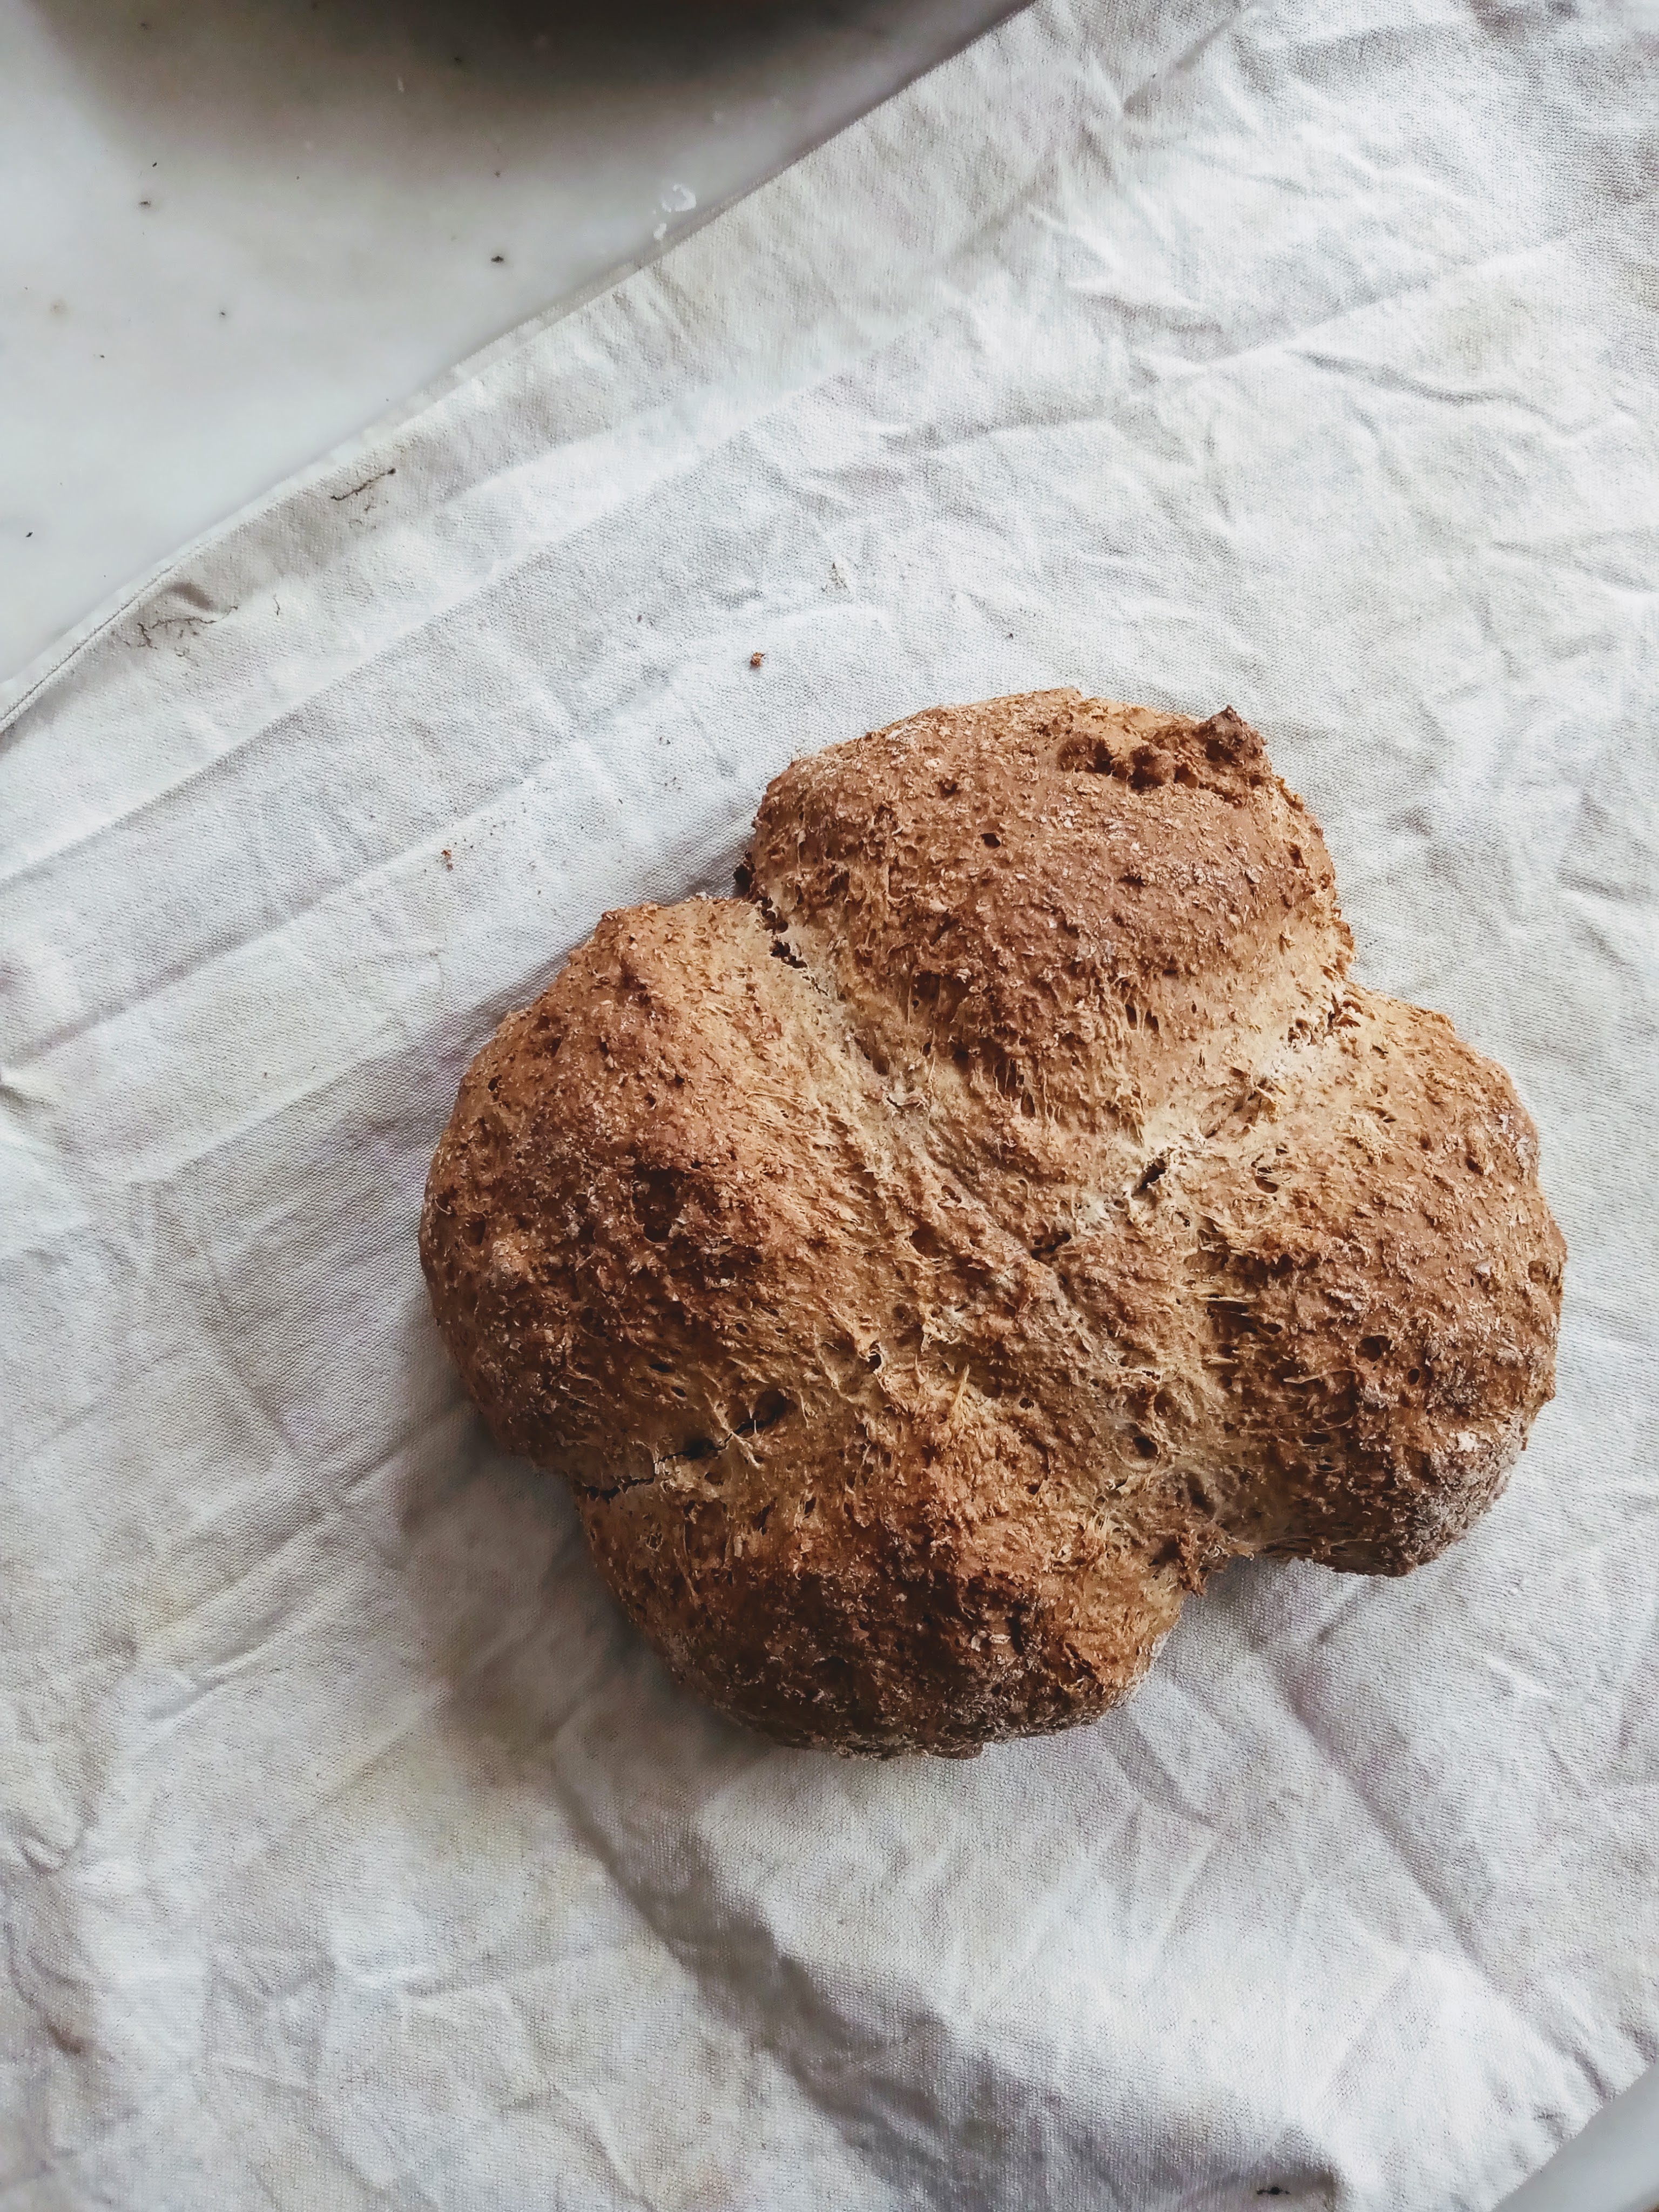
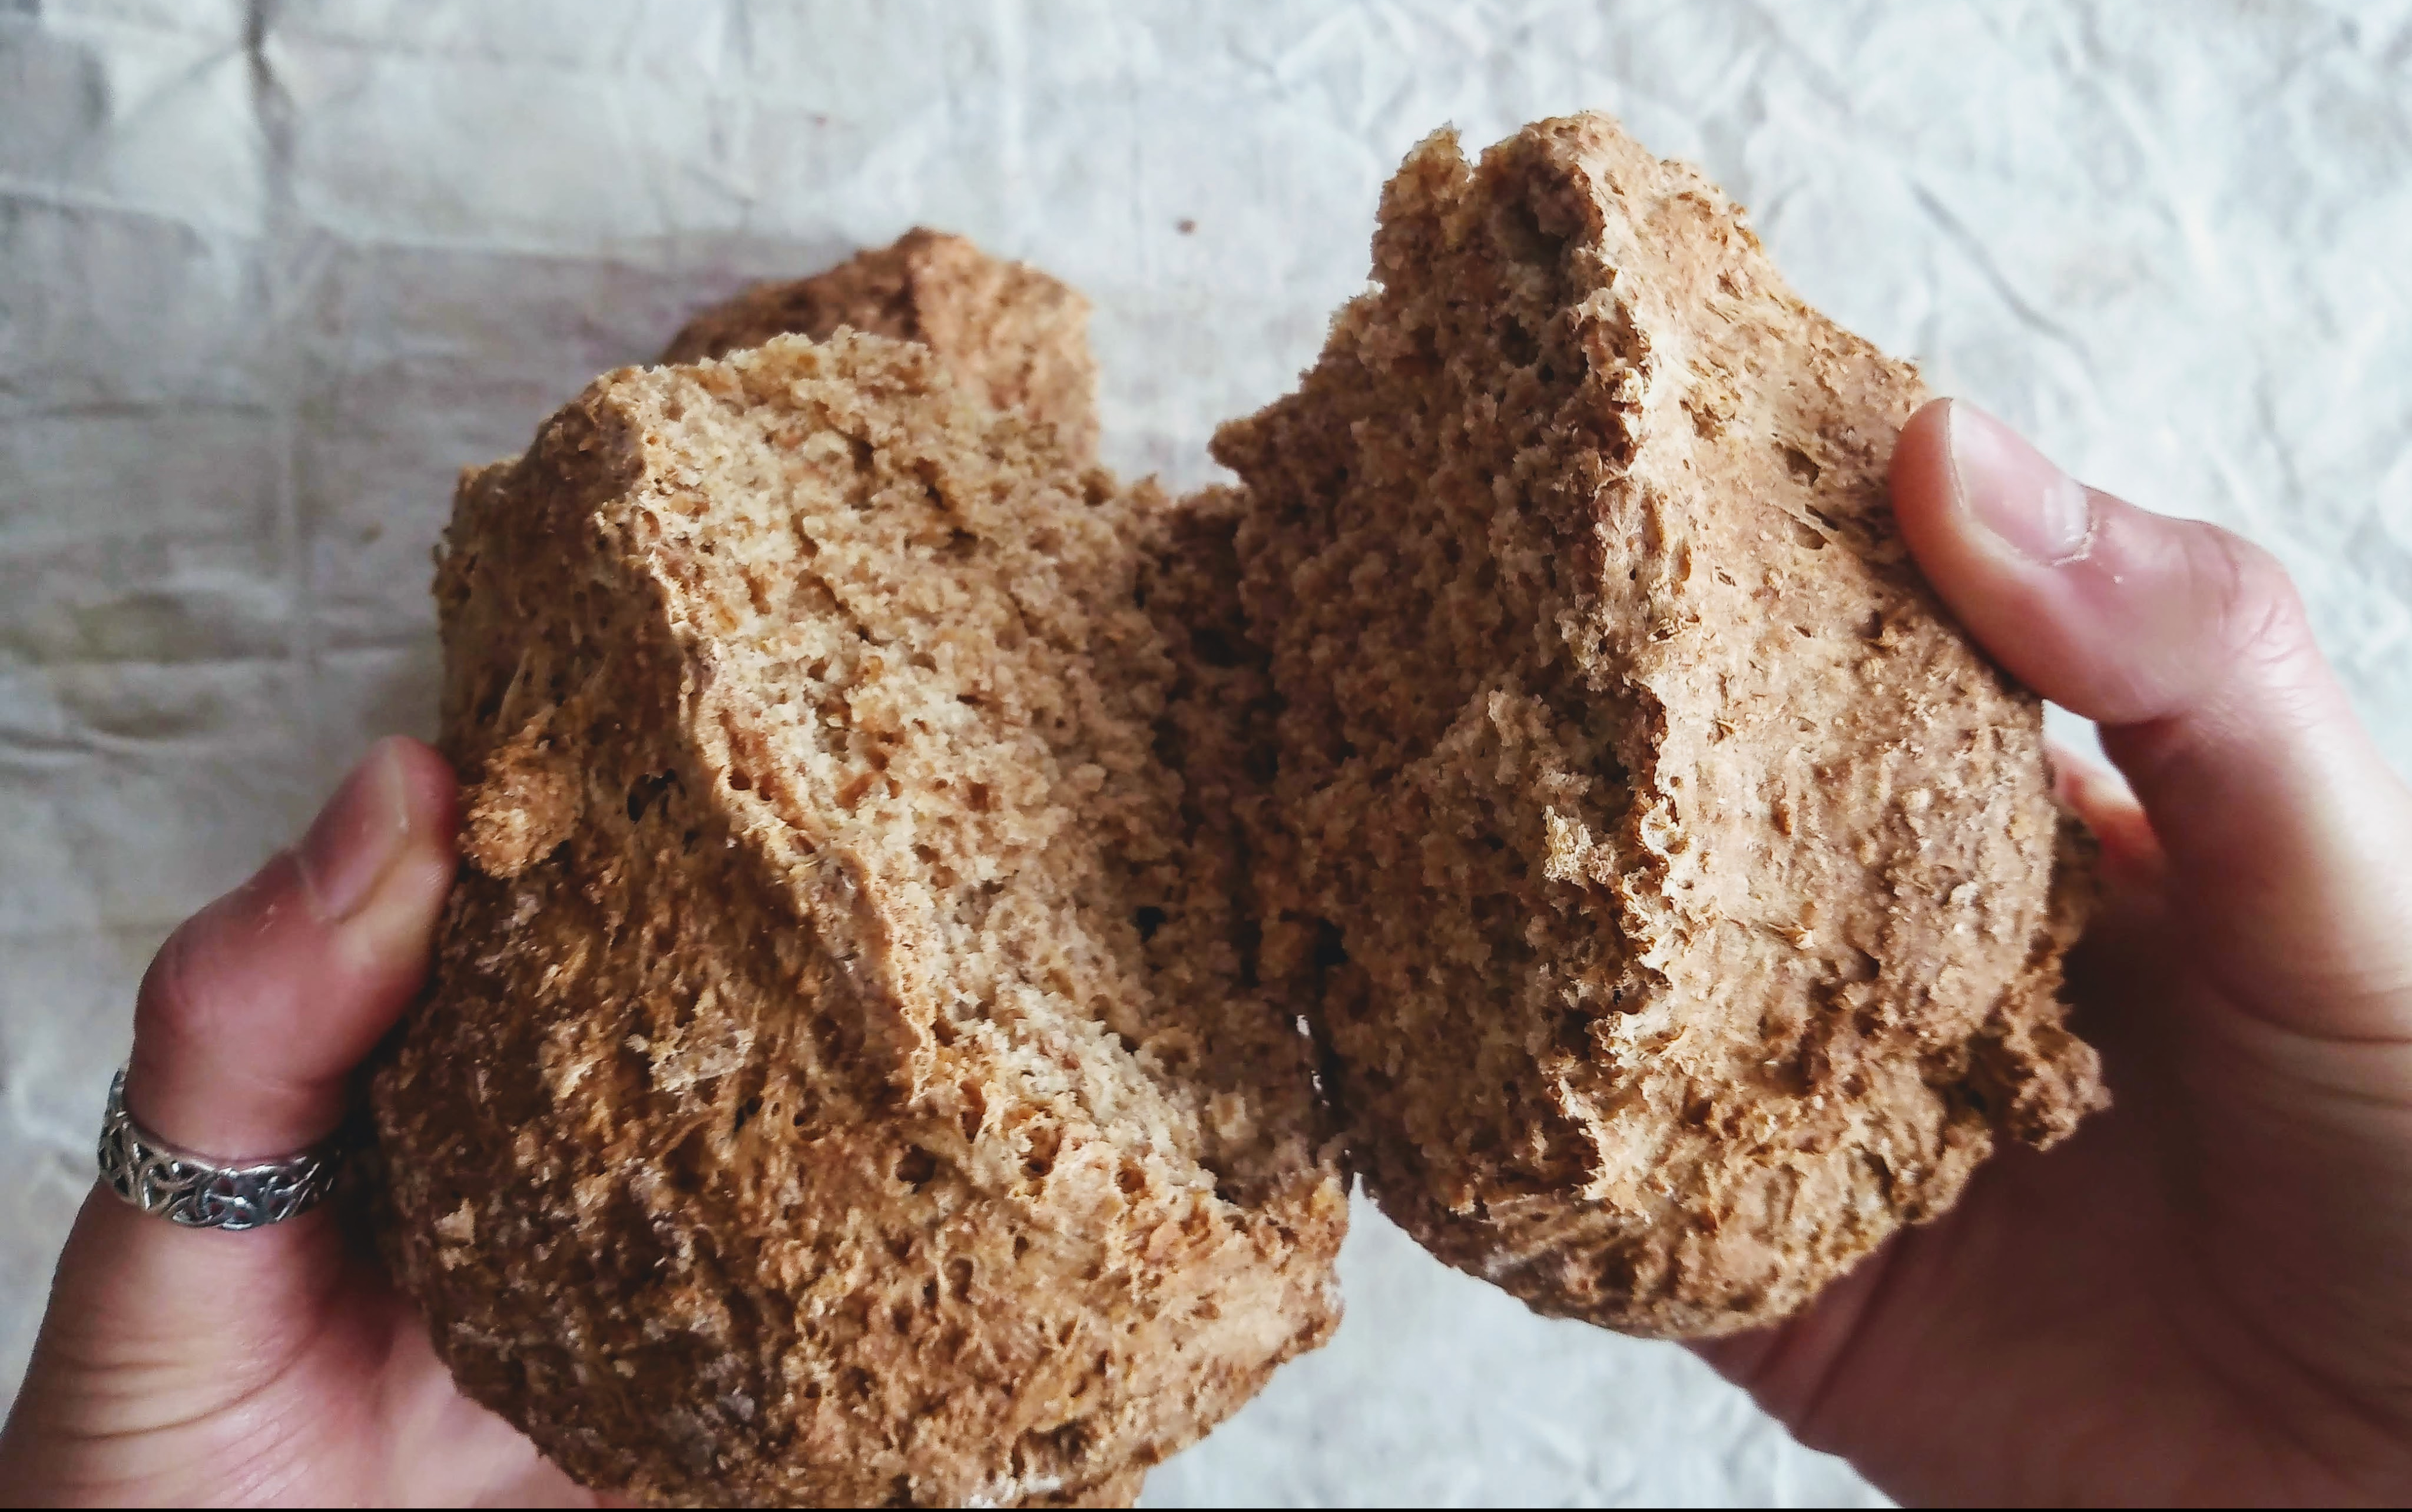
My cute lil loaf
WOW too much writing. I want soda bread. Joe, this is the bread I was telling you to make the other day. The reason this recipe is magic is because, from start to finish, you get fresh bread in under an hour. Soda bread uses bicarbonate of soda to rise, instead of yeast. So, once all the ingredients are mixed it can go straight in the oven, rather than having to wait for the yeast in the dough to ferment.
This bread is quick, easy, makes your house smell like a bakery and is MMMM so good. Once I make a loaf of soda bread, I eat the whole thing in about an hour. I hope you do the same too.
Ingredients
170g Wholemeal flour
170g plain flour
1/2 teaspoon bicarbonate of soda
1/2 teaspoon salt
90g yoghurt
200ml milk
2 teaspoons sugar
Traditionally this bread is made with buttermilk. I always have milk and yoghurt in the fridge and this does the same thing as buttermilk but if you want to use the real deal you can find it in most supermarkets. Replace the yoghurt and milk with 290ml buttermilk.
I normally use brown sugar in this recipe, it gives a really nice colour to the loaf and a note of caramel (lol). You can just use standard granulated sugar though, and you wouldn’t be missing out on any ‘notes’.
Method
Pre heat the oven to 200 and flour a baking tray, ready for your lil loaf.
Mix together your milk and yoghurt, set this aside.
In a large bowl, mix together all your dry ingredients. Make a well in the flour mixture and pour in your yoghurt and milk mixture.
Stir it all together, you might need to get your hands involved to form it into a shaggy lump of dough.
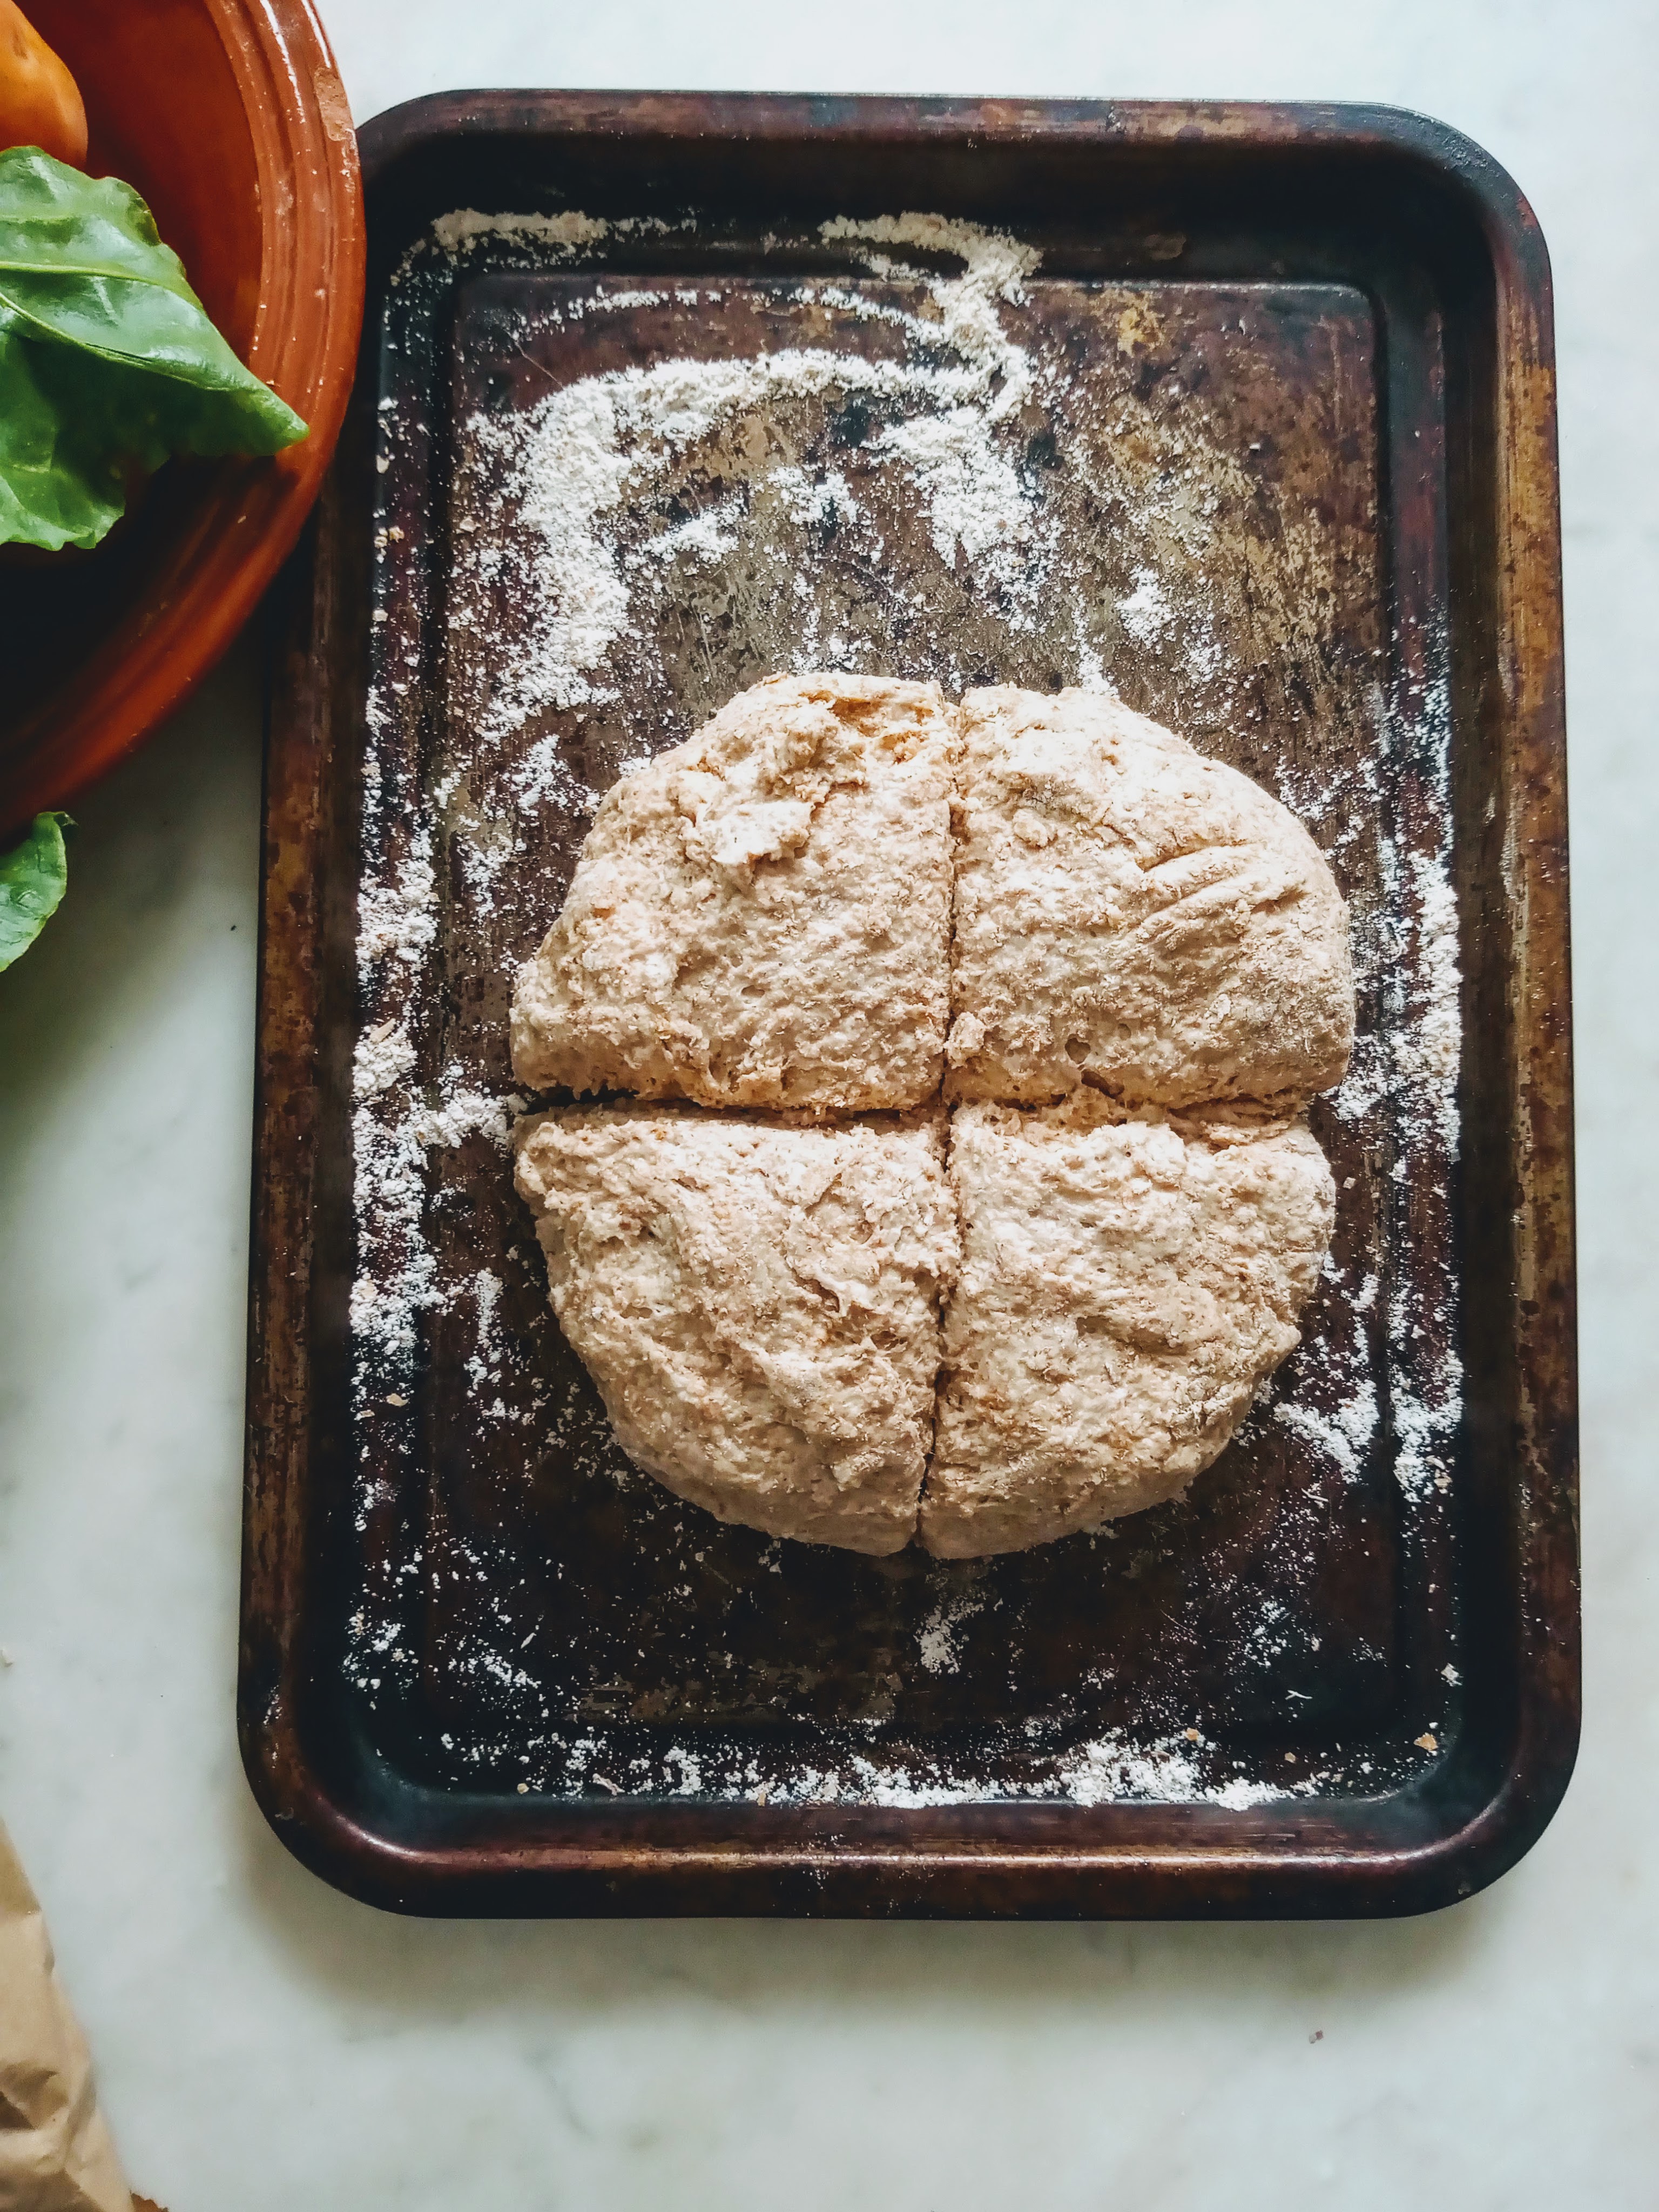
Form the dough into the shape you want to bake it in and whack it on the baking tray.
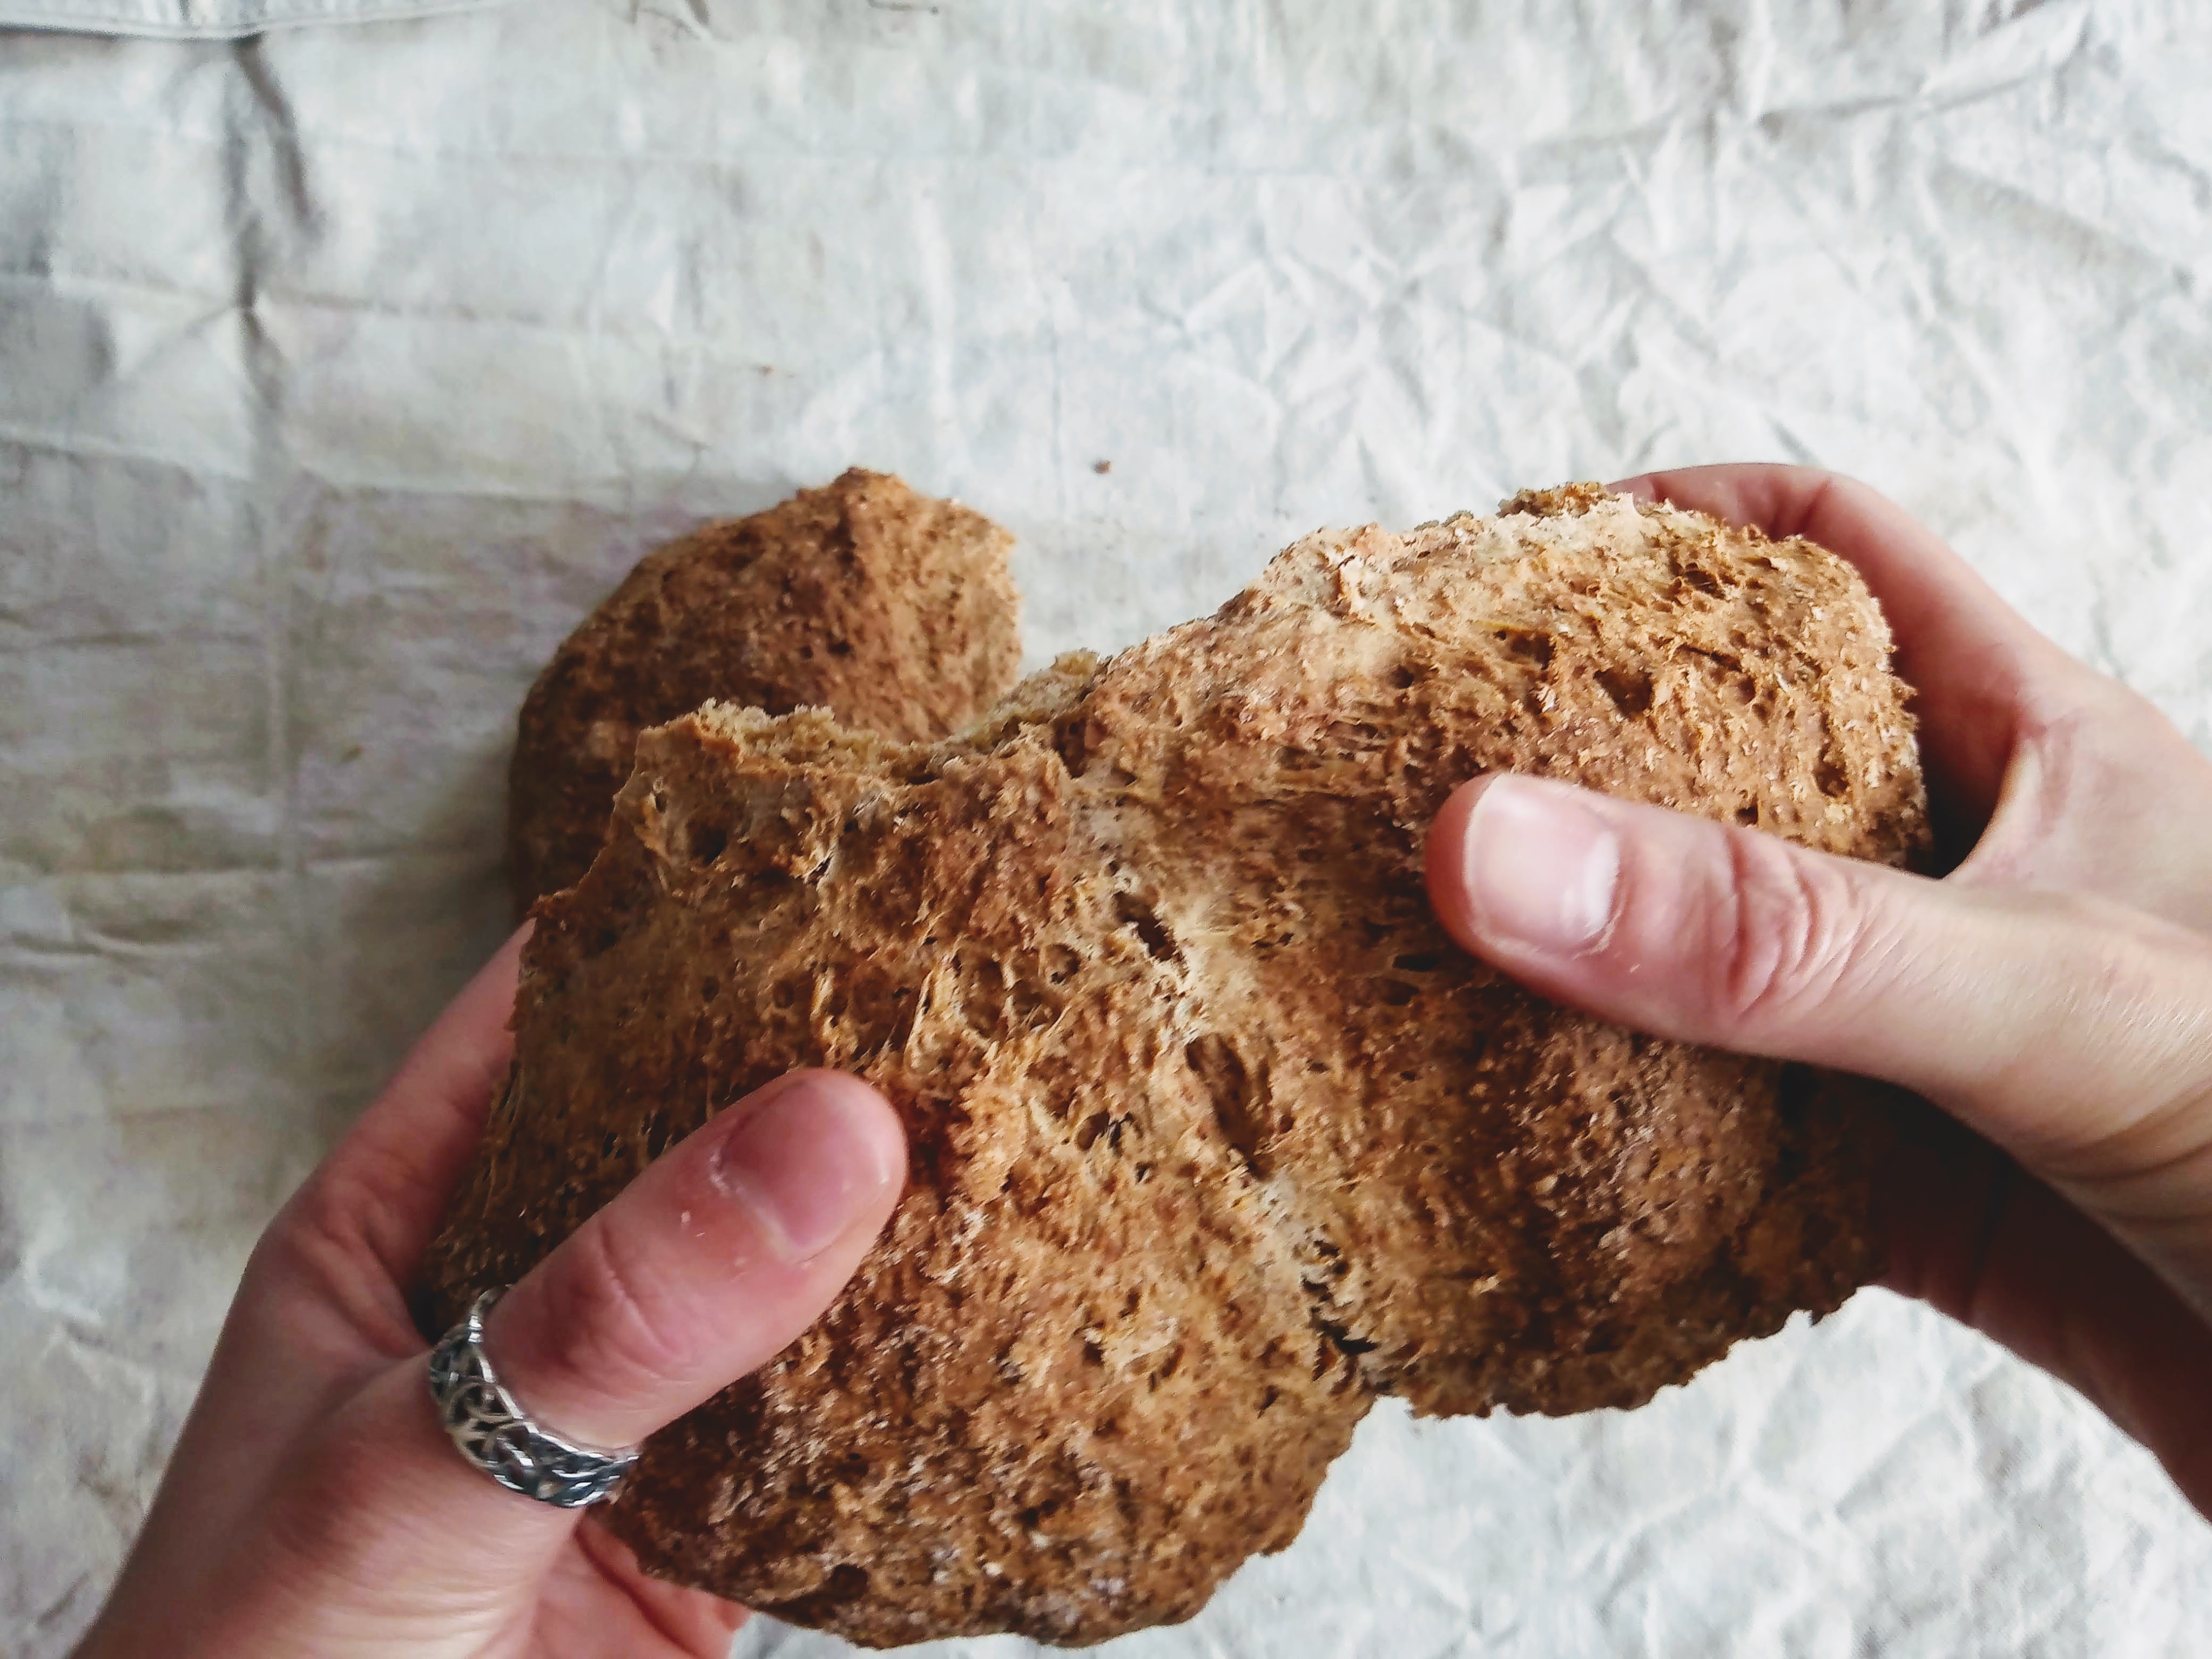
Sprinkle flour over the top of your loaf and using a large knife, cut the loaf into quarters. This will help the loaf rise in the oven and make it ready to be ripped apart into perfect bread rolls once its baked.
Put it in the oven and bake for about 30 mins, if you want a darker colour leave it in for a bit longer.
Once you’ve taken it out of the oven wrap the loaf in a clean tea towel and allow to cool before eating. Wrapping the loaf in a tea towel will give you a moist, soft bread.