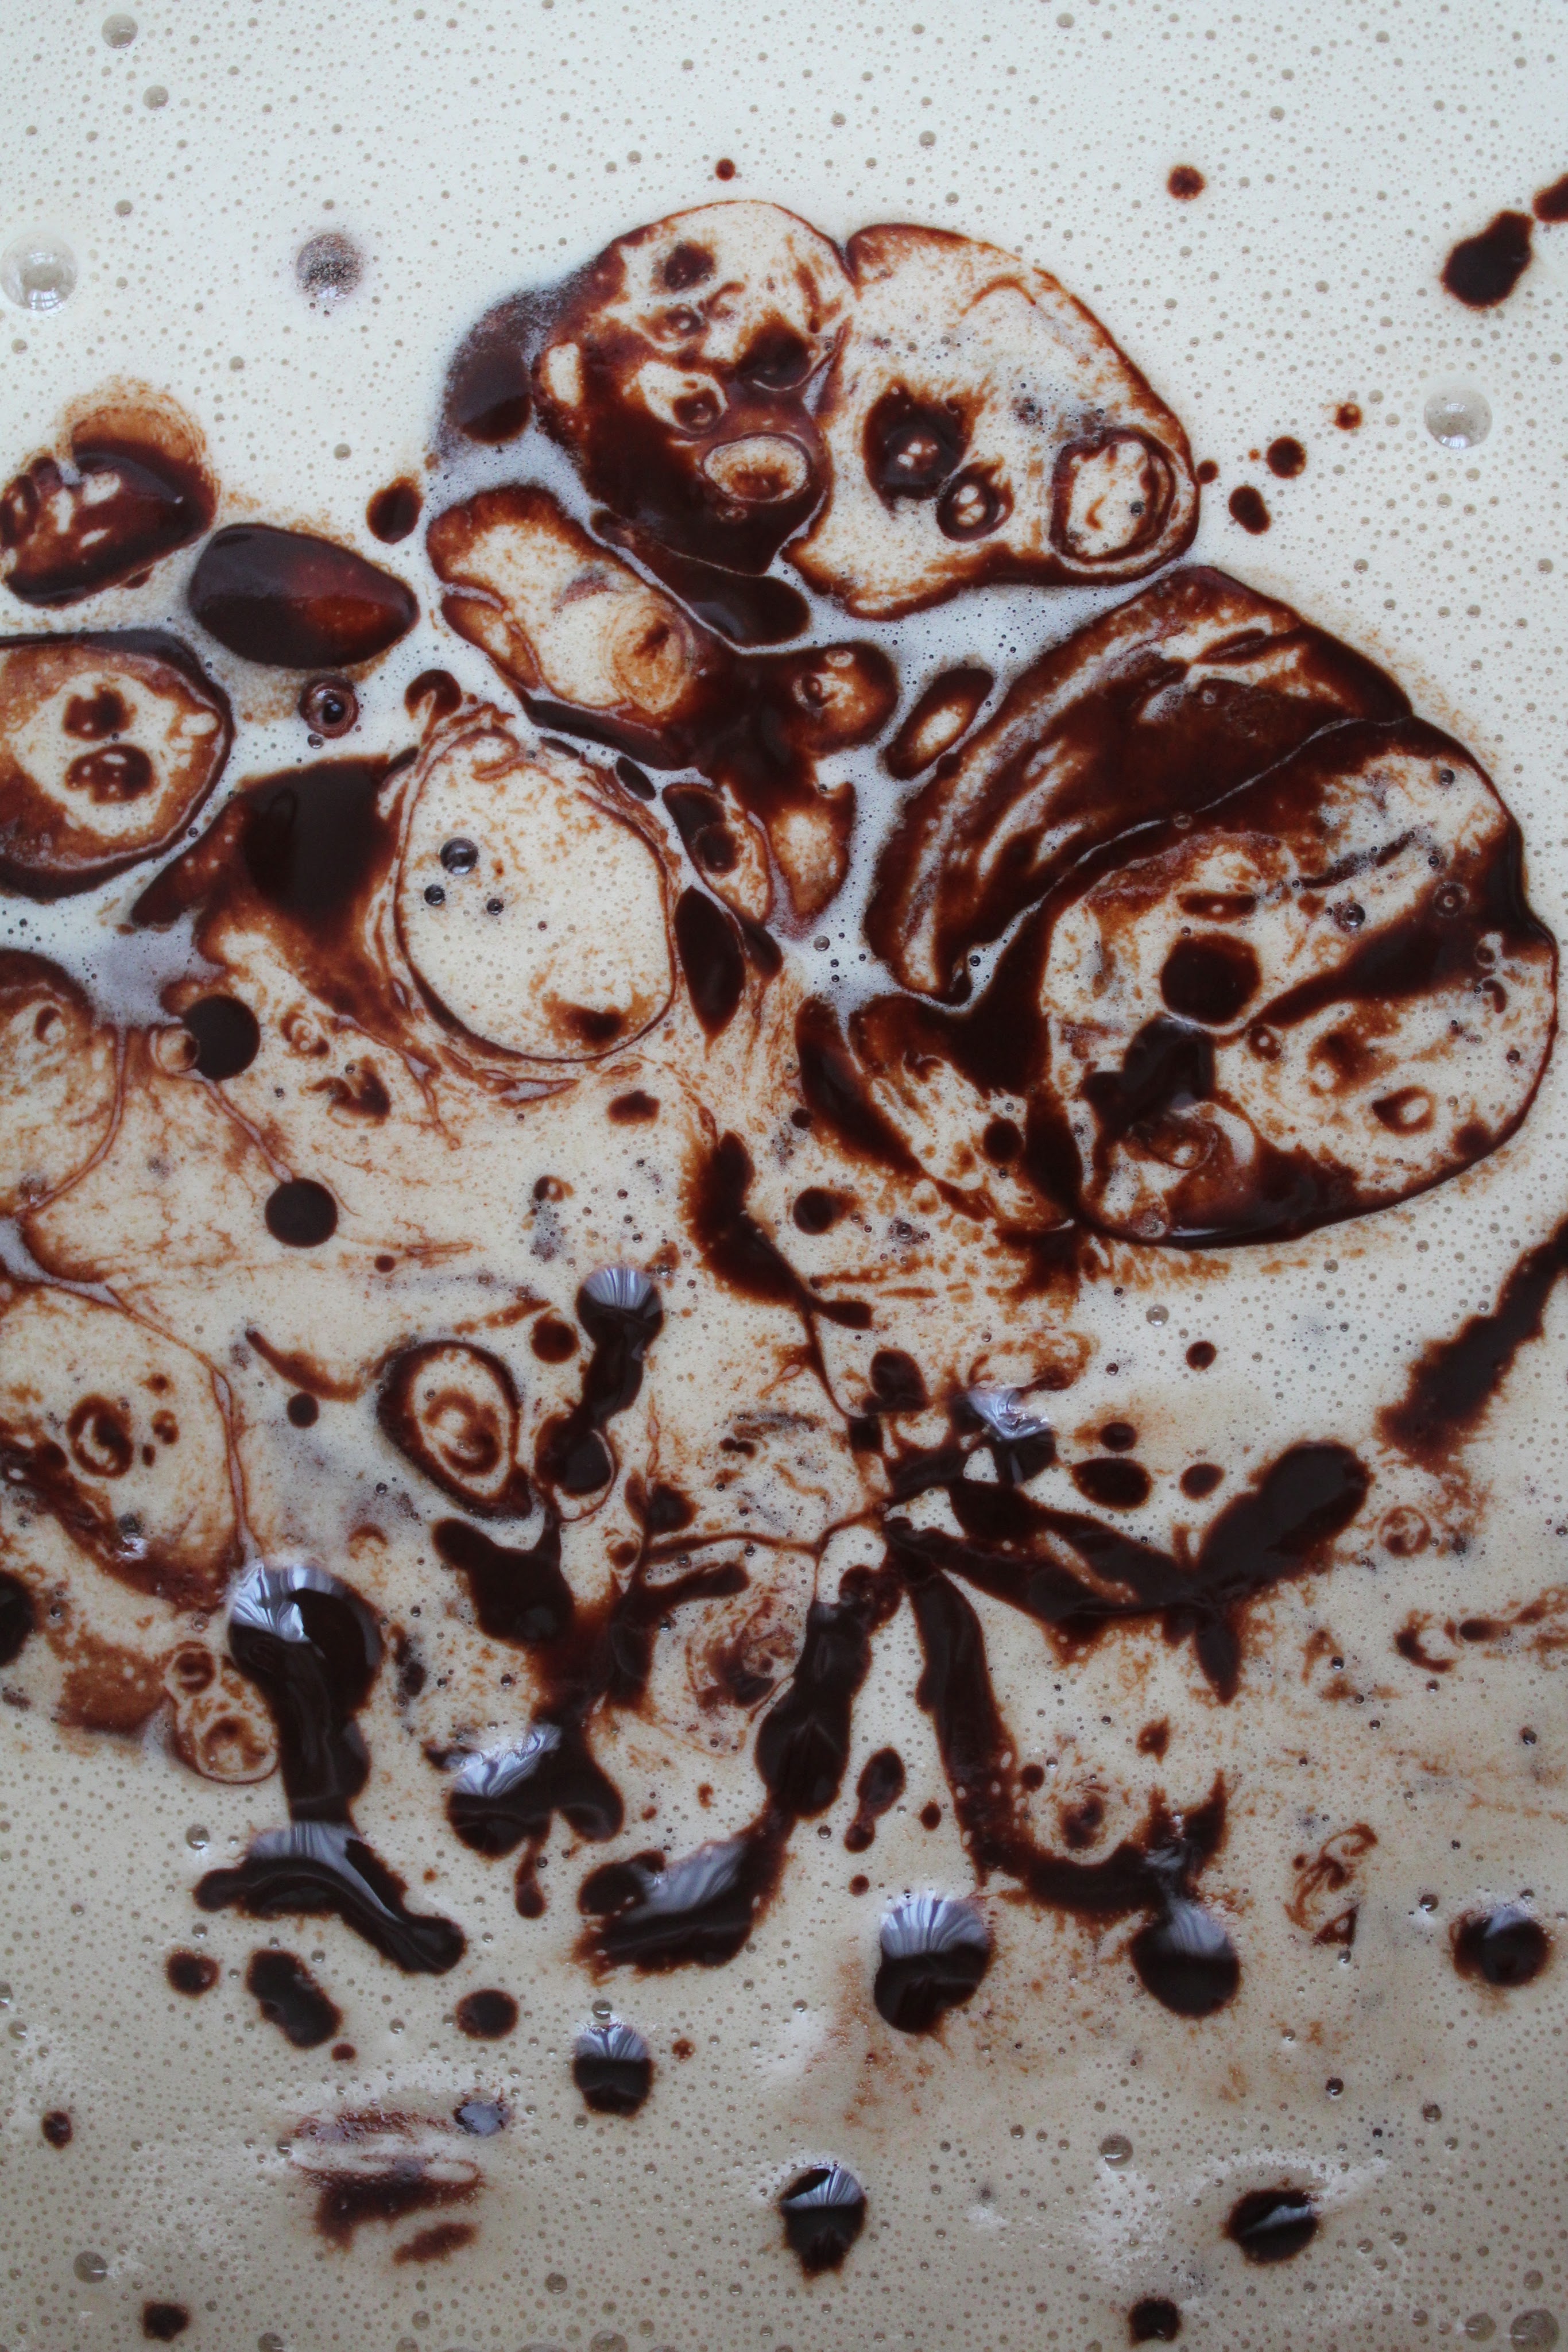
All I can smell is coffee. I made a moka pot this morning before starting my first day at work and spilt it all over the kitchen counter, the floor, and myself, had to change, didn’t have time to clean it up and arrived at the new place sweating coffee. So back home and the kitchen is dripping a bit.
I’m reading The Boston Cooking-School Cook Book (1896) on Google Books because it’s supposed to contain the first recorded recipe for blondies. The book has everything from Yorkshire Puddings, and Macaroni Cheese to Frogs Hind Legs, Stringbean Soup, Boiled Cucumbers, and Heart (ha!). As well as all the characteristics of a dated cookbook (lots of Fruit Punch and a section on How to make Tea), recipes like the Emergency Biscuit pop up as reminders that some things never change. I’m thinking of Nigella’s Emergency Brownies from 2017.
Fannie Merritt Framer carefully dedicated her book to the president of the Boston Cooking School, Mrs. William B. Sewall. It reads, In Appreciation of her helpful encouragement and untiring efforts in promoting the work of scientific cookery, which means the elevation of the human race. Like that dedication, Fannie’s preface to the book is backing food with real importance. She opens it with what I’m assuming is a quote – But for life the universe were nothing; and all that has life requires nourishment.
That wasn’t what I was expecting to find when searching for the OG Blondie recipe. I was expecting more 100g butter, 200g sugar andless life, universe and nourishment. It’s nice.
The recipe I’m after in the book is titled Brownies. Only it has no chocolate in it so it’s similar to what we now call a Blondie. Fannie uses a lot of molasses in her recipe, which would give it the brownish colouring and fudgy texture of Blondies and Brownies we all know.
To honour Fannie from 1896, I’ve added some black treacle to my blondies. It’s not quite molasses but in the same vein. The black treacle, combined with the dates is what gives these blondies the smell and taste of a sticky toffee pudding, your kitchen really will smell like the sponge dessert. With a generous amount of salt, and served fridge cold, these blondies are like crack.
This recipe comes with thanks to Jess and all the people in her office for the sticky toffee brownie inspiration xoxoxox
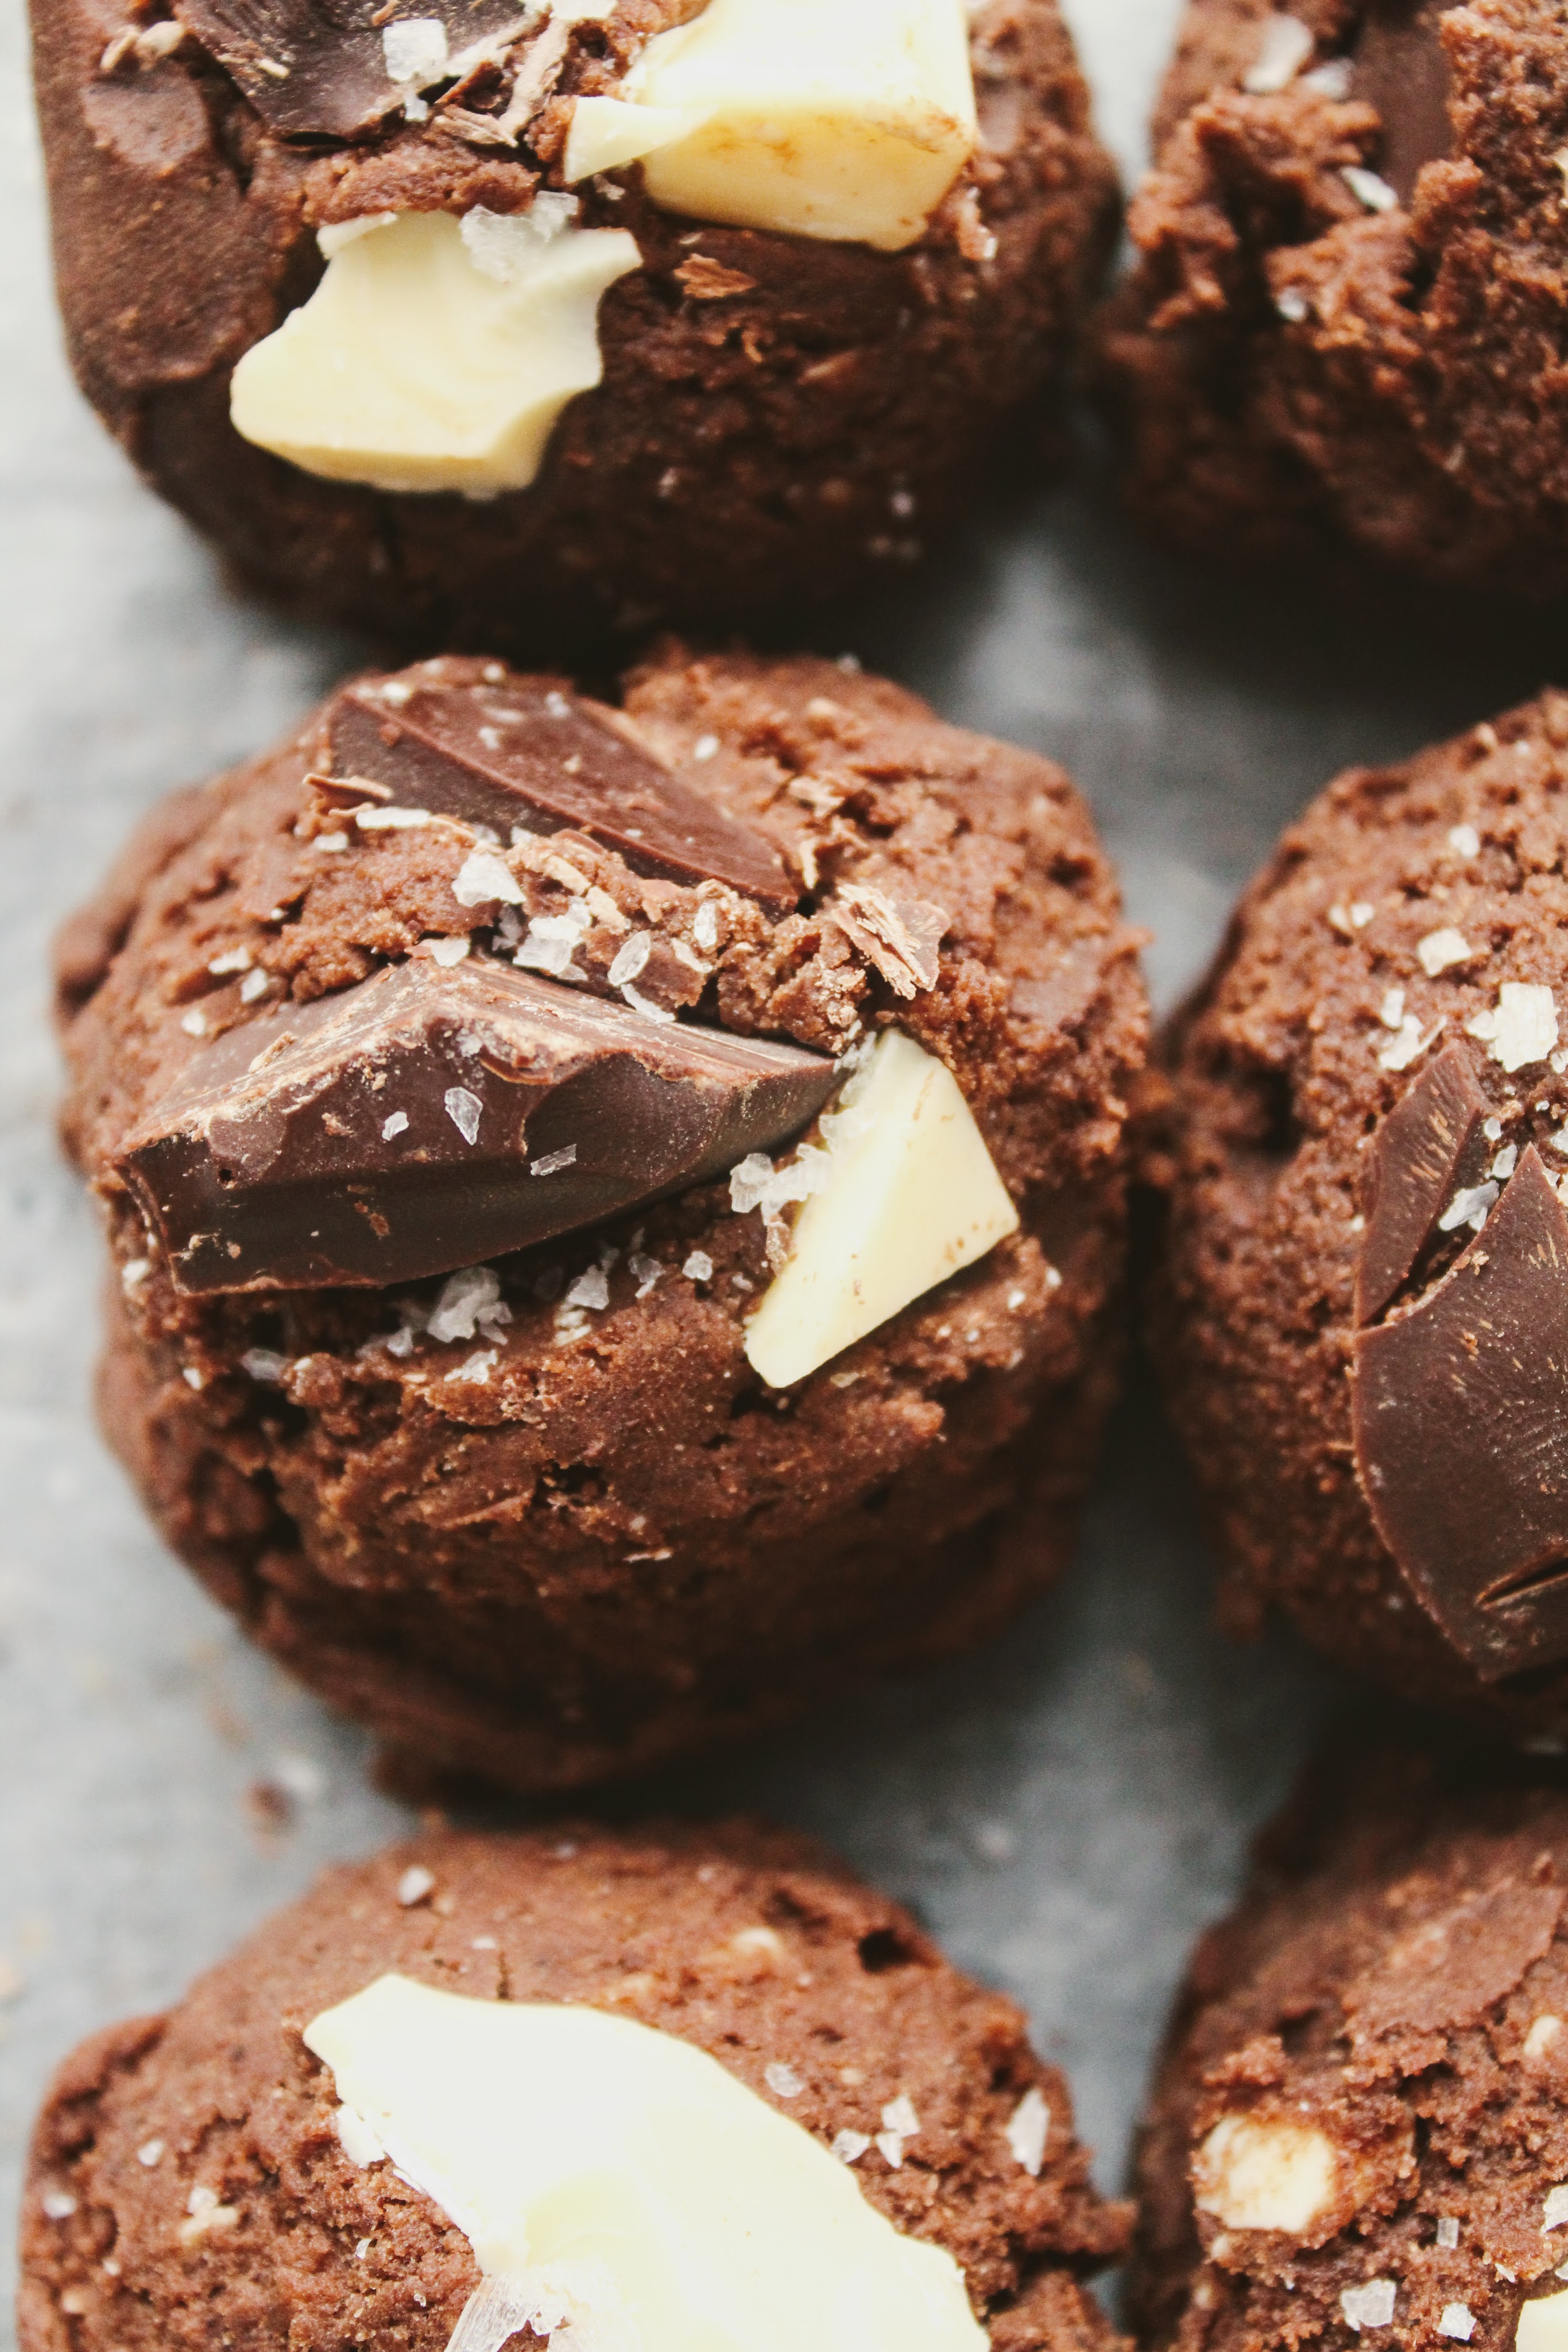
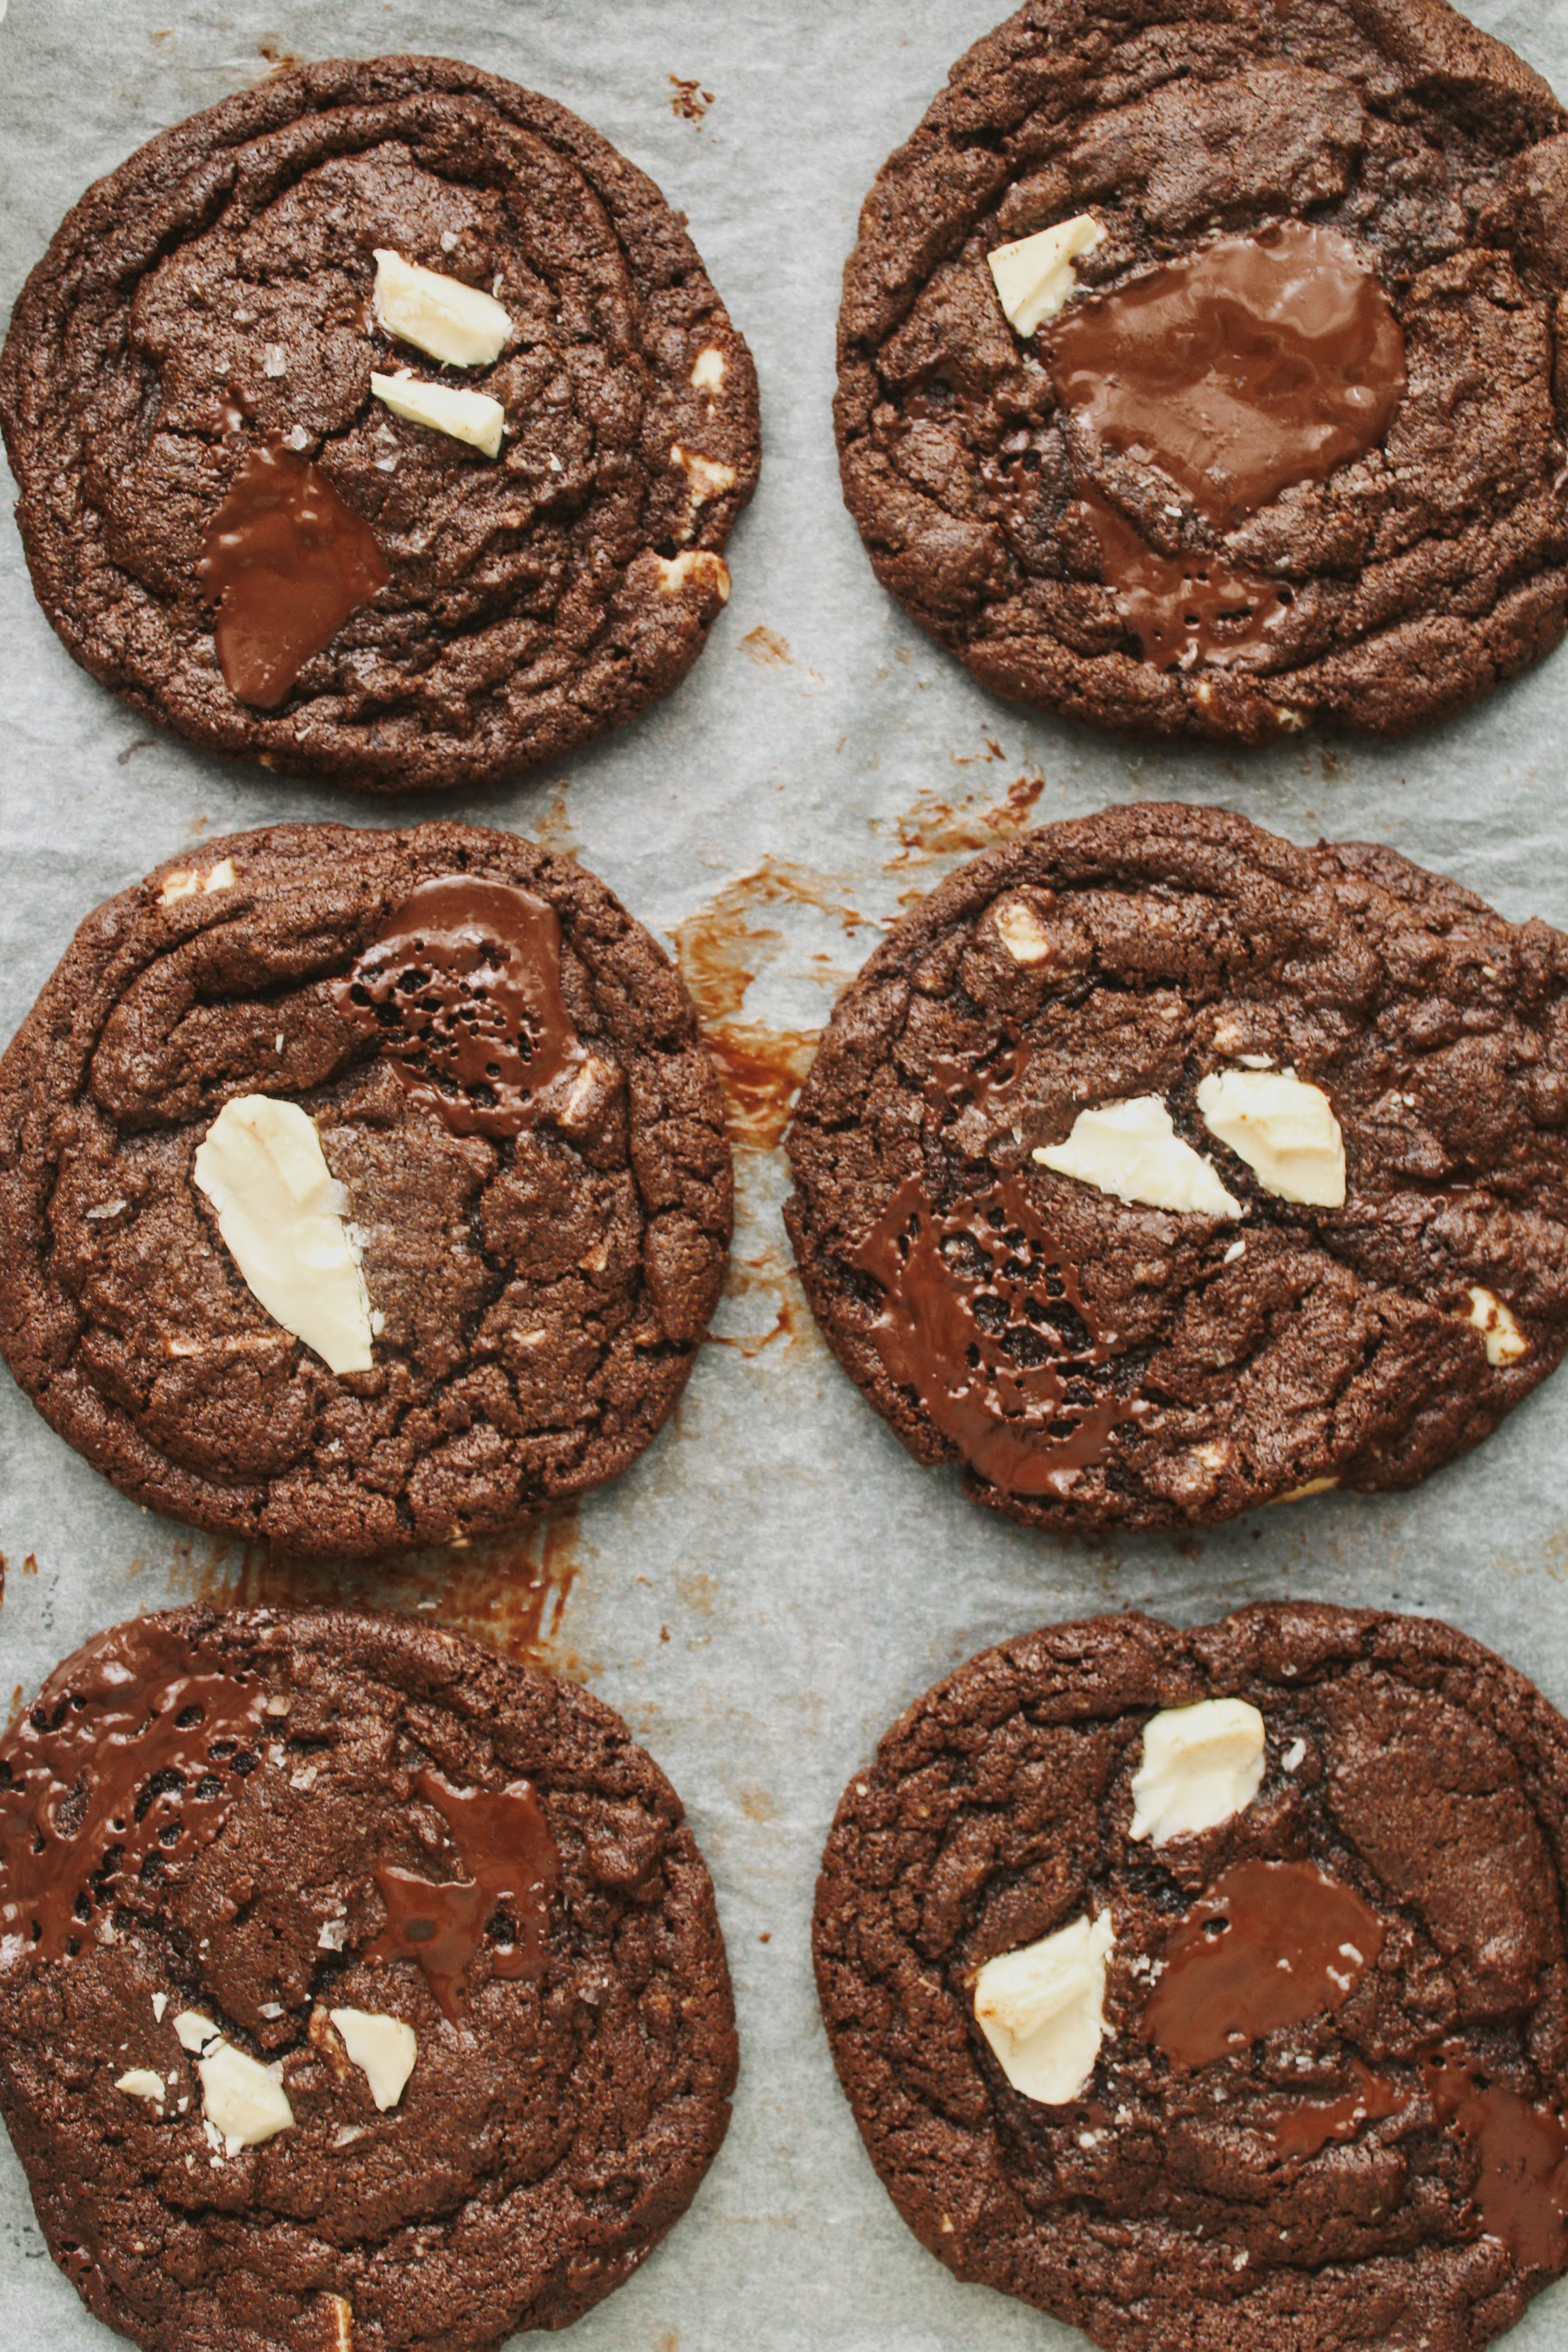
With this recipe – go generous on the salt, all the sweetness needs it. And assertive on the baking time. You want the centre to set while they cool rather than baking solid all the way through.
Ingredients
150g dates – roughly chopped, kept chunky
1/4 tsp bicarbonate of soda
280g white chocolate
100g butter
40g black treacel
175g light brown sugar
1 tsp salt
1 tsp vanilla
2 medium eggs
225g plain flour
1 tsp baking powder
Flaked sea salt – if you have it
Method
Preheat the oven to 180/160 fan. Grease and line a 7 inch square tin.
Add the dates and bicarbonate of soda to a small bowl. Pour enough just boiled water (from the kettle) to submerge the dates. Cover the bowl with a plate and set aside.
Chop the chocolate roughly, set 100g aside to add at the end. Melt the rest of the chocolate together with the butter and black treacle over a bain marie. Do this slowly, and keep an eye on it – white chocolate burns quickly.
Once the chocolate is melted, take it off the Bain-marie and stir through the sugar, salt and vanilla. Don’t worry if the mix is split here. Mix in the eggs one at a time, followed by the flour and baking powder.
Drain the dates and shake well to remove excess water. Add them to the batter followed by the 100g chopped white chocolate. Taste the batter and see if it needs more salt – it probably will, so add flaked sea salt or regular table salt.
Pour in the tin and bake for 27 – 28 mins or until the outside edge is browned and set but there is still a wobble in the centre. Let these cool completely before cutting.
Heres some written bits about birds and baths, and a chocolate cake (!!!!!! haha)
There are lots of birds in the garden at the moment. I’ve been thinking about them, in the sky mid-flight, fully feathered and singing. A picture book, pitch perfect bird. The image of a bird in my mind is a simple one; it never gets old, it never takes its first flight, it never eats its first worm, it never suffers a wing injury or almost gets eaten by a bigger bird.
Then last week I read this by Richard Mabey: ‘nightingales… are more cultured singers in June than they are in April…’ and a small part of my mind exploded. I have read and re-read that sentence. What a great thing. And a simple thing, that a bird becomes richer in singing power from one month to the next.
In March I thought of the word ‘relish’ a lot. I thought of this word on its own, and as part of a phrase which sounded like the opening of a book, or an essay, or an entry in the diary I don’t keep.
I will relish this time. This phrase came on March 1st and stayed stuck on a loop until about March 24th. I understand the core of it. It’s speaking to the domestic beats that have punctuated my days since moving back home after a period of unsustainable effort. At the root of it, I think, was an instruction to hold the knowledge that I will relish these moments later. In April maybe.
April came and I spent a lot of time in the bath. I learnt that missing someone deeply has a way of making your bones ache. For a few weeks just about the only thing that would soothe that ache was a bath. So, I like baths more now than I did in March.
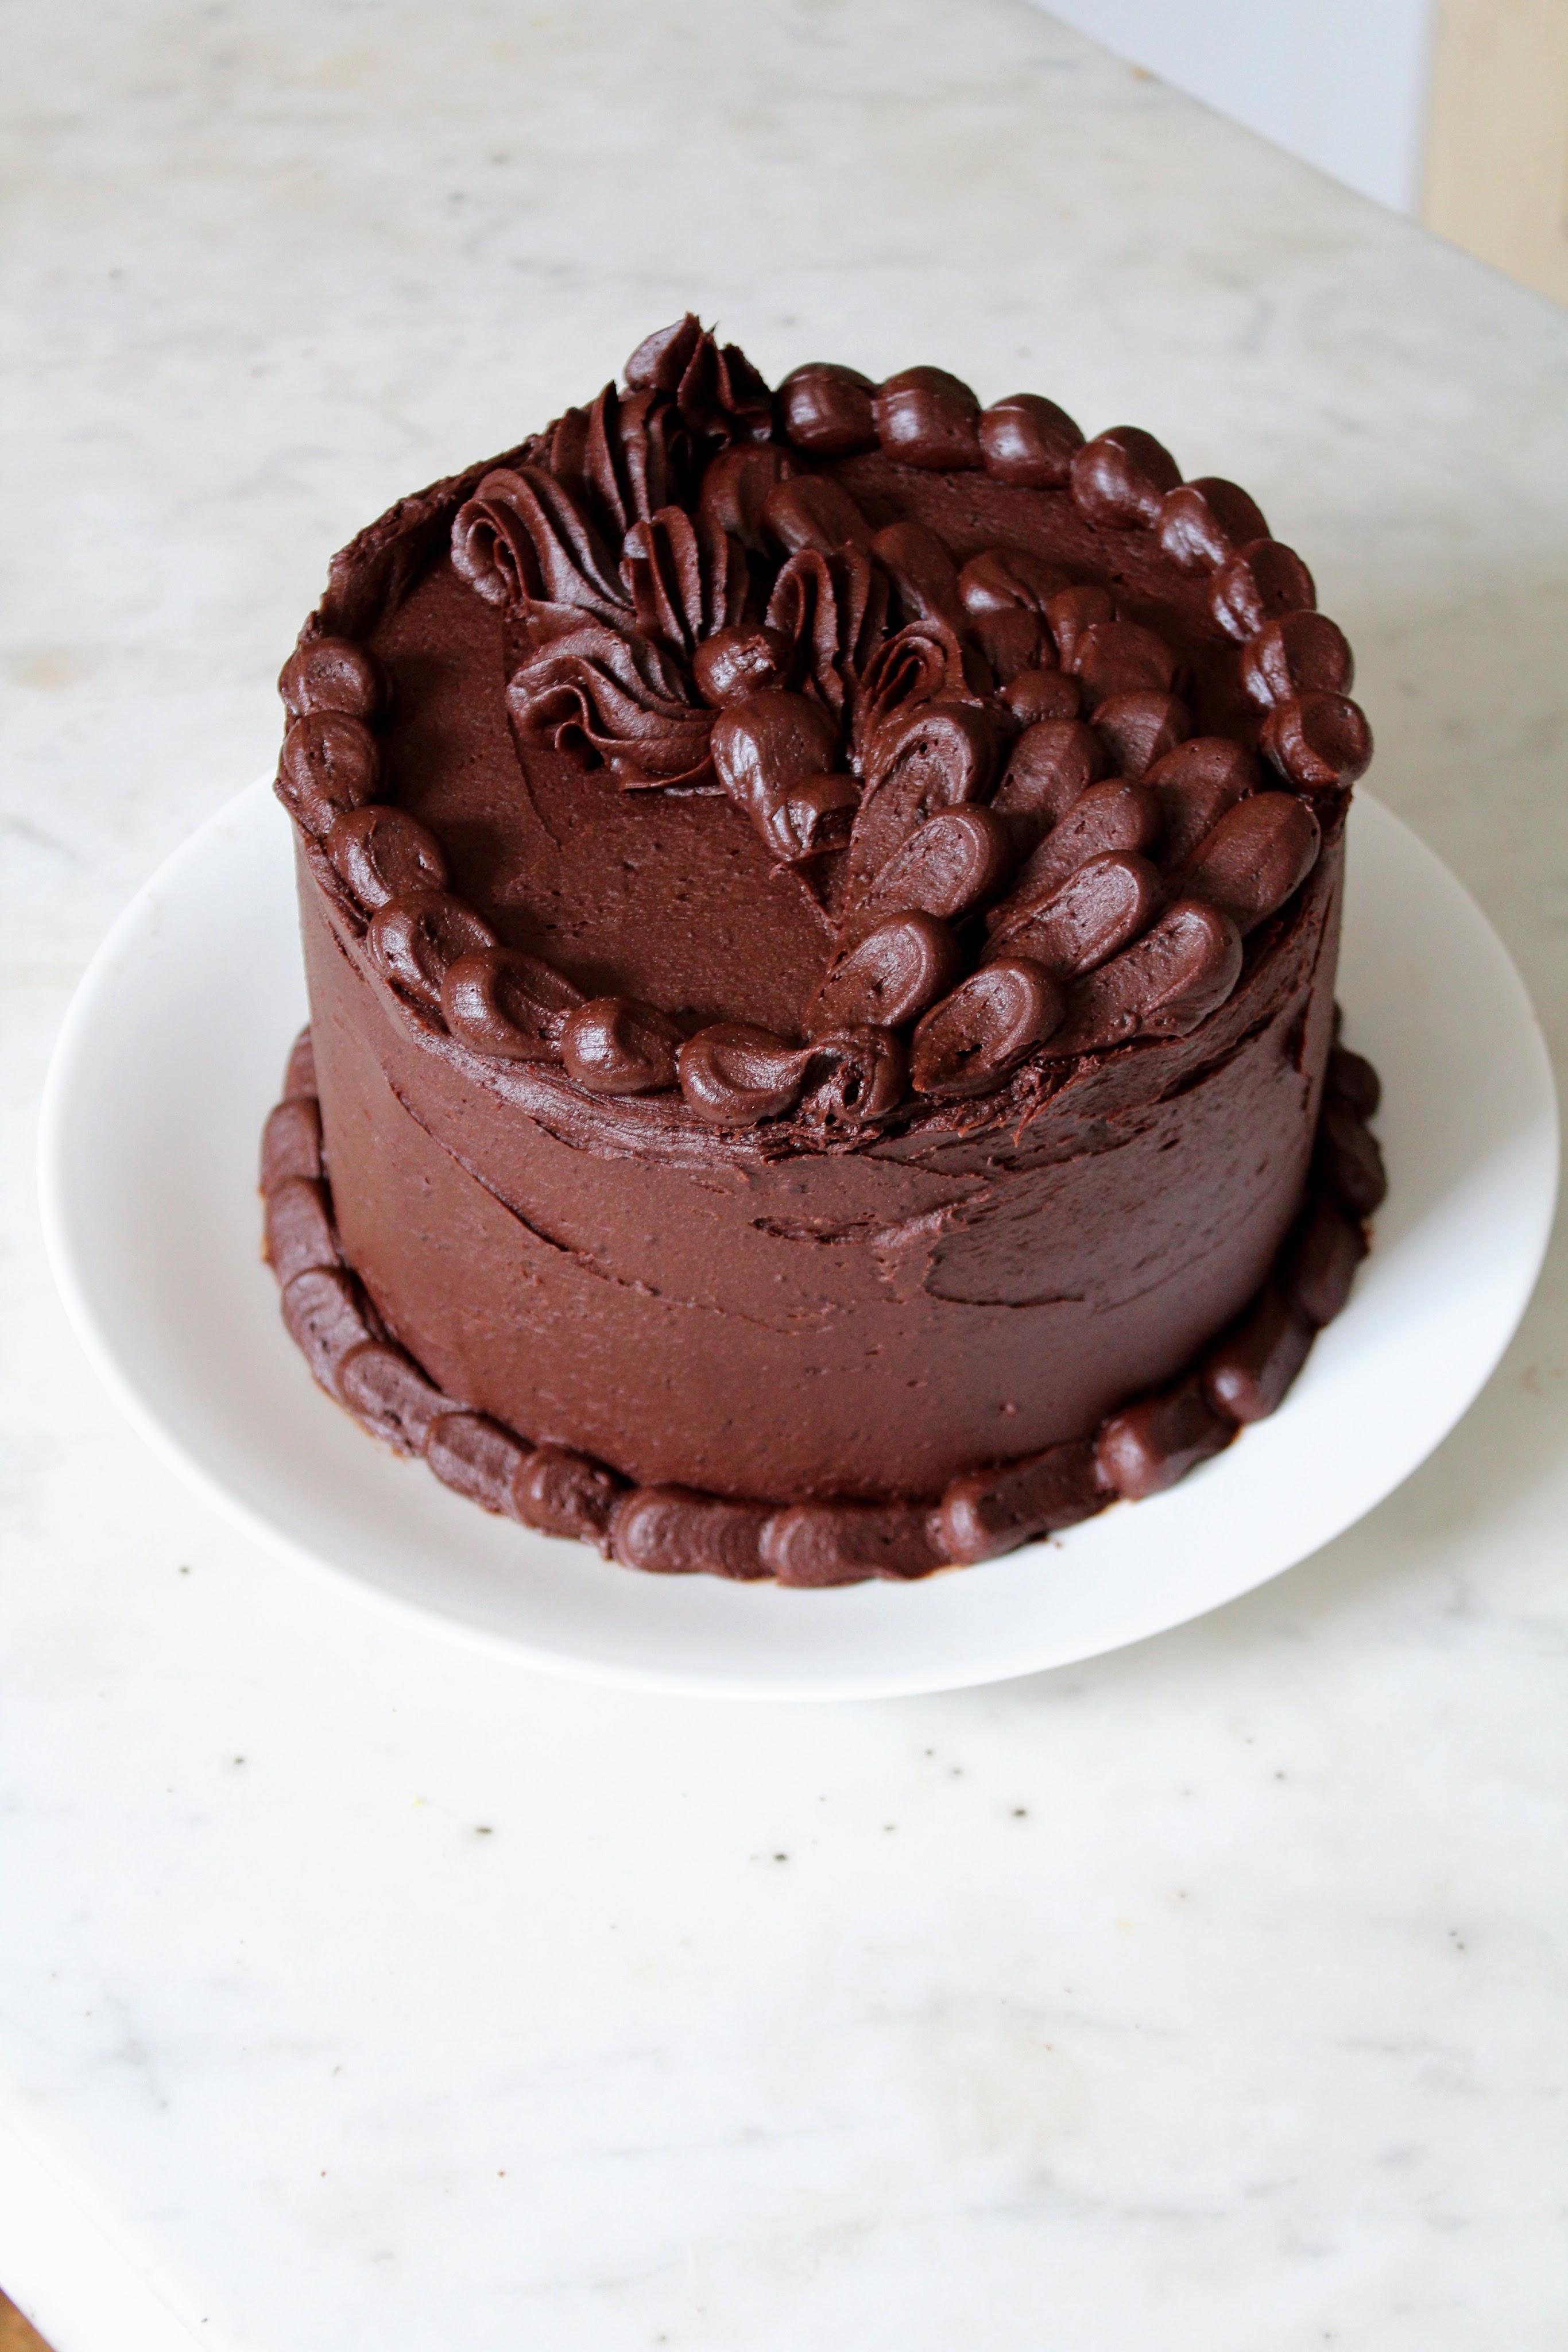
I made this cake in honour of that time. A rich chocolate cake – brilliant, restless, playful. And every now and then, sassy.
Ingredients
For the Cake Layers
Note On Layers – This makes for two very thick layers of chocolate cake.
200g Dark Chocolate
100g Cocoa Powder
200g Boiling Water
400g Sugar
300g Salted Butter, Softened
4 Medium Eggs
200g Plain Yoghurt
300g Plain Flour
1 tsp Bicarbonate of Soda
For the Buttercream
Note on Buttercream – This recipe makes A LOT of buttercream, for a thick covering all over the cake and extra to put in a piping bag and play around with decoration. If you aren’t feeling as excessive as I was while working on this recipe, half the quantities for the buttercream will give you just enough to sandwich the layers and cover the cake. The buttercream can be made up to a week in advance of icing the cake if kept covered in the fridge. Just make sure to bring it to room temp and give it a really good mix before using.
80g Dark Chocolate
20g Golden Syrup
350g Butter, Softened
550g Icing Sugar
170g Cocoa Powder
1 tsp Vanilla Extract
5 Tbs Milk
Method
Pre heat the oven to 180 / 160 fan. Grease and line two 7 inch / 18cm round cake tins.
Start with the cake. Chop up the dark chocolate roughly and add it to a bowl you can cover. To this bowl add the cocoa powder and the boiling water then cover with a lid ( I used a plate) and set aside.
In a large bowl, cream together the sugar and butter until fluffed up slightly. Add one egg at a time, beating into the butter mixture until fully combined before adding the next.
Remove the lid from the cocoa powder and chocolate which should now be melted and stir to form a thick paste. Mix this paste into the butter mixture, quickly followed by the yoghurt and the flour and bicarbonate of soda. Give everything a good mix to combine.
Divide the batter evenly between the two tins and bake for about 35 – 45 mins or until a kinfe inserted into the cake comes out with a few moist crumbs. The top will be cracked that’s exactly how it should be. Allow the cakes to cool while making the buttercream.
For the Buttercream, chop up the dark chocolate and melt together with the golden syrup on a low heat over an bain marie (This is a bowl resting over a saucepan that is filled with a small amount of water. The bottom of the bowl should not touch the water in the saucepan).
While the chocolate melts, beat together the butter and icing sugar for about 3 minutes, until light and fluffy. Now add in the cocoa powder, the vanilla extract, the melted chocolate mixture and half the milk. Don’t worry here if the chocolate mixture has split a bit or is very firm, it will still whip into the buttercream with no problem. Beat the mutter cream for a further 2 mins, adding the rest of the milk if you want a slightly slacker consistency.
To assemble the cake, make sure the layers are cool. You may want to trim off the cracked tops but it’s not necessary. Place one cake on a serving plate and spread the top with an even layer of buttercream. Flip the second cake over so the base of the cake is towards the ceiling and place ontop of the partly iced cake. Cover the top and sides of the whole cake with a thick layer of buttercream and it is ready to go (eat).
The cake will keep covered well at room temperature for up to 4 days.
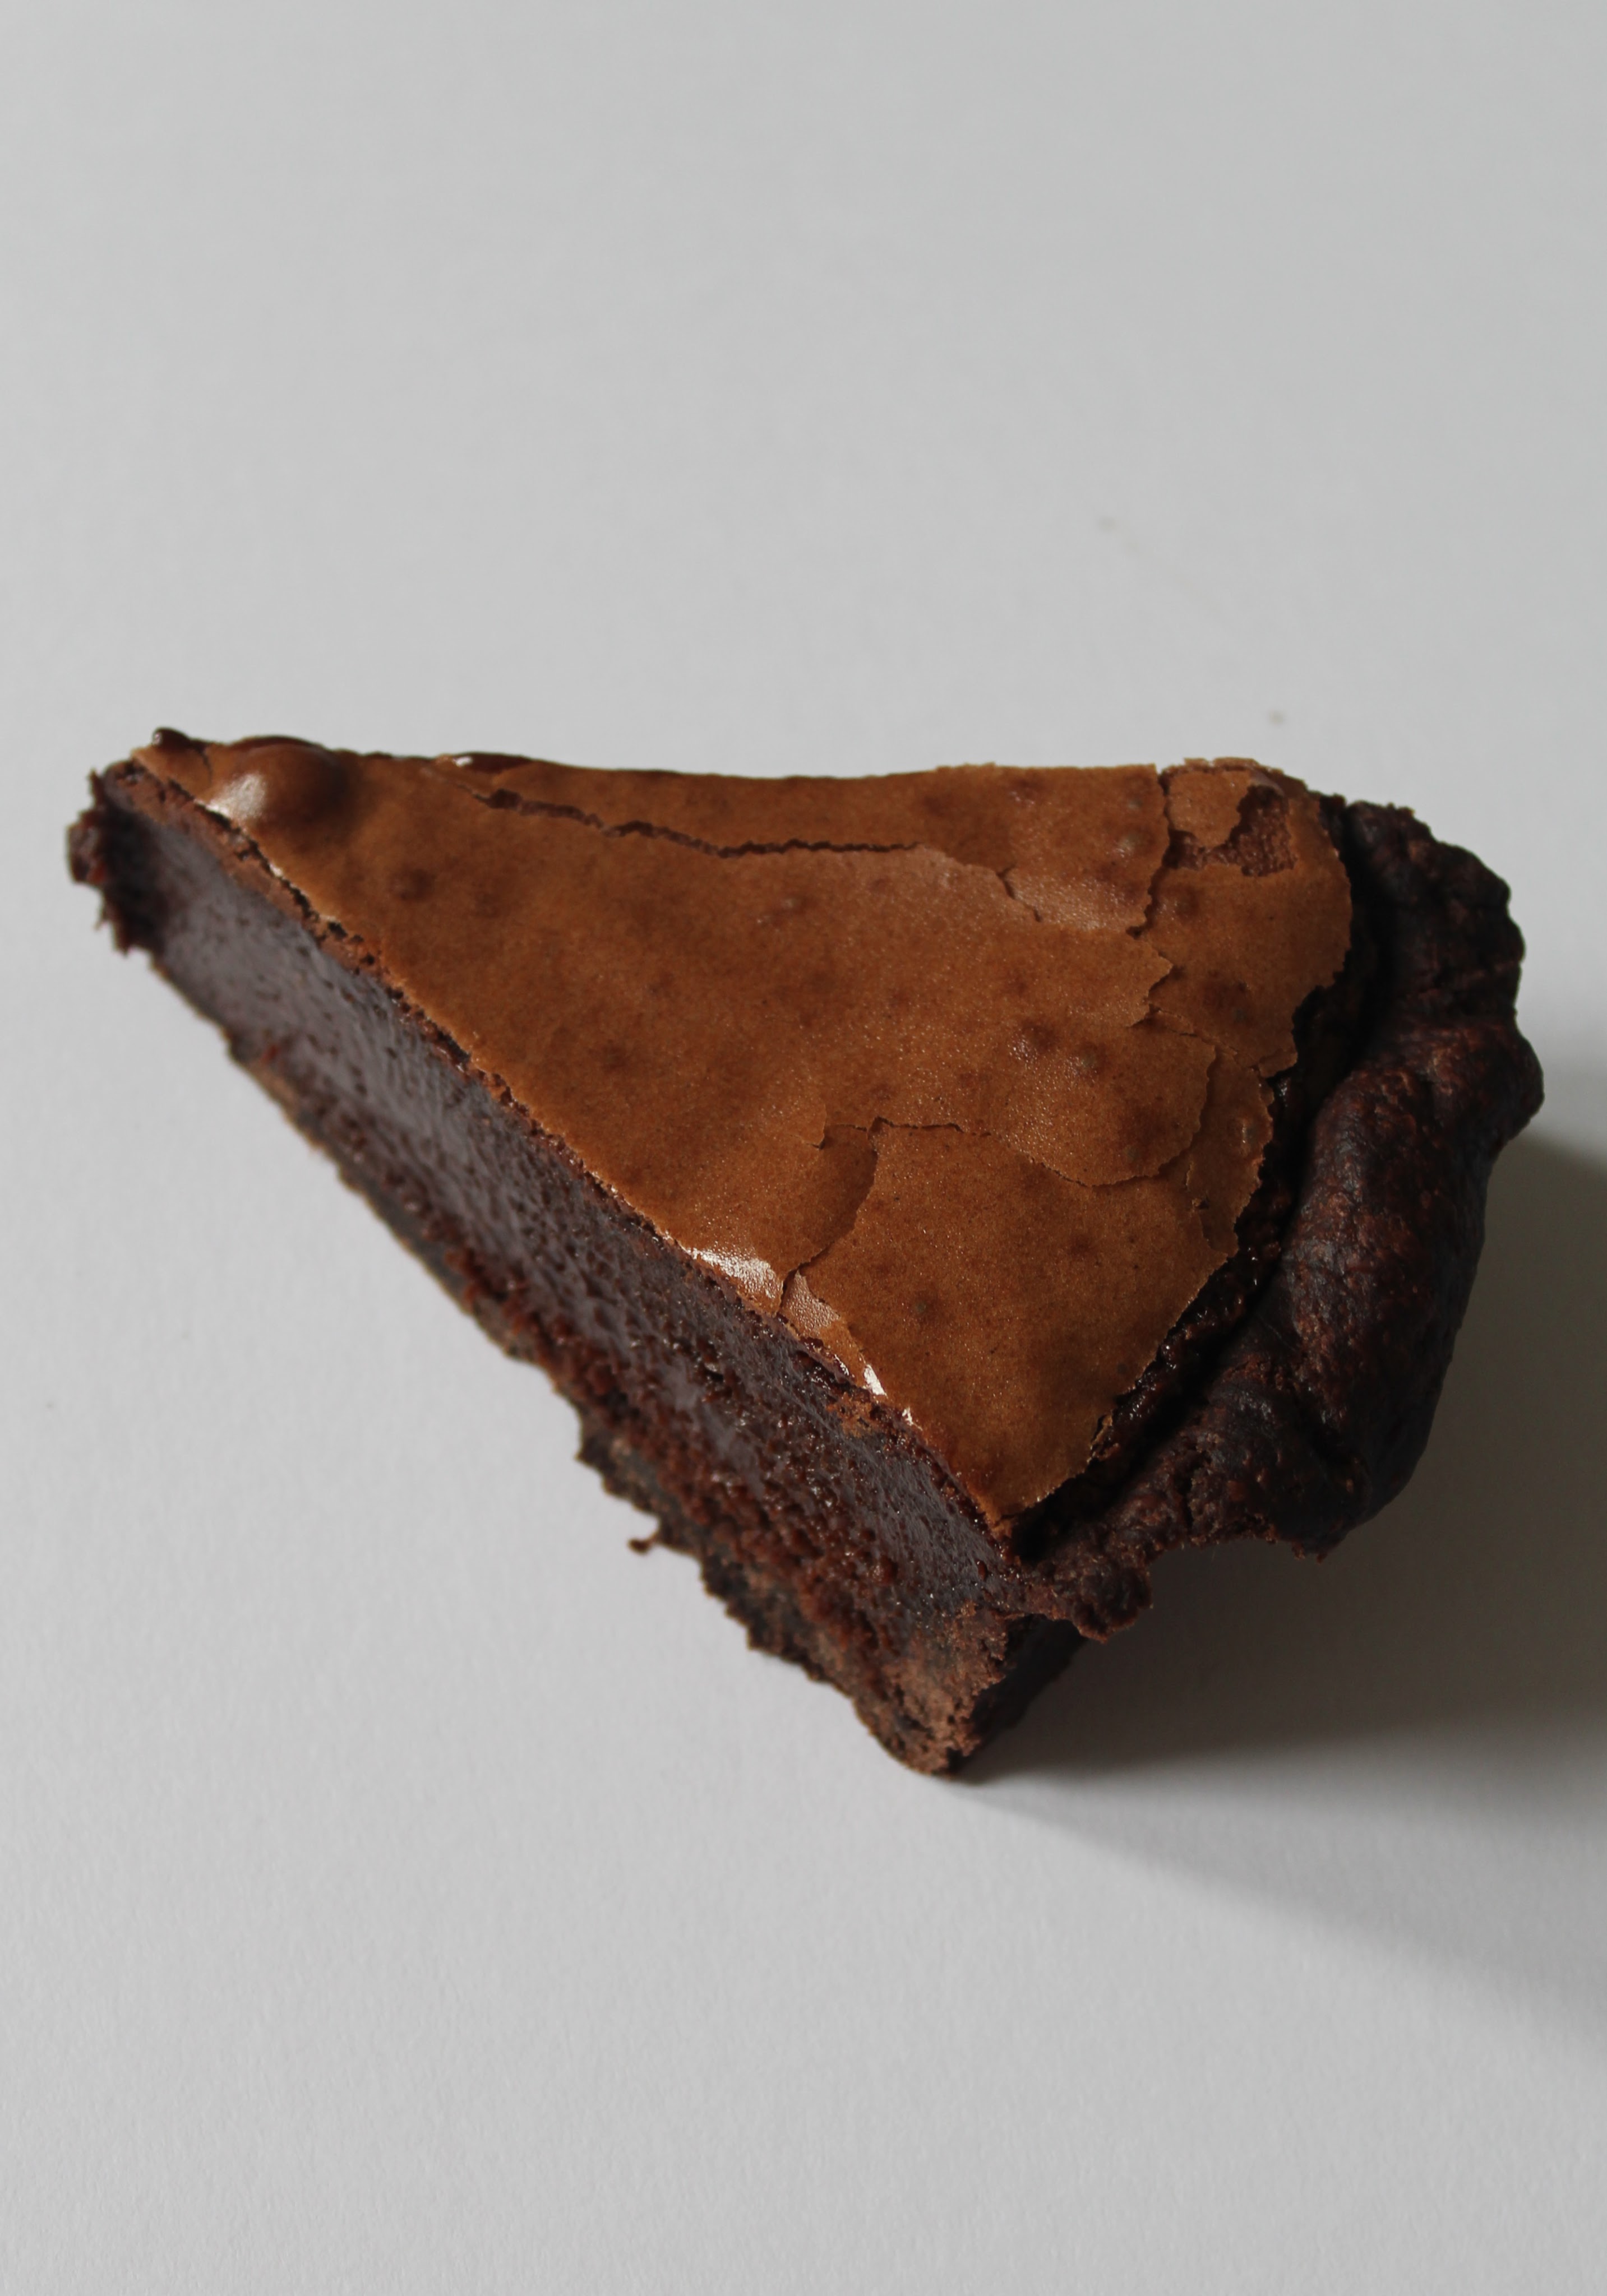
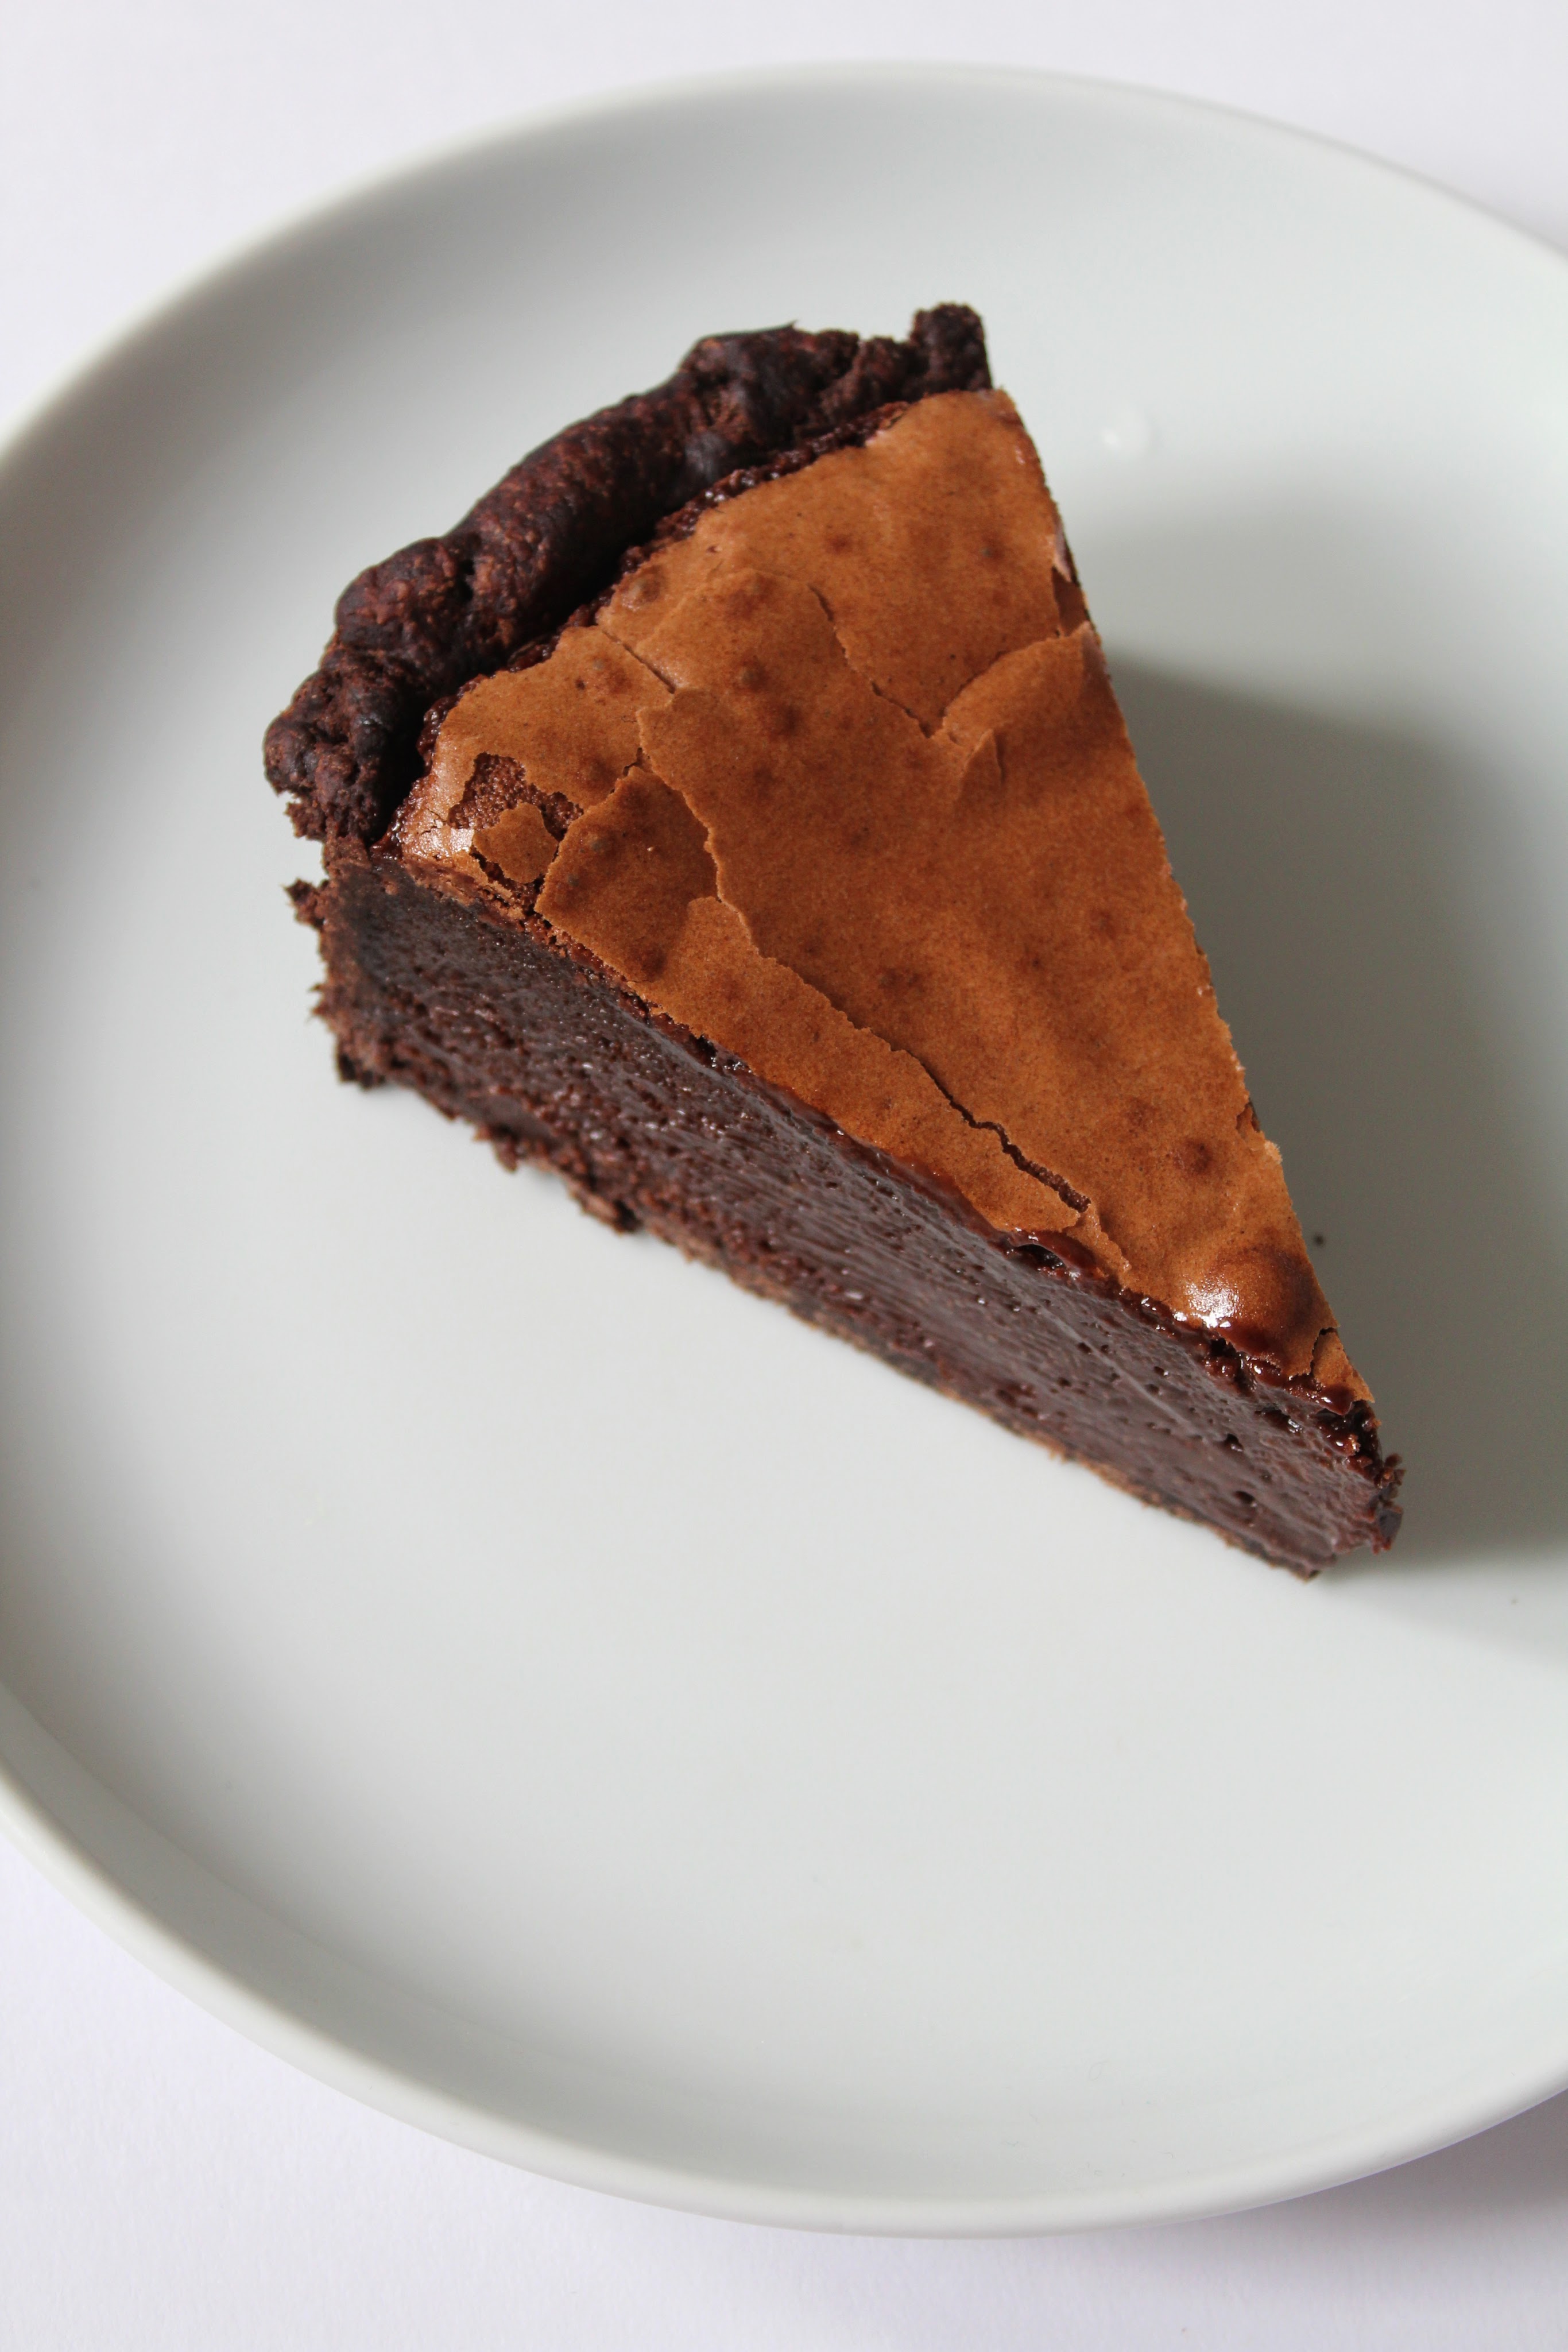
Been turning this chocolate pie over in my mind for the past couple weeks, triggered by a want to bake you something for your birthday and by a strong pie craving. I was after a specific texture – a ‘Joe chocolate texture’ – thick, velvety chocolate mousse in the centre, surrounded by a very dense, almost brownie like chocolate mud cake exterior, all topped off by a shiny sugar crust. I wanted it in a chocolate pastry case too. Here’s how I went about my choc pie quest: I looked at cheesecake, brownie and chess pie recipes, custard and mouse recipes and had a long look at that chocolate mud cake you were obsessed with when we were young. The calculator even came out to get the ratios right.
And here it is. In all its pie glory. Between a chocolate mousse, a thick chocolate pudding and a chocolate cheesecake; the centre has an unexpected delicateness to it, left untouched it holds its own weight – and it is weighty – but relaxes and melts on impact from a fork or hands eager for pie. This centre is encased by the densest chocolate mud cake you’ve ever eaten, which is all wrapped in a bitter, sweet and flaky chocolate pastry case. These layers of texture form in the oven, the only trick is knowing when to pull it from the heat. It goes in a viscous chocolate mixture and comes out puffed up, seemingly liquid under a firm set glassy sugar crust. The pie exhales as it cools and sets satisfyingly firm.
Before the pie, or baked into it, are my thoughts about usefullness, of which I’ve been thinking a lot about lately. People really do need to feel useful. Hold that thought in your head, and you’ll start to see it everywhere. Getting a job is a great example of being useful, it’s a given that, unless there’s a specific reason you can’t work, you need to get a job, so that you can provide, do, or fix things for other people. Obviously, getting a job is important for keeping everything, like the economy (lol out of my depth here), going, but the resulting feeling of use provided by having a job to do is bound up, sometimes messily, with a notion, my notion, of self. I’m talking about things like self-worth, being needed, having a direction. As I write this, I remember we had a conversation similar to what I’m tentitivly scratching at here in a piazza in Naples this summer.
I wasn’t aware that the need to be useful was quite so strong a part of me, until I got the job I’m in now. I feel fulfilled after working, and I notice that same fulfilment in friends who are similarly at a post student moment of their life. The need to be useful skates close to a deeper, more private notion of self, called purpose. ‘I work, I am useful. I have a purpose, I am needed’ is beautifully simple mantra that signals a warm feeling of being at the right place, in the right time, doing the right thing. And we all love to be right; it forms part of the fabric of bubble wrap we are ‘fragile, handle with care’ taped in.
Thinking back on that convo in Naples, I remember we feel something similar. Only, our expectations of the work we do in our life surpass ‘usefulness’ – it seems we shoot for exceptional. This way, no one, even ourselves, can question our sense of self, our worth, that we are needed, or that we have direction.
If you’re not Joe and reading this observation as a big congratulation to the two of us for being really great, (we are, but) you’re missing my point, and I’m sorry about that. I hope this makes things clearer: my version of finding purpose, my usefulness – and everyone has their own way – was born out of circumstances that stretched my child self’s capacity of usefulness beyond what I could give. And for Joe, repeatedly felt the brunt, a harsh brunt, of supposedly not being usefull enough. I’m treading cearfully here so as not to write something I would later rather not be publiclly accessable, but you could say, the way me and Joe grew up left us feeling we had something to prove, something to fight against.
The ease with which the feeling of lacking purpose, of not being useful, finds me at the moment, is really quite impressive. There’s no failure in this, although it can feel like that, because if framed in the context of starting to work after finishing uni, it makes a lot of sense. It is becoming clear to me that we’re all making up our purpose, all the time.
My feeling of lacking in purpose becomes a bit spikey when met with that large part of me left over from when I was young that had to do a lot of fighting to prove my usefulness, or fighgint to prove, perhaps to myself, that everything was ok. I wonder if it’s similar for you Joe, might not be, maybe I should ask you lol.
We don’t have anything to prove, Joe. We are, it seems, incredibly useful, very needed, and have purpose, most of the time, for example, I purposefully went to Lidl after work to get cream cheese so I could bake you this pie. And it’s a peng pie !!!
Note On Oven Time – This pie has quite a long bake, don’t wait for it to firm up before pulling it from the oven. It won’t. This is essentially a brownie recipe combined with key elements of a cheesecake, cream, cream cheese and a low flour to batter ratio. Just like a brownie and a cheesecake, you don’t want them to bake until firm, you want them to bake and then set in the fridge. It will need at least 4 hours in the fridge before it set enough to slice, a safe bet is to let it sit in the fridge overnight before slicing. Store the pie in the fridge, covered well for up to 4 days.
Ingredients
For the Pastry
155g plain flour
30g cocoa powder
30g sugar
100g butter – cubed and cold
1 egg yolk – keep the egg white to brush the interiro of the pie shell during blind baking
2.5 – 3 table spoons cold water
For the Pie Filling
80g butter
170g dark chocolate – roughly chopped
120g cream cheese – atroom temperature
3 medium eggs + 1 egg yolk
370g caster sugar
80g double cream
35g plain flour
35g cocoa powder
pinch of salt
Method
Start by making the pastry. Mix the flour, cocoa powder, and sugar in a large bowl. Add the cold cubed butter, rubbing the butter into the flour mixture with fingertips until it resembles breadcrumbs with some larger, slightly bigger than pea size chunks of floury butter. Add the egg yolk – reserving the egg white for blind baking – followed by 2.5 tablespoons of water. Bring the crumbly mixture together into a tight ball by squeezing with your hands. If the mixture is too crumbly to hold a ball, add the extra half a tablespoon of water. Press the ball into a thick disk shape and wrap in cling film. Chill in the fridge for at least 30 mins, and up to 24 hours.
Pre heat the oven to 180 / 160 fan. Thoroughly grease a deep 8inch pie dish or shallow cake tin including the rim of the dish – if you use a springform or loose bottom cake tin, like I did, you can lift the whole pie out of the tin before cutting, it looks cool, no other reason. Dust the tin or dish with cocoa powder if you’re worried about it sticking.
Remove the pastry from the fridge. Using a rolling pin, roll it out to a rough circle about 1/4 of an inch thick. Line your prepared tin with the pastry, making sure there are no cracks in the pastry, and it is flush with the edges of the tin. There will be some overhanging pastry, squash these bits together to rest on top of the rim of the dish – forming a thick pastry crust around the pie as it bakes. Prick the base with a fork, cover with greaseproof paper, weigh it down with baking beads or uncooked rice and blind bake the pie crust for 15 mins.
Take it out the oven, remove the weighted greaseproof to expose the pastry case, brush the interior liberally with the reserved egg white – this will act as a barrier between the pastry and the liquid filling. Return to the oven for a further 3 minutes. Once out the oven, allow to cool while you make the filling.
When you are ready to make the filling make sure the oven is on at 180 / 160 fan. Melt the butter and chopped chocolate together over a bain-marie, stirring occasionally. Once melted, take off the heat and set the mixture aside.
Using a whisk, loosen up the cream cheese in a large bowl so it becomes smooth. Add the eggs one at a time, whisking vigorously in between each addition to combine – you don’t want to whisk air into the mixture, you just want to ensure there are not lumps. Now stir in the egg yolk, followed by the sugar and double cream.
Pour in the melted chocolate and stir again. Sift in the flour and cocoa powder and give the batter a final mix, until no dry patches of flour are visible. Pour the mixture into the pastry case and bake for 1 hour and 10 mins. The pie will be puffed up and when gently shaken the middle will have a liquid wabble beneath the set crust. Allow to cool in the cake tin or pie dish at room temp before setting the pie in the fridge for at least 4 hours, and preferably overnight.
If you are using a cake tin, it is easiest to remove the tin once the pie has been chilled. To get a nice cut of the pie, run a large knife under just boiled water, wipe the knife and cut into the pie, repeat for each slice. The pie will keep for up to 4 days, in the fridge and covered well.
I’ve sat with this brownie recipe, and the little intro below, for quite a while now. I’ve tested them A LOT and seems like now is the right time to send you the recipe… I think you should make them.
For the first half of July, I lost all my words.
Maybe that isn’t fair to say, maybe it was more, I lacked words.
Maybe it was more that I felt lacking in all the good things, like words. Haha.
It lasted two weeks and two days this time round. I’m learning that when this feeling comes along, I’m worse off trying not to feel it, that is, fight the feeling of lack so that I might be able to keep up with my un-lacking friends and family. Obviously, to fight like this would be anyone’s instinctive reaction. Thing is, fighting it results in the sad moment where the state of lack makes itself known to you as something much more fixed than a sad mood that could juuuuust about be subsided with will power alone. I’m learning that the lacking state is much less painful if I lead a ‘lacking’ way of life during these times while I wait for it to pass. It passed.
Like it always does.
Now I feel like I’ve got words coming out my ears lol so I can write about these brownies I made during those 2 weeks, while Egg sat on the kitchen counter, patient with me in my lacking state, eating bread.
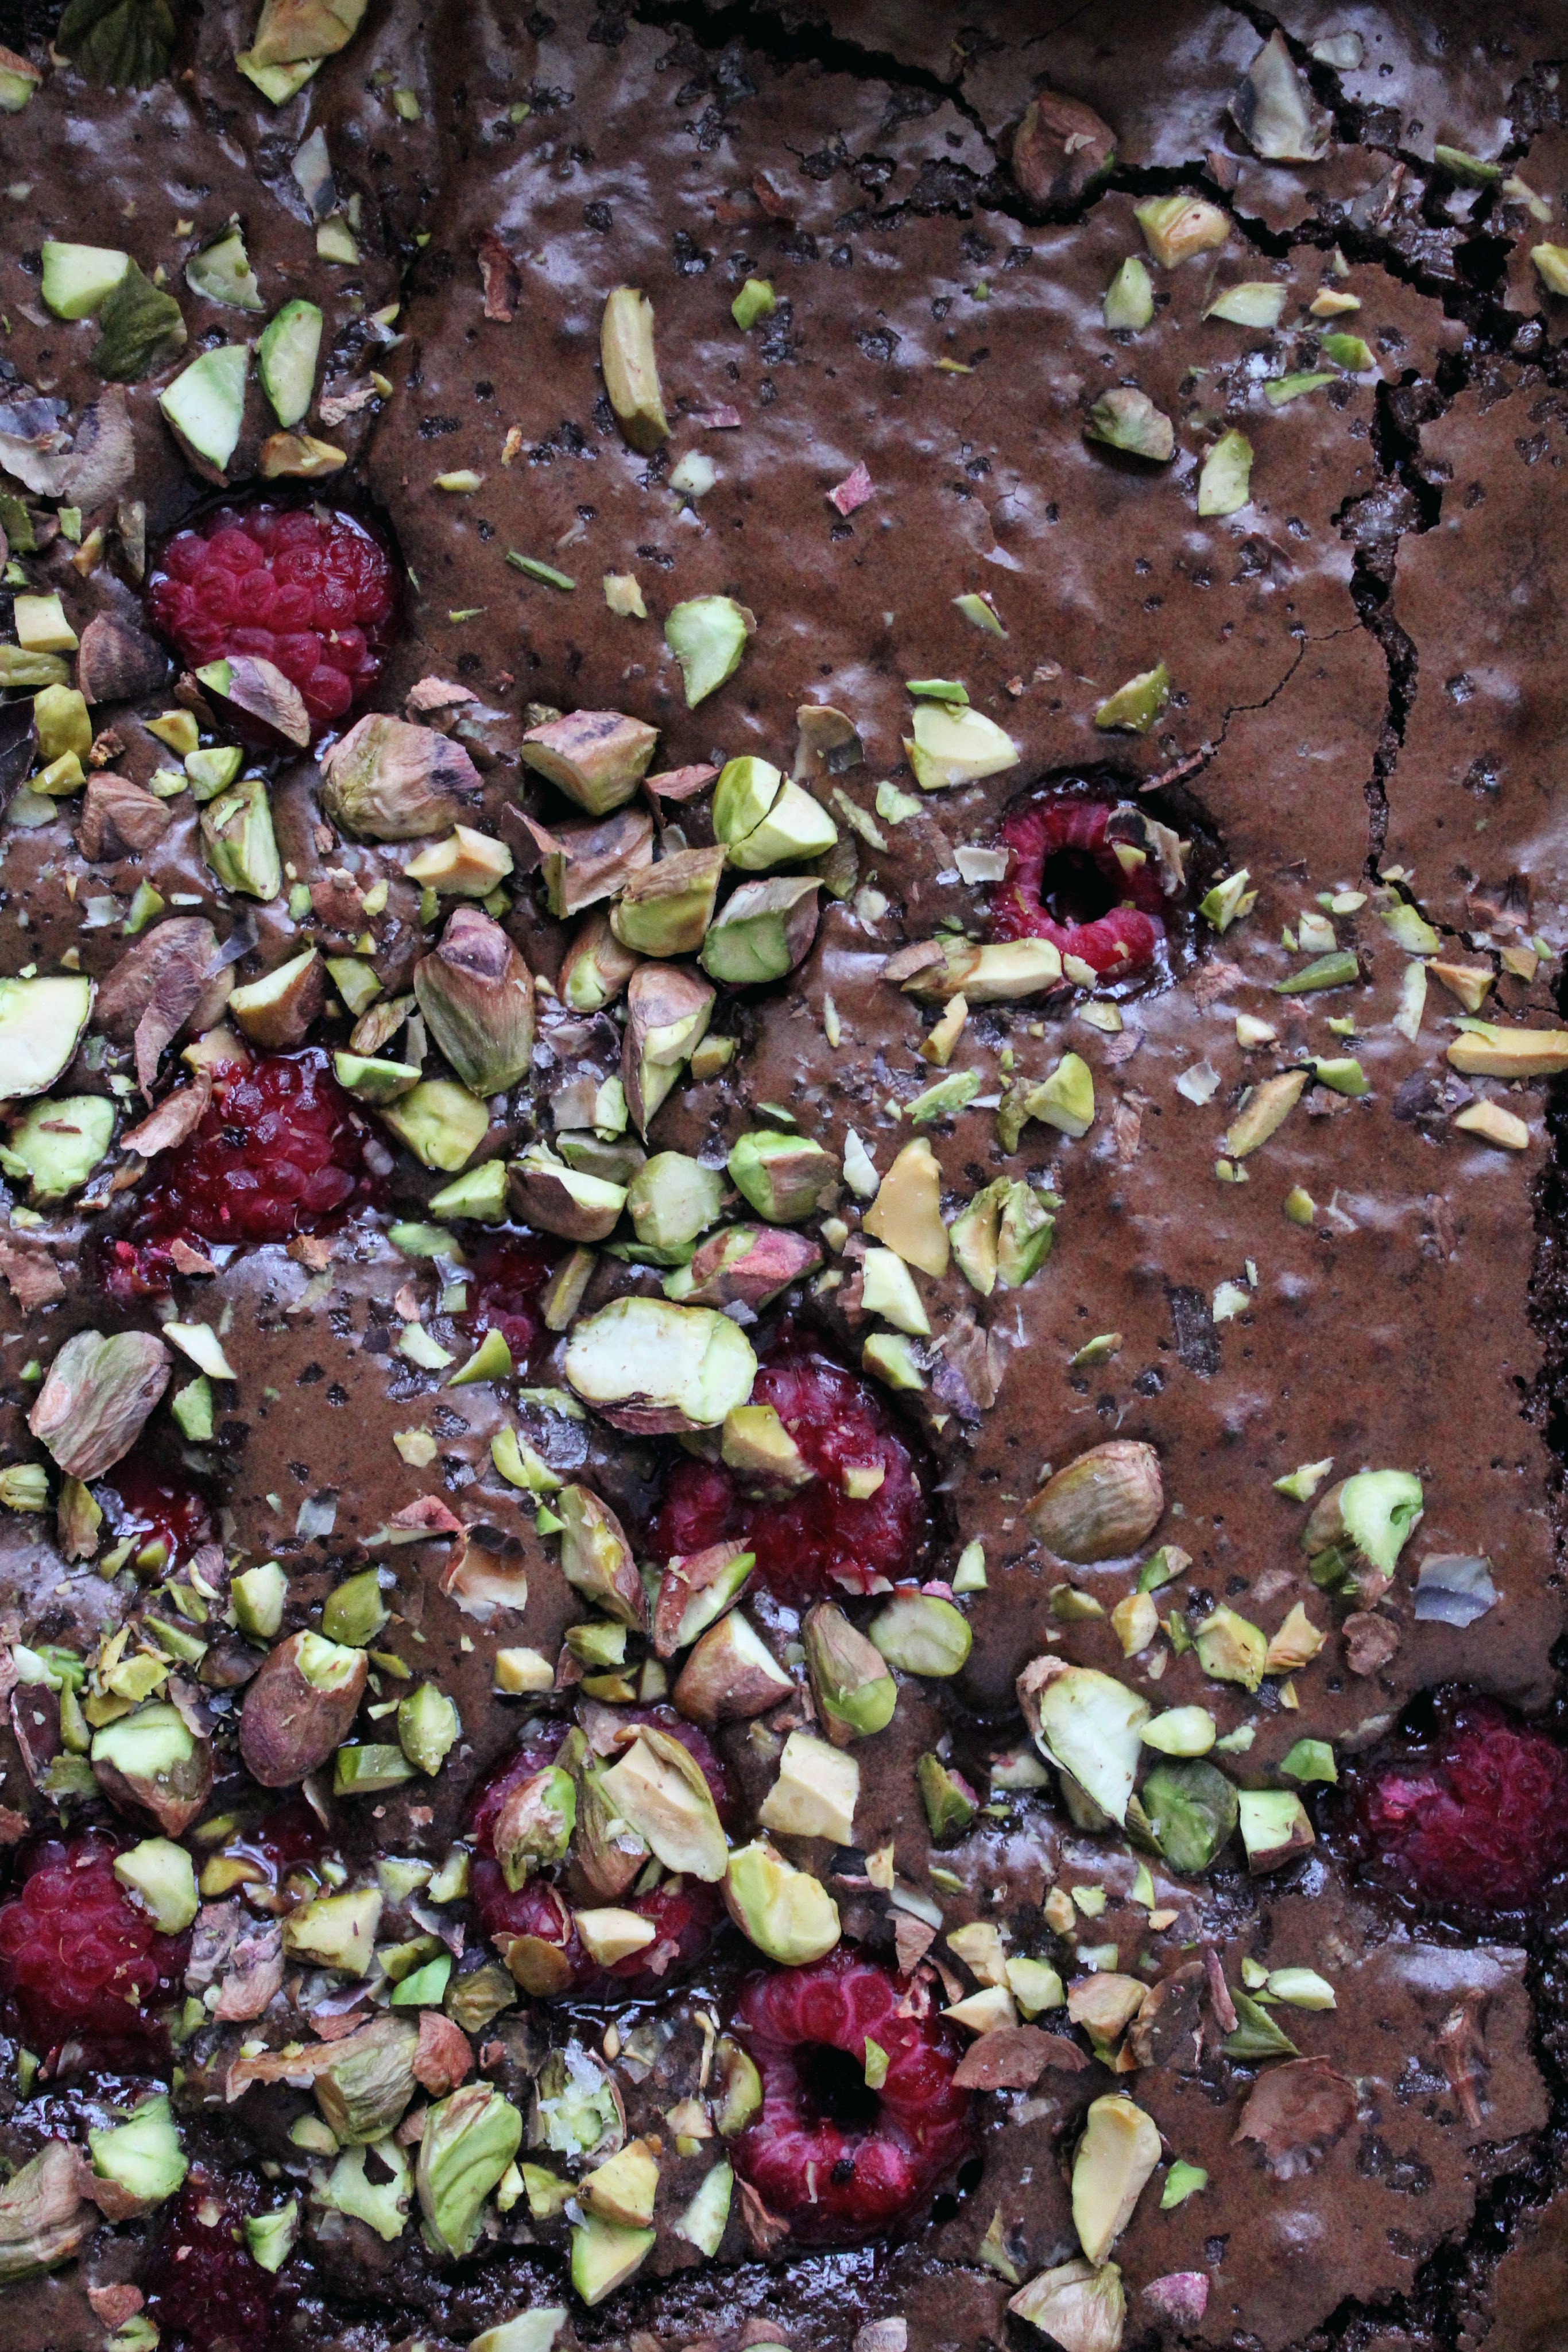
I hope that these pics can give you some of the good things if you feel lacking in them? Look into that chocolate abyss…mmmmm. These brownies are incredible. Rich, very rich, like molten chocolate pudding scooped straight from the oven or like smooth chocolate fudge once cooled with a wafer-thin crispy top, exactly the kind of top you’d want on a brownie. The raspberries and pistachios were Egg’s addition, I’d really recommend not leaving them out, you need something to cut through the pure fudge of these brownies.
Pistachio Notes – they are spenny spenny spenny. But we were celebrating me being very sad and Egg’s exciting love life… Any other (less expensive) nuts will work.
Here’s a diagram demonstrating what the brownies would look like if you put hazel nuts in them instead of pistachios
Ingredients:
300g dark chocolate
250g unsalted butter
400g light soft brown sugar
5 medium eggs
1 tsp vanilla extract
1 tsp salt
100g buckwheat flour – plain flour works perfect in these. The buckwheate flour has the benefit of making these brownies gluten free.
50g cocoa powder
30g pistachios – finely chopped
150g raspberries – if you wash these make sure to dry them a bit before adding them to the brownie batter.
Method
Pre heat the oven to 180 (160 fan oven). Grease and line with grease proof paper a 23cm square tin. If you don’t have this sized tin, find one of similar dimensions and keep an eye on it during baking as the timing will be slightly different.
Chop the chocolate and butter into chunks, place in a large bowl. Fill a small saucepan with a little water. Set the bowl of chocolate over the saucepan making sure the bottom of the bowl does not come into direct contact with the water when rested over the pan. Heat on a stove top on low/medium, stirring the chocolate occasionally until melted. Alternatively, put the chocolate and butter into a heatproof bowl and leave in the oven for a few minutes. Once melted, set aside.
In a separate bowl add the sugar, eggs, vanilla, and salt. Whisk these together until combined and a little lighter in colour.
To the egg mixture, add the melted chocolate, sift in the flour and cocoa powder and whisk to combine.
Pour the batter into the prepared tin, sprinkle with pistachios and scatter in the raspberries, submerging a few in the batter so they don’t all rest on top.
Bake for 40 (yes, 40) minutes, until the edges are set and a little cracked, but the centre still has a slight wobble. These brownies seem uncooked when they come out the oven, because of how wobbly the centre is, that’s how you want them to look. I promise they will set to be sliceable and perfect. Allow to cool completely in the tin before slicing.
Eating Notes – If you can’t wait for the brownies to cool, they have a molten chocolate cake vibe scooped out the tin fresh from the oven. It’s peng but don’t expect this way of eating or serving them to be neat. The rest of the brownies will be set the next day… so, two desserts in one.
Baking Notes – If they don’t set, it means you have underbaked them haha. They’ll still be great, just stick the whole (cooled!!) tin of brownie soup in the freezer overnight. Set it on the counter the next morning to defrost and you’ll be able to slice your brownies. Store the tin of brownies in the fridge once defrosted.
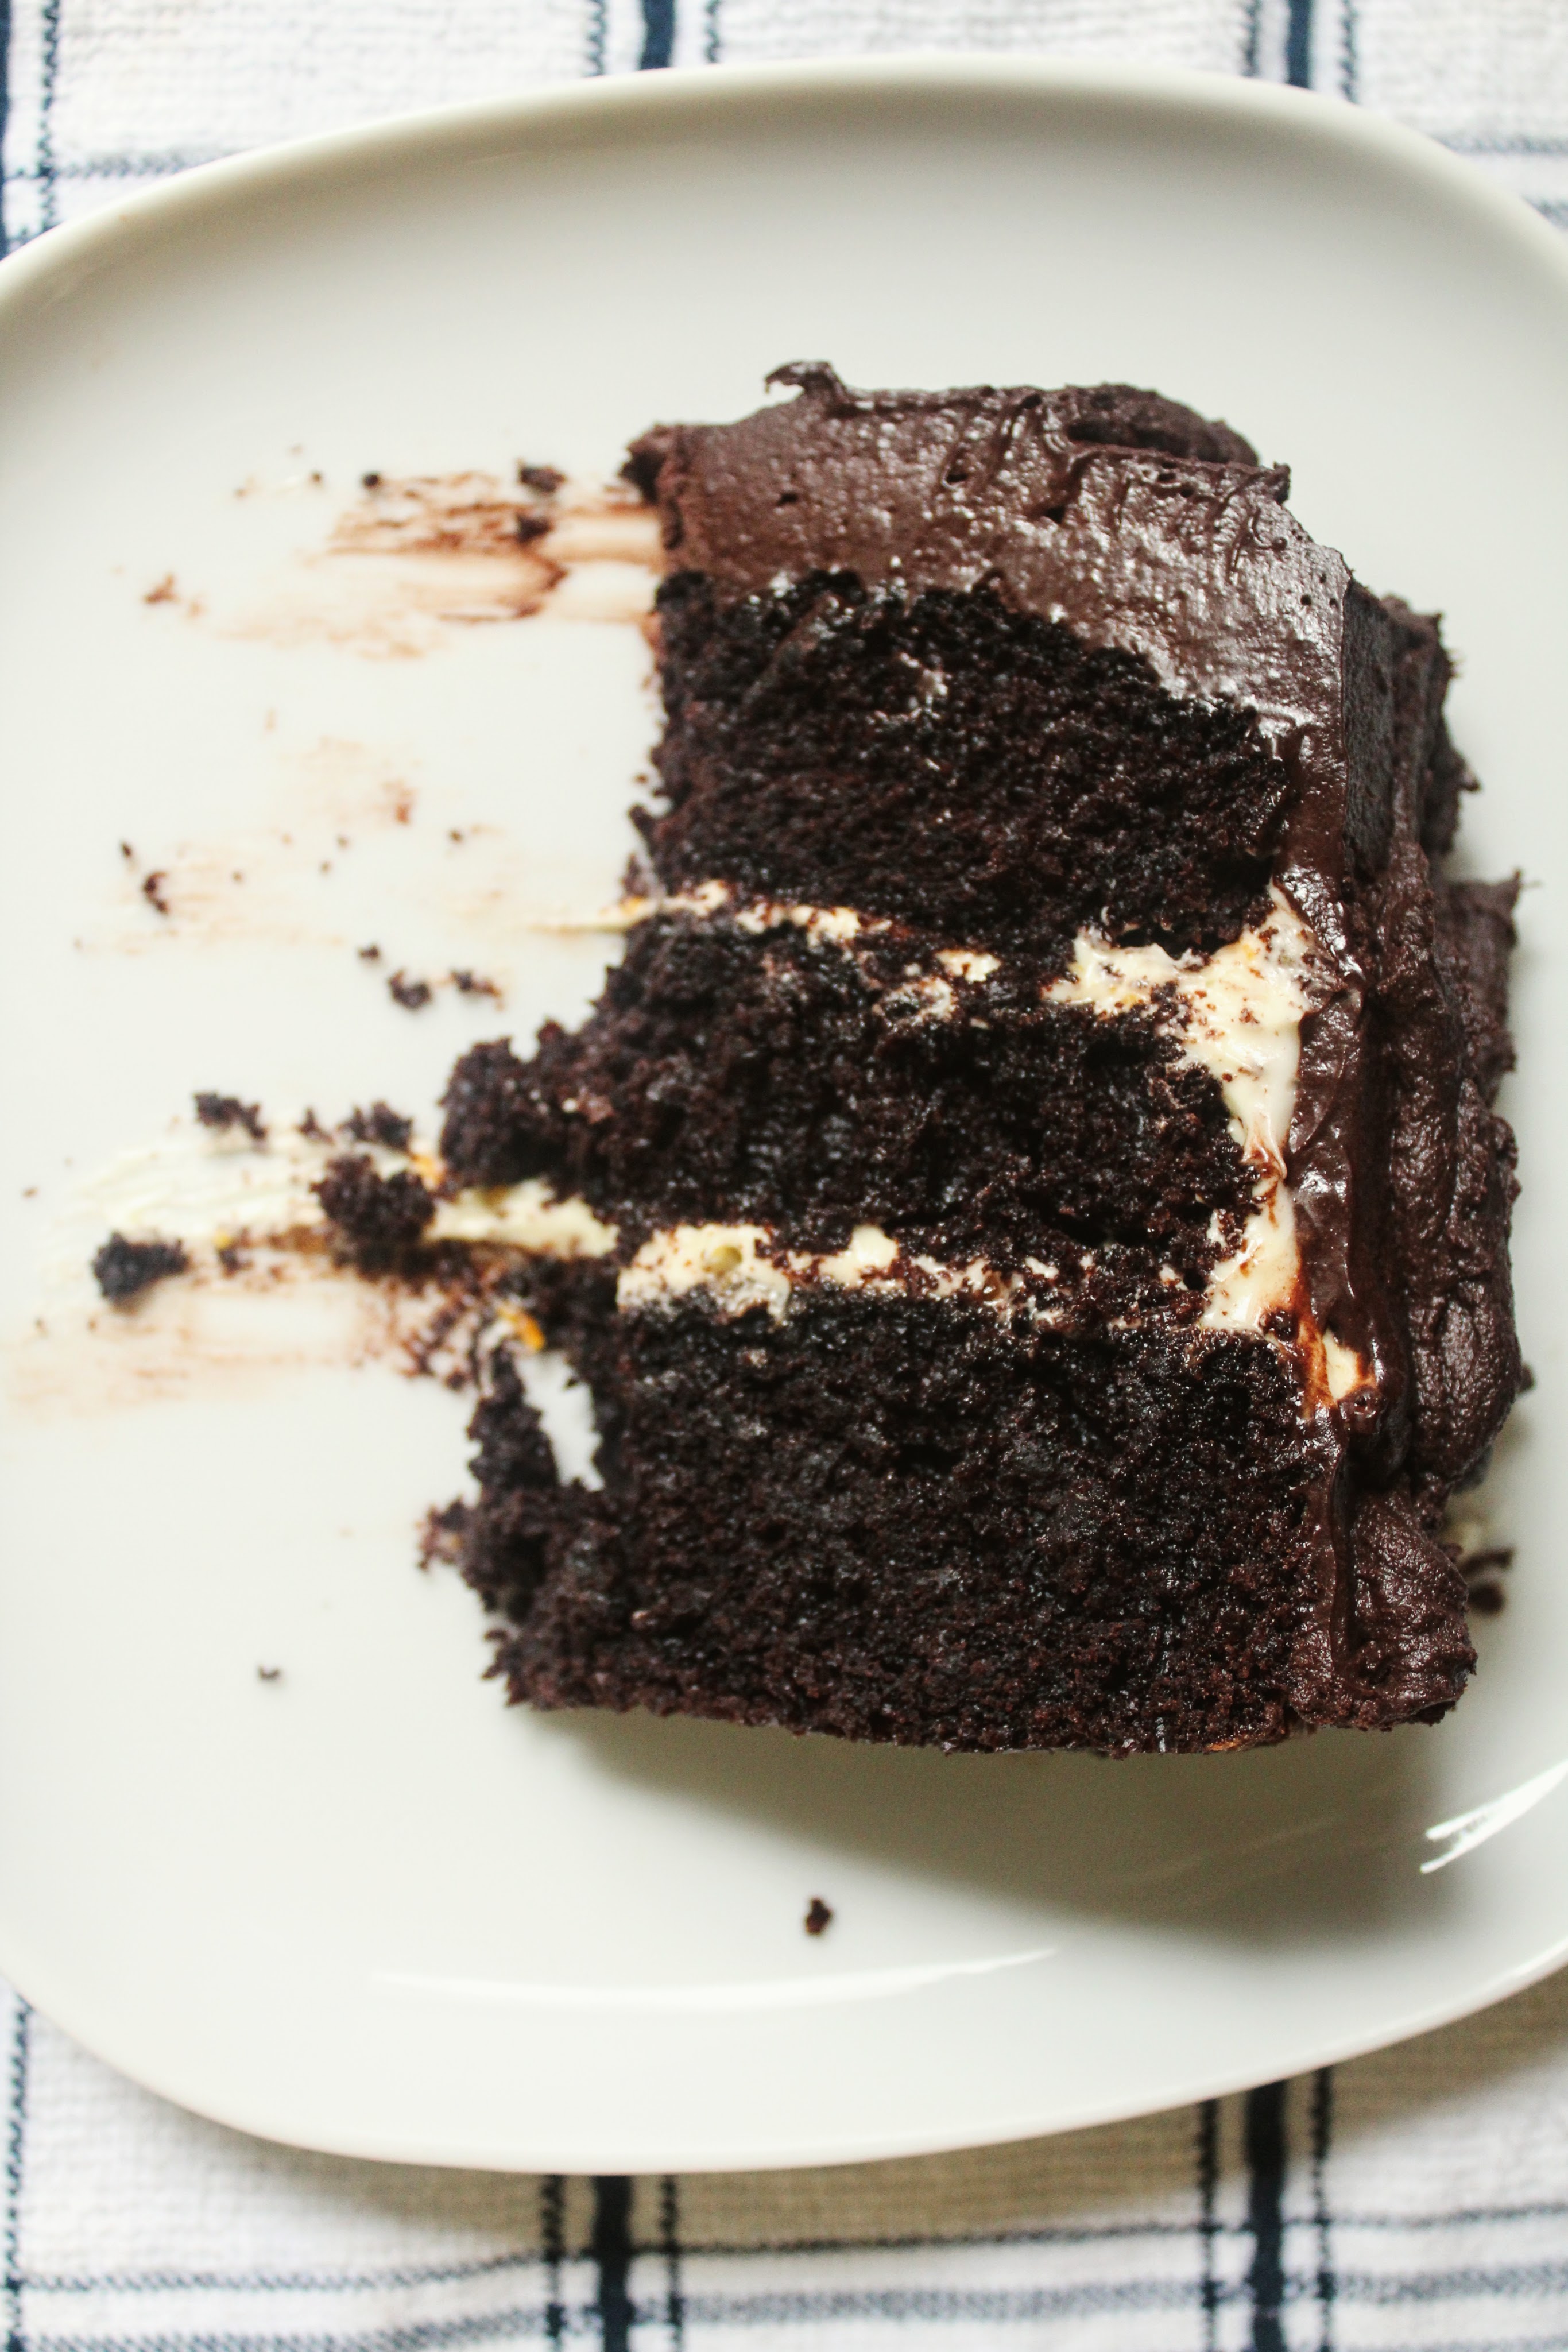
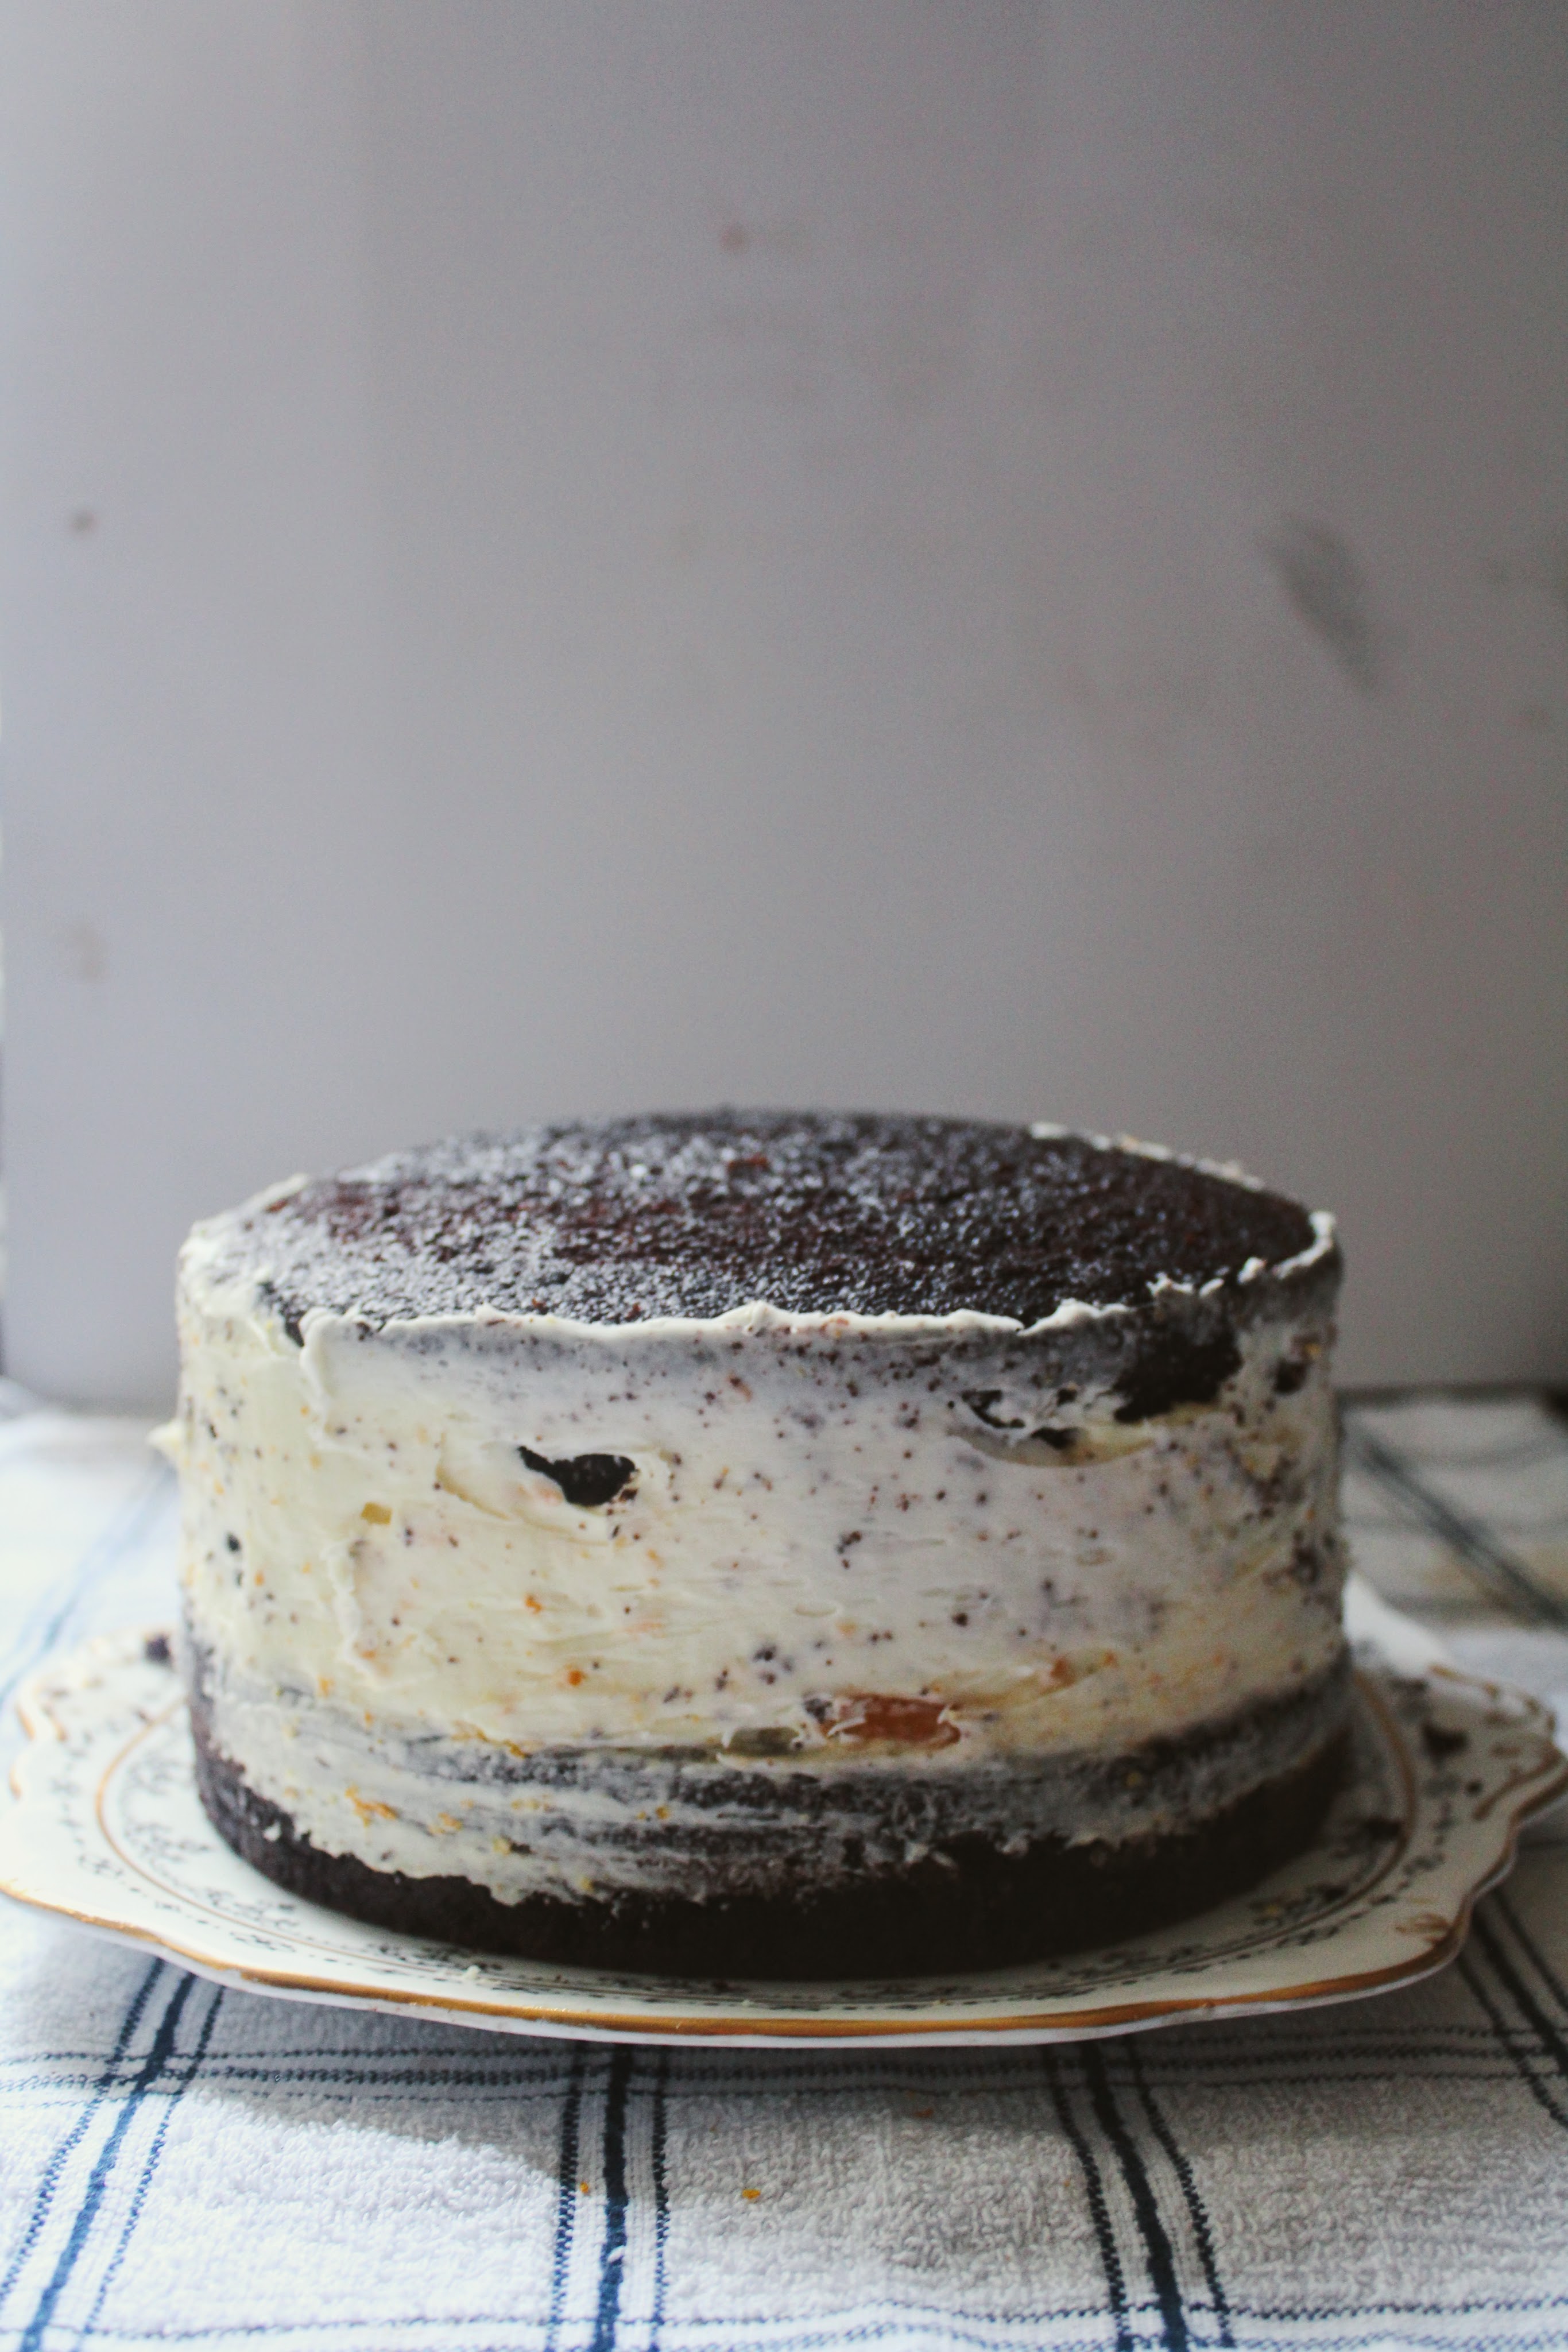
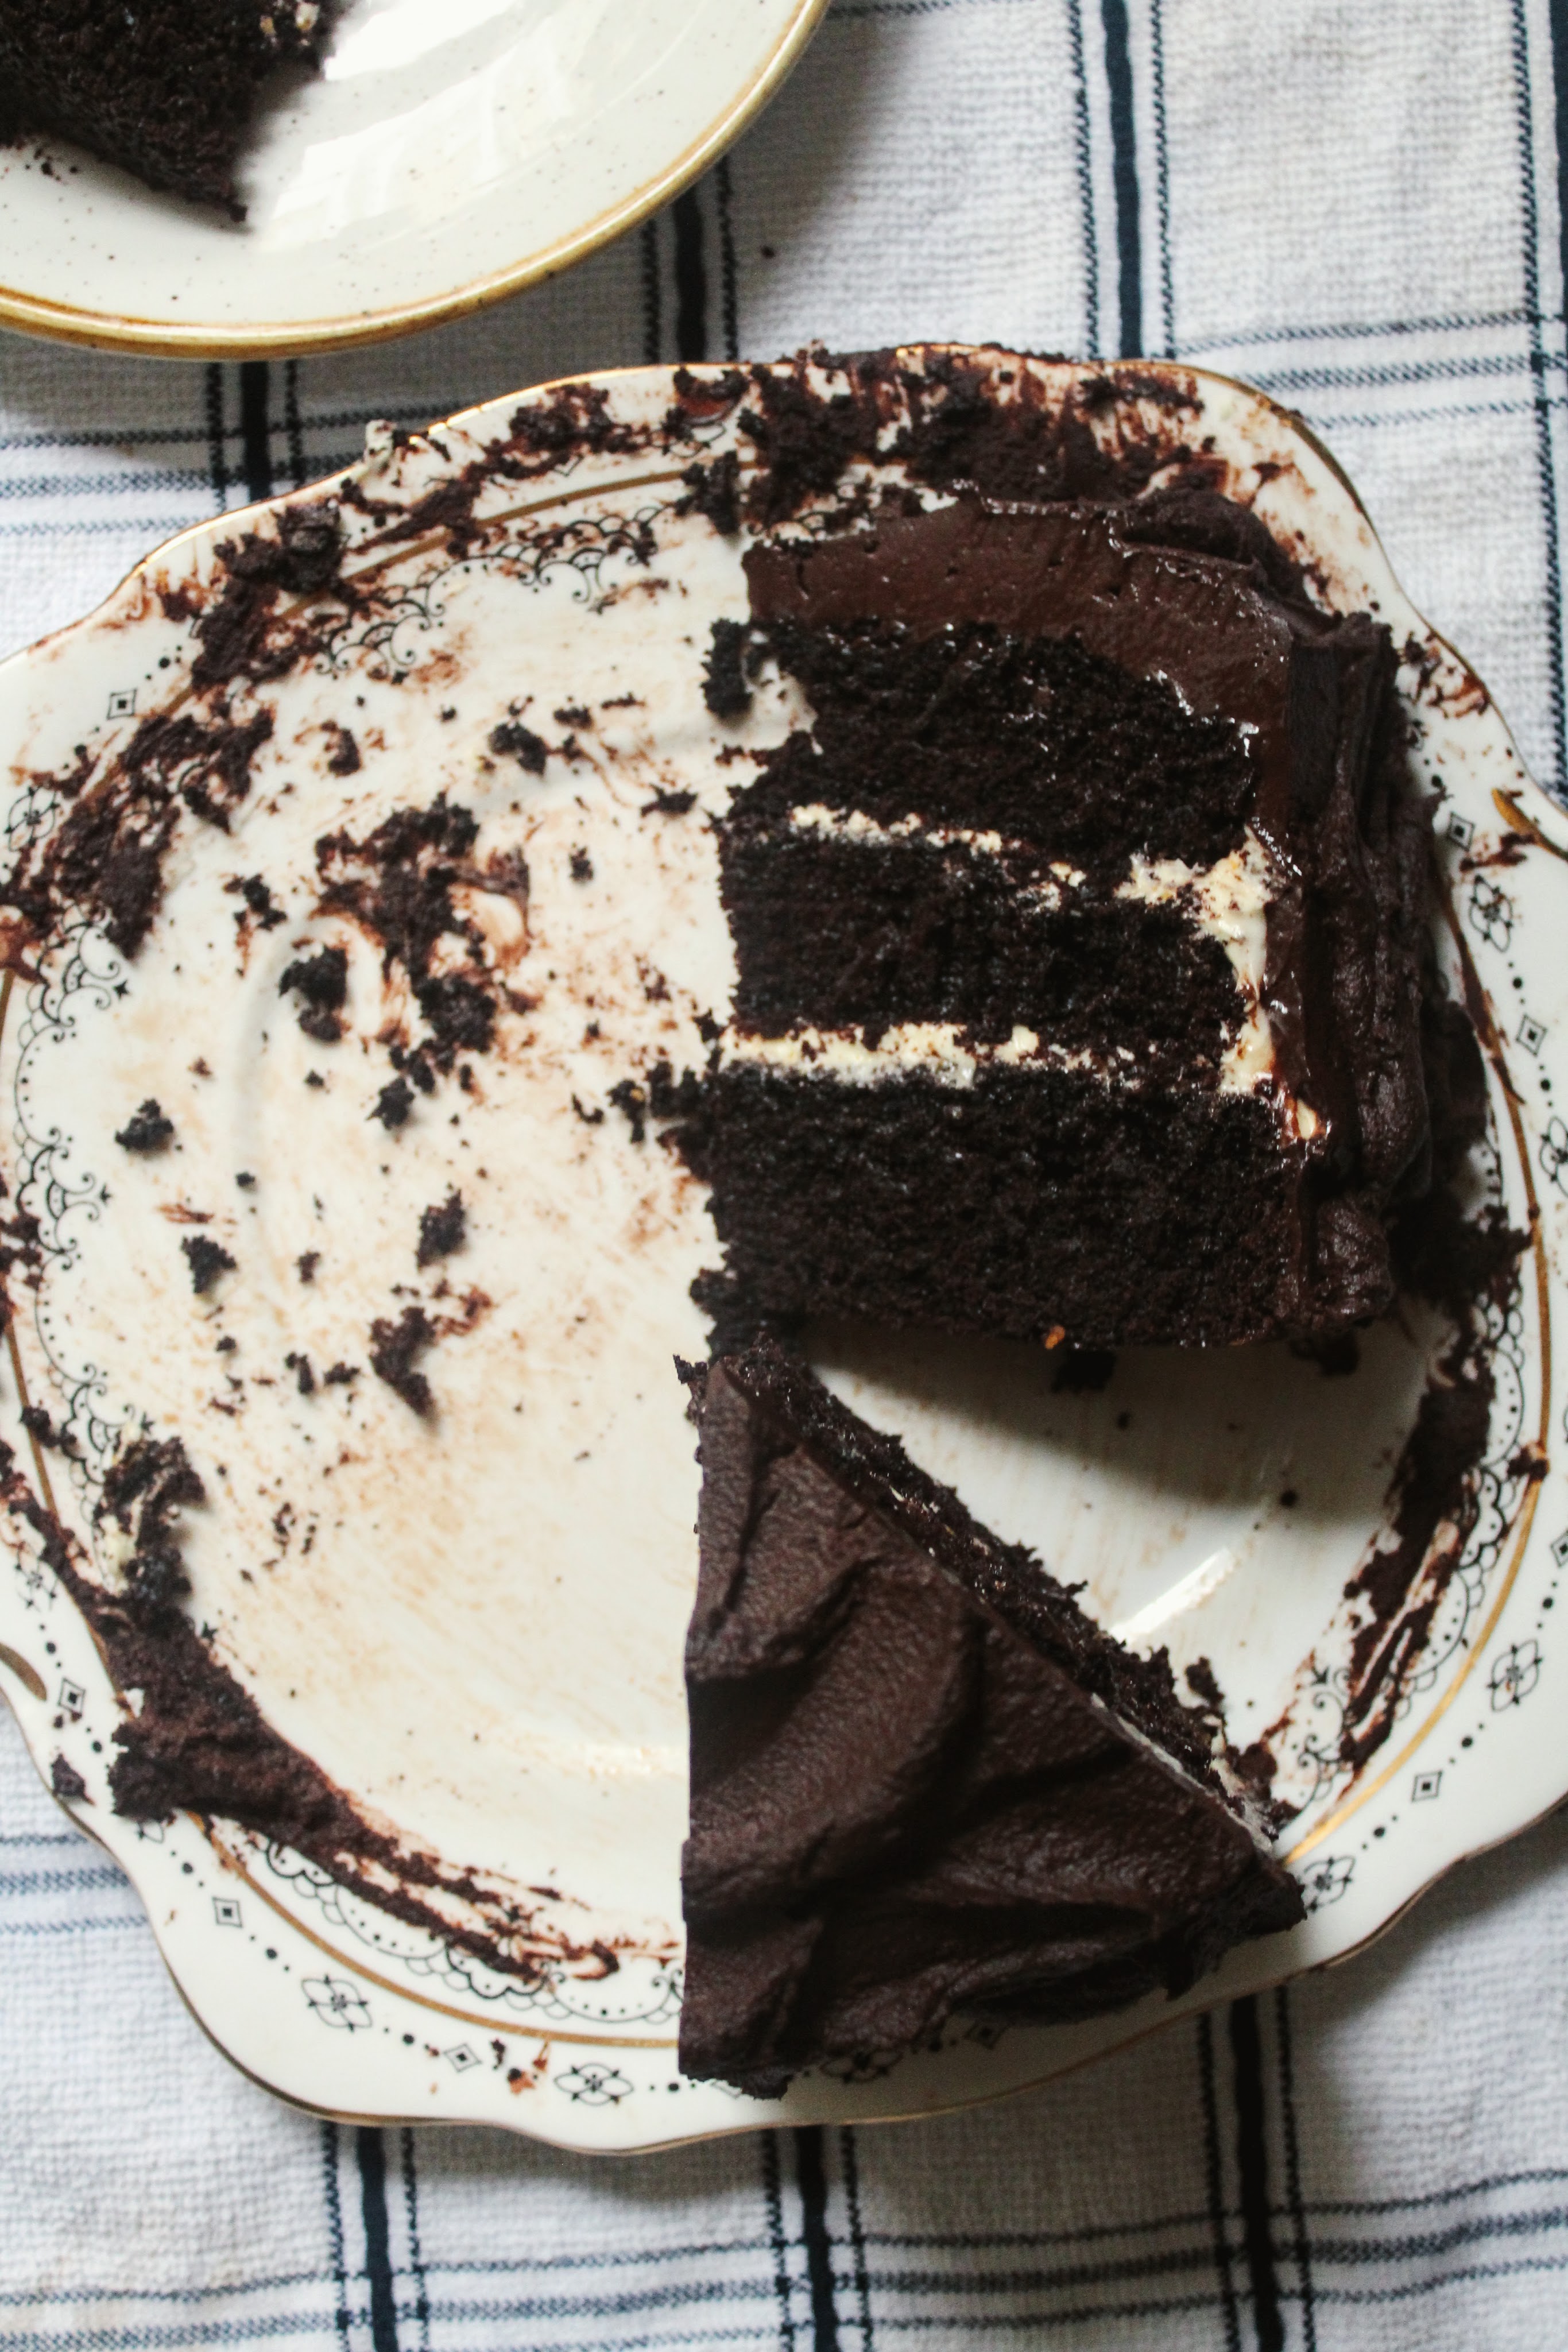
This cake is peng and also dairy free. This is the best chocolate cake you will ever eat and the only chocolate cake I will ever make. Mmm bold. A dark, moist chocolate cake flecked with orange zest, sandwiched together with an orange cream cheese buttercream and slathered in a chocolate mousse like fudge icing. You can’t always have your cake and eat it. But sometimes you can haha. So when the opportunity comes along you have to jump on it.
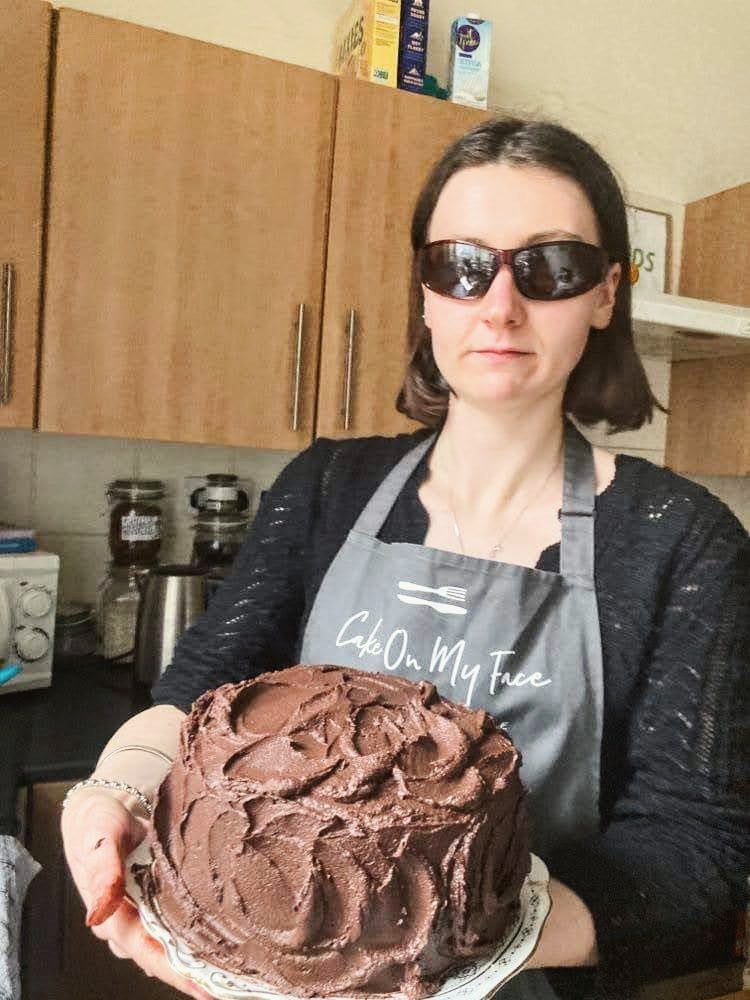
you can get one of these aprons fron my giftshop located in the bread aisle of your local Sainsbury’s
I’ve actually been drafting this post for about 6 weeks, I’ve gone through 29 different versions of this intro. Not because the cake is hard to write about (it’s actually very easy to write about how good this cake is) but because of the reason that I made the cake. That was harder to write about. I’ve realised there are some things that I don’t want to write about on here, and that day is one of them. Joe, you know why, and that’s good enough for me. So… cake.
Me and Sue spent a day making this. It deffo didn’t have to take that long but we really drew out the process. We adapted the cake from thetasteofkosher.com and the fudge frosting from loveandoliveoil.com. The actual cake part of this is honestly the best chocolate cake in the world, so moist and dark and deep, lots of layers to the flavour. You could eat the chocolate fudge buttercream straight out of the bowl with a large spoon, the trick is cream cheese. It does great things.
This is turning into a bit of a confessional post. The white buttercream in the centre is a tub of Betty Crocker’s ‘Cream Cheese Style Icing’, mixed with some orange zest and salt. We needed it to be dairy free and we didn’t want to make a liquid, yellowy icing that you get when you use df butter and cream cheese. Cheers Betty, you’re a legend.
Note on Cake Tins. This recipe will give you a 3-layer chocolate cake, using 3 7inch round cake tins. You can also bake this in 2 9inch round tins, just increase the baking time by about 10 mins. If you only have one tin, like we did, you can bake the cake in batches. As one cake comes out, remove from the tin straight away, wipe the tin, grease it again and pour the next round of batter in. Honestly, with this batter there is no difference at all in the finished cakes if it has waited out for a bit before being baked.
Ingredients
For the Chocolate Cake
255g / 2 cups plain flour
395g / 2 cups caster sugar
75g / 3/4 cup cocoa powder
2 tsp cornflour
2 tsp baking powder
1 1/2 tsp bicarbonate of soda
1 tsp salt
470ml / 2 cups hot black coffee – just use cheap instant coffee here
120ml / 1/2 cup vegetable or sunflower oil
2 large eggs
2 tsp vanilla extract
Zest of 2 oranges
For the Orange Cream Cheese Buttercream
400g/1 tub Betty Crocker Cream Cheese Style Icing – achieved by walking to your local supermarket
Zest of 1 orange
1/2 tsp salt
For the Chocolate Fudge Buttercream. This icing sets in about 20 mins so you can’t make it in advance. Only start this once you have sandwiched the cake layers together.
100g / 1/4 cup + 3 tbsp dairy free cream cheese – or regular cream cheese
100g / 1/4 cup + 3 tbsp hot water
2 tsp vanilla extract
1 tsp salt
285g dark chocolate
Method
Pre heat the oven to 180 / 160 fan oven. Grease cake tins and sprinkle lightly with flour, banging the sides of the tin to remove any excess.
In a large bowl, mix all dry ingredients; flour, sugar, cocoa powder, cornflour, baking powder, bicarbonate of soda and salt. Set this aside.
Make the coffee. To 470mls water you want about 3 teaspoons instant coffee.
Make a well in the centre of the dry ingredients and add in all the wet ingredients; coffee, oil, eggs, vanilla extract and orange zest.
Pour the batter into the prepared tins and bake for 25 mins or until a skewer inserted into the cake comes out clean. If you want even layers, weigh out the cake batter, you want roughly 450g in each tin. Once out of the oven allow cakes to cool completely before icing.
Prepared the orange cream cheese buttercream by mixing all ingredients in a bowl.
Place the first cake layer on the place/board/cake stand you want to serve the final cake on. Spread an even layer of the orange buttercream over the top of the cake making sure it reaches the edges of the cake. Place the next cake layer on top and repeat. If you want to, fill in any holes and smooth out any bumps in the sides of the cake with any extra buttercream. Place the cake in the fridge to firm up while you make the fudge buttercream.
For the chocolate fudge buttercream, use an electric whisk to cream the butter for 4 mins. You want a really fluffy consistency, I promise the time is worth it. If you don’t have an electric whisk, go at it with a wooden spoon.
Sift in the icing sugar and coco powder. Add in the cream cheese, hot water, vanilla extract and salt. Mix everything to combine.
Chop up the chocolate and melt it. I give the chocolate 15 second bursts in the microwave, stirring in between so it doesn’t burn. When this happens, the chocolate goes lumpy 😦 .
Pour the melted chocolate into the butter cream and beat everything together for another 2/3 mins. This whips air into the buttercream, giving it the chocolate mousse like melt in the mouth ting.
Remove the cake from the fridge and cover the whole thing in buttercream.
I had an identity crisis yesterday. Did a HIT workout and then ate an egg white omelette…with no toast. Lol I’d rather eat a muffin, thanks.
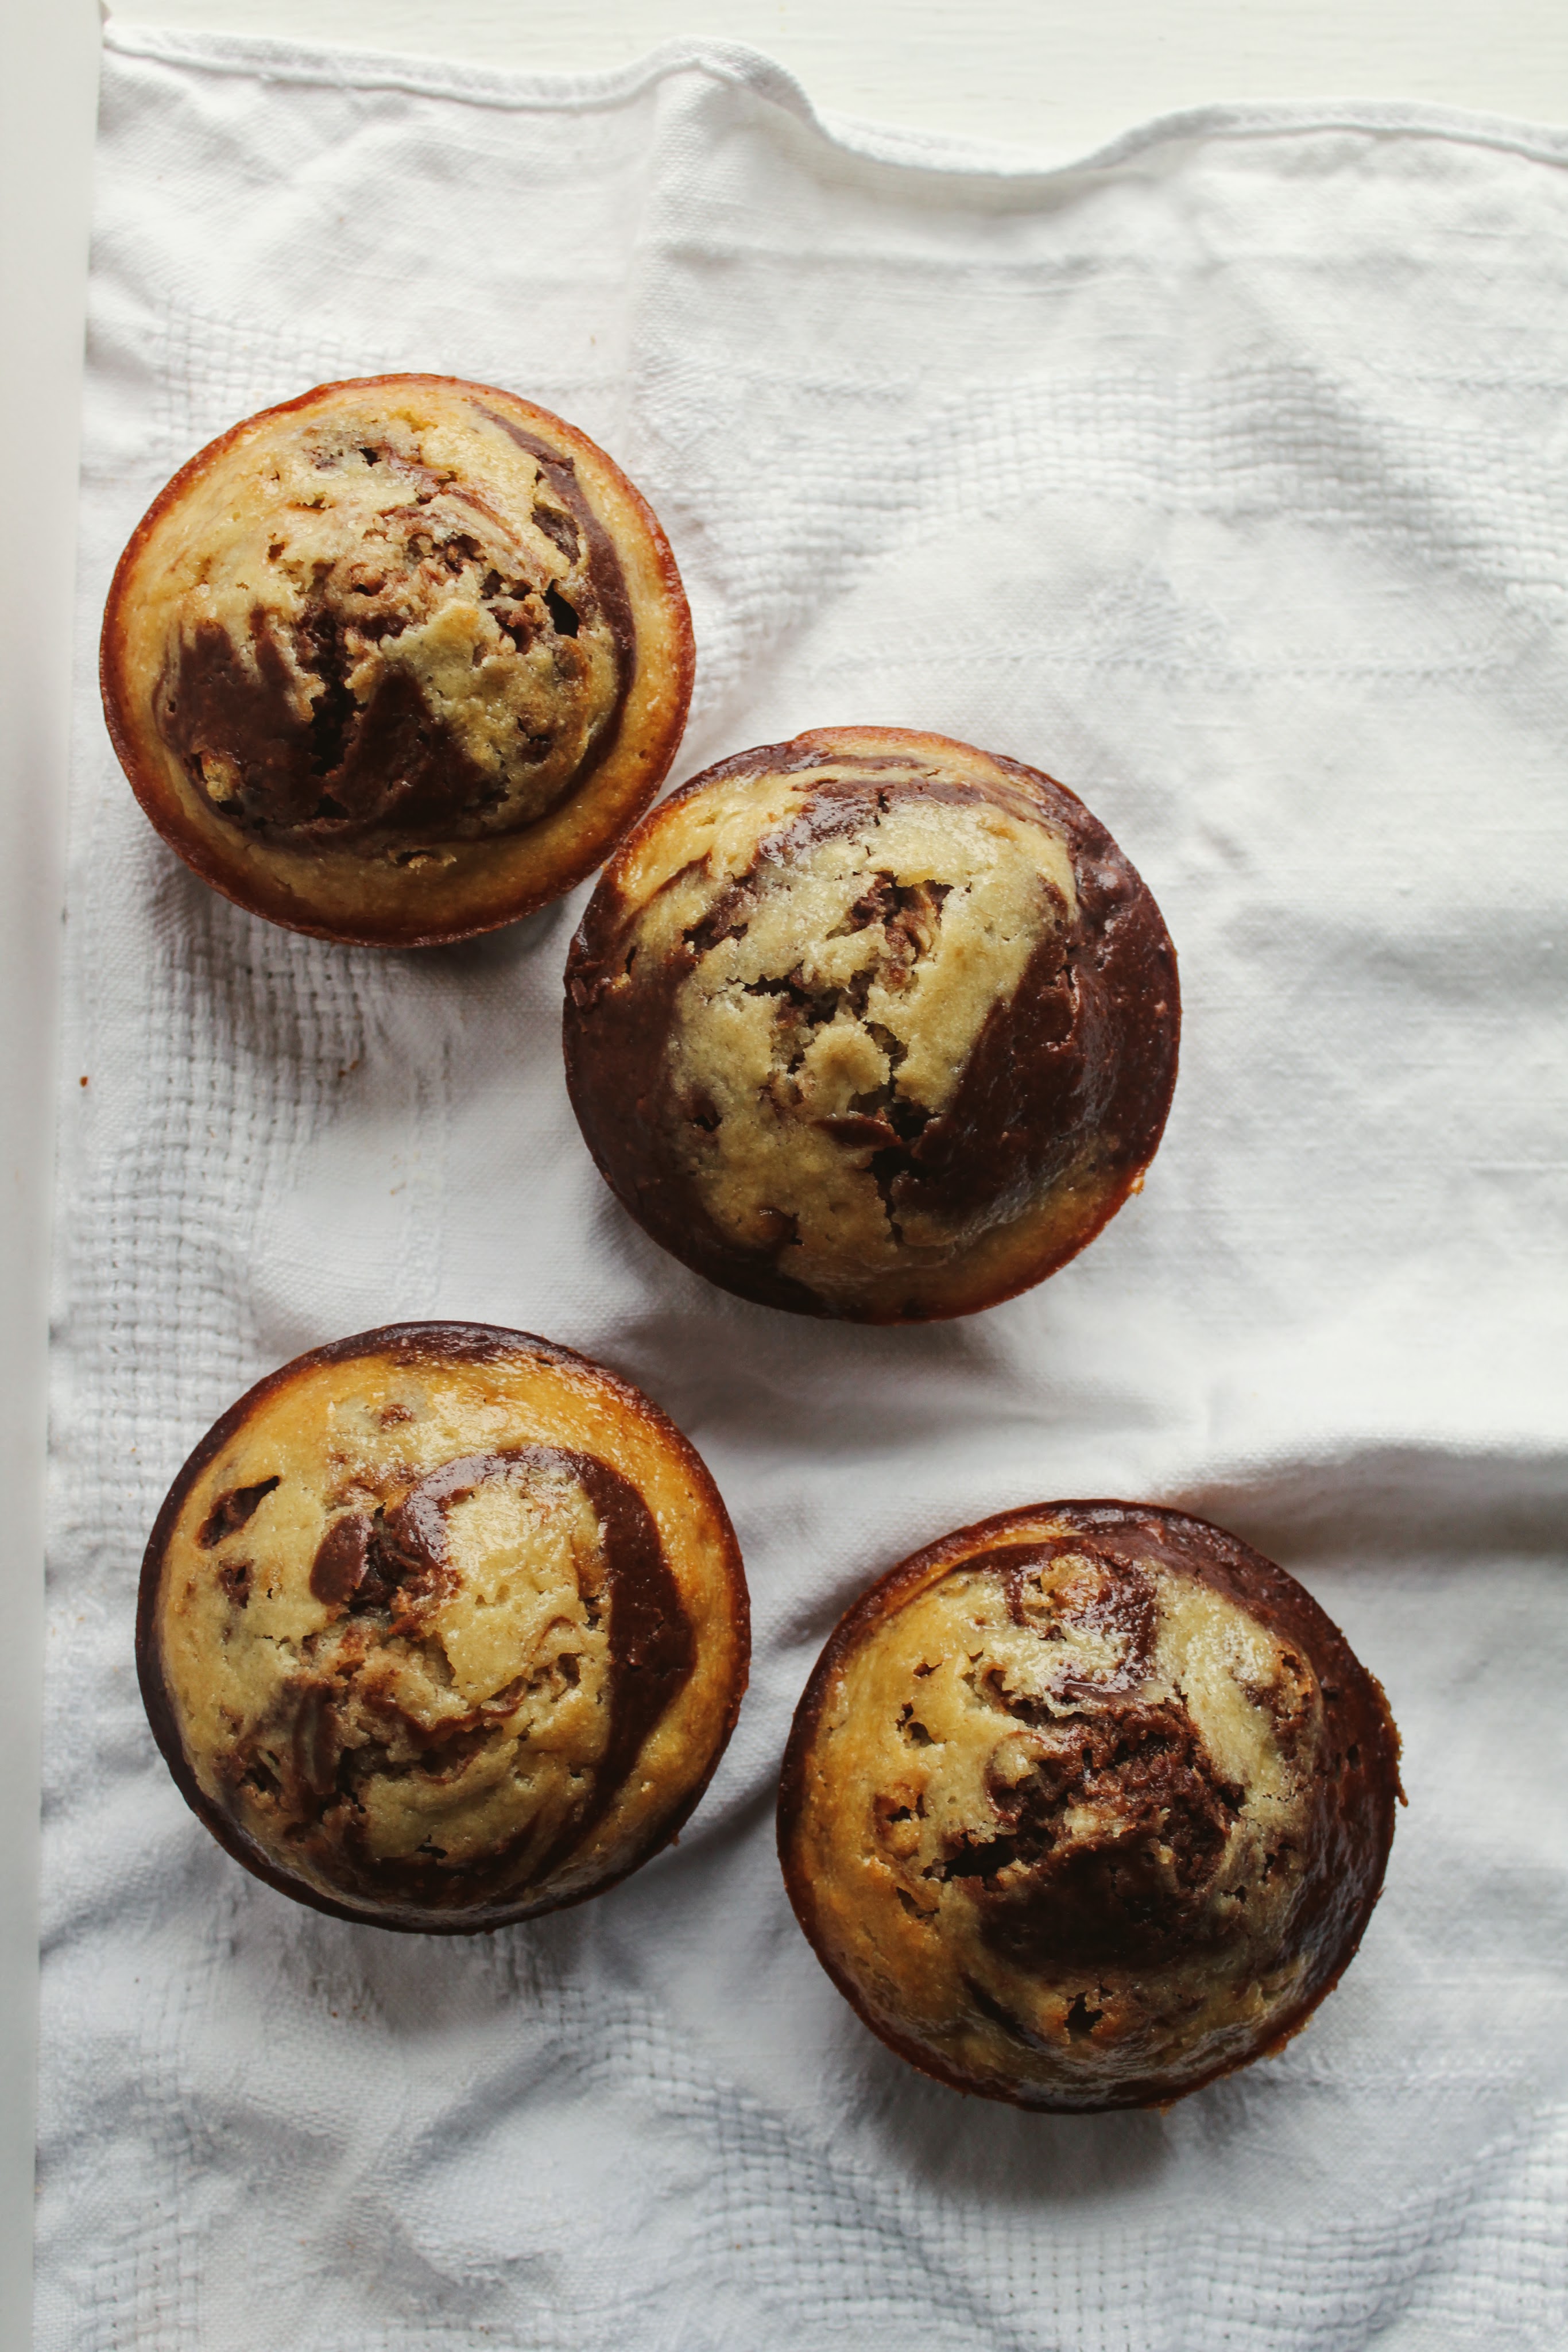
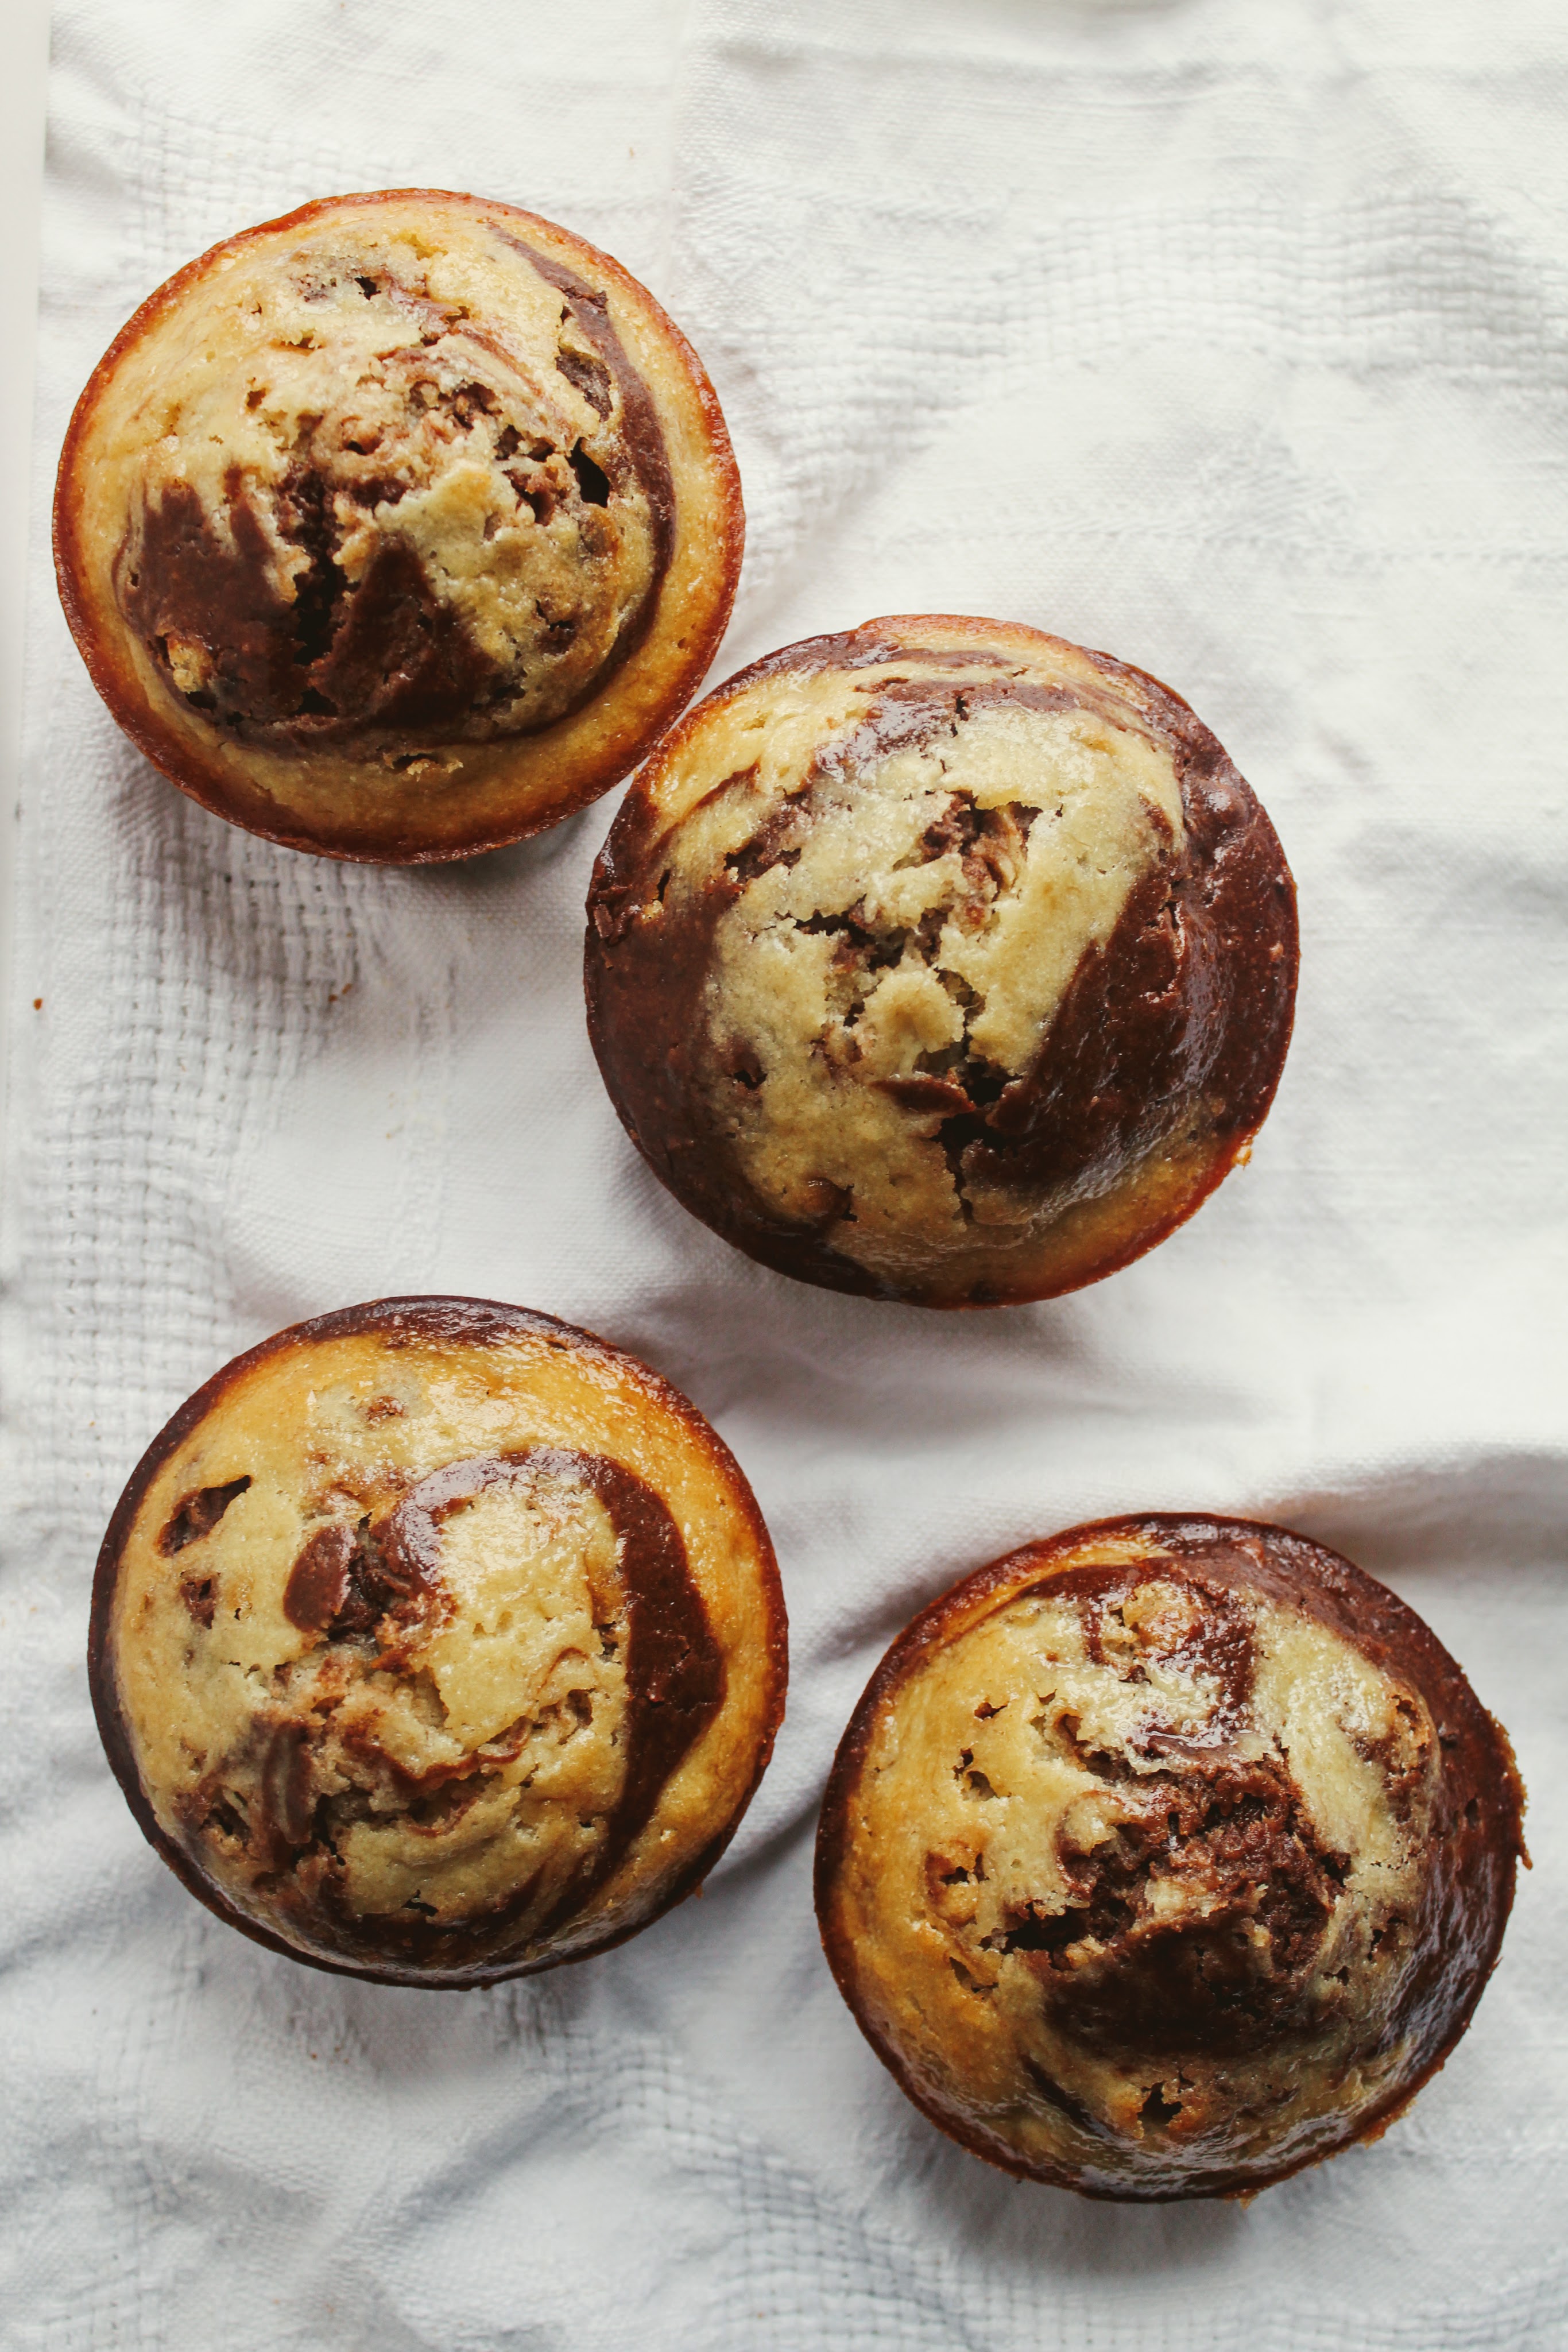
Time the eating of these right – not too hot to burn your mouth, not too cold to firm up the chocolate – and you get the most amazing little pockets of melted chocolate hiden in swirls of sweet banana cake.
I developed this recipe from a very old baking book that mum had on her shelf. It’s the kind of baking book where desiccated coconut and glace cherries are put on everything, and all the pictures have a kind of yellow tint to them. The recipes in this book are simple. They say things like ‘combine all of the ingredients, smooth into a tin and bake for 50 minuets.’ or ‘Once you have made the cake, ice it.’ In the spirit of this baking book, I’ve made this recipe really quick and easy. Have a good muffin!
Note on tins – This recipe makes 6 large muffins. If you’re using more of a standard cupcake style tin, expect to get about 12 muffins from the batter. Just remember they will need less time in the oven.
Ingredients
240g mashed banana – about 2 medium bananas
2 eggs
185ml / 3/4 cup milk
60g / 1/4 cup melted butter
1/2 tsp vanilla extract
185g / 3/4 cup + 3 tbsp caster sugar
1/2 tsp salt
250g / 1 1/4 cups + 1 tbsp self raising flour
1/4 tsp baking powder
For the Chocolate Batter
60g / 1/2 cup + 1 tbsp cocoa powder
120g / 3/4 cup dark chocolate, chopped – milk chocolate will work just as well
Method
Pre heat the oven to 190C / 170C fan. Grease 6 miffin holes in a muffin tin.
In a large bowl, mix all the wet ingredients together; mashed banana, eggs, milk, melted butter and vanilla extract.
To this, add all the dry ingredients; sugar, salt, self raising flour and baking powder. Mix everything together to combine.
Pour half of this batter into another bowl. Add the cocoa powder and chopped chocolate. Give it all a mix.
Alternating between the two batters, spoon blobs of the cake mix into the muffin tins until they are 3/4 full. Using a skewer or knife draw a figure of eight through each muffin, this will give you the swirl effect.
Bake the muffins for 25 mins or until a skewer insterted into them comes out clean.
Bruh, these are peng. Hahahaha you just sent me a message with ‘bruh’ in it and I think it’s a great word. These took a few goes to get right, but once they found their sweet spot, they were perfect. A lil bit crispy round the edges but so chewy and fudgy in the middle, these are now the only chocolate cookies I will ever need. I was trying to recreate the Sainsbury’s Taste The Difference Triple Belgian Chocolate Cookies, they are the best cookies. You really can taste the difference.
To get the Sainsbury’s flat, chewy, dense cookie vibe I did a bit of playing around with my Double Chocolate Cookies recipe. The ingredients are similar but the key is to use plain flour instead of self raising. This gives you less of an American style cake like cookie and more of a… Sainsbury’s style cookie.
If you want cookies that look like they are straight out of a bakery, add a couple chocolate chunks and, for these cookies, a sprinkling of sea salt to the top of your cookie balls. These additions stay on top of the cookies as they bake and make them look very ‘pretty’ (Joe this was your review of them before they went in the oven.)
Freezing Cookie Dough: Once you’ve formed the cookies into balls, you can bake half the batch and freeze the rest for cookies on a rainy day. Bake them thawed, as instructed in the recipe or add 2/3 mins to the baking time if you’re going straight from freezer to oven. I do not have a degree in food hygiene so use your judgment on how long to keep them in the freezer for before baking, maybe a week?
Ingredients
200g butter
100g caster sugar
150g light brown sugar
1 teaspoon salt
1/2 teaspoon vanilla extract
1 egg
170g plain flour
20g cornflour
60g cocoa powder
1/2 teaspoon baking powder
1/2 teaspoon bicarbonate of soda
250g chocolate, chopped into rough chunks – I use a mixture of white and dark
Method
Line a plate with grease-proof paper and set aside.
Cream together the butter, sugars, salt and vanilla until light and fluffy. It’s easiest to use electric beaters here, but can be done with a wooden spoon. Add in the egg and cream the batter again.
Sift in the plain flour, cornflour, cocoa powder, baking powder and bicarbonate of soda. Use a wooden spoon to work the dough together until there is no more dry flour visible.
Stir in your chopped chocolate, saving a small handful to press into the top of your cookie dough balls.
Form the dough into balls. I use a 4.5cm ice-cream scoop, which fits a lil more than a level tablespoon of dough but you can easily use a spoon to scoop and your hands to roll. Place the dough balls on the lined plate and put in the fridge for 30 mins. (I see you’re about to, but don’t skip this step). If your dough is too squidgy to form into balls pop the bowl in the fridge for 15mins to let the dough firm up.
Preheat the oven to 180 regular oven / 160 fan over while the cookies are chilling. Line a couple of baking trays with grease-proof paper.
Top the balls with chocolate chunks and a lil sprinkle of salt, and place them spaced apart on the baking trays. Bake for 9-12 mins until the outer edge is set but the center is still soft. Keep an eye on these, they go from perfect to burnt fast.
When they come out of the oven, bang the baking tray on your work surface a couple times. This flattens the cookies, giving them a rippled effect on the crust and a dense chewy interior.
Remove the cookies from the baking tray to stop them cooking further.
Happy Halloween bboooiii. Here are some monster cookies. You actually helped me make these yesterday haha but now you have the recipe written down. Thought all our followers needed the recipe too. (Ha! Mum, maybe tell a couple of your friends about this blog? I told mine, but they didn’t seem too interested…)
These are FAT chocolate chip cookies. They have a cookie/brownie/cake texture that is gooey and melts in the mouth. I put cornflour in these, the stuff you thicken gravy with, it gives the cookies the melt in the mouth ting – sounds strange, just trust me.
I made theses dairy free so Tiger can eat them. If you want the full dairy effect, swap the same amount of olive oil spread for unsalted butter.
Lil dudes!!
Ingredients
For about 15 cookies
200g chocolate – I used a mixture, if you wanna add in another 100g of chocolate chunks, go for it.
200g dairy free spread – I used olive oil spread.If using butter make sure its unsalted and softened.
100g caster sugar
150g light muscovado sugar – light brown sugar is all good too.
1/2 teaspoon salt
1/2 teaspoon vanilla extract – leave this out if you don’t have it.
1 large egg
200g self raising flour
30g cornflour
80g cocoa powder
Method
Chop up your chocolate into rough chunks. These don’t have to be neat, you want some bigger bits and some small. Set this aside.
Use a wooden spoon or electric beaters to cream the dairy free spread and sugar together until light and fluffy. Add in the egg, salt and vanilla extract and give it another good mix together. Don’t worry if the mixture has curdled at this point.
To the sugar mixture sift in the flours and cocoa powder then mix this in. Add the chocolate chunks and give the cookie dough a final mix.
Cover the bowl with clingfilm and put in the fridge for 20mins. Sounds annoying, but it means the cookies won’t melt and flatten out when they hit the heat of the oven. This means your less likely to burn the cookies and they will have a fatter (this a thing?) texture.
While the cookie dough chills pre heat the oven to 180. Line a couple baking trays with grease proof paper.
When the cookies are ready to be baked, spoon out the dough in small mounds, making sure to leave them a lil bit spaced apart on the tray. Use one heaped tablespoon amount of dough for each cookie, or you can use an icecream scoop. Bake these for 12-14 mins, they will be squashy when they come out the oven, this is what you want.
This guy is my fav guy. Seems like a Quentin to me.
Enjoy the cookies man and have a good Halloween. Caitlin xxxx
(I’m writing this on the train to Glasgow, the wifi is pretty shit and I have diarrhoea. Apart from that, my Halloween is going really well.)
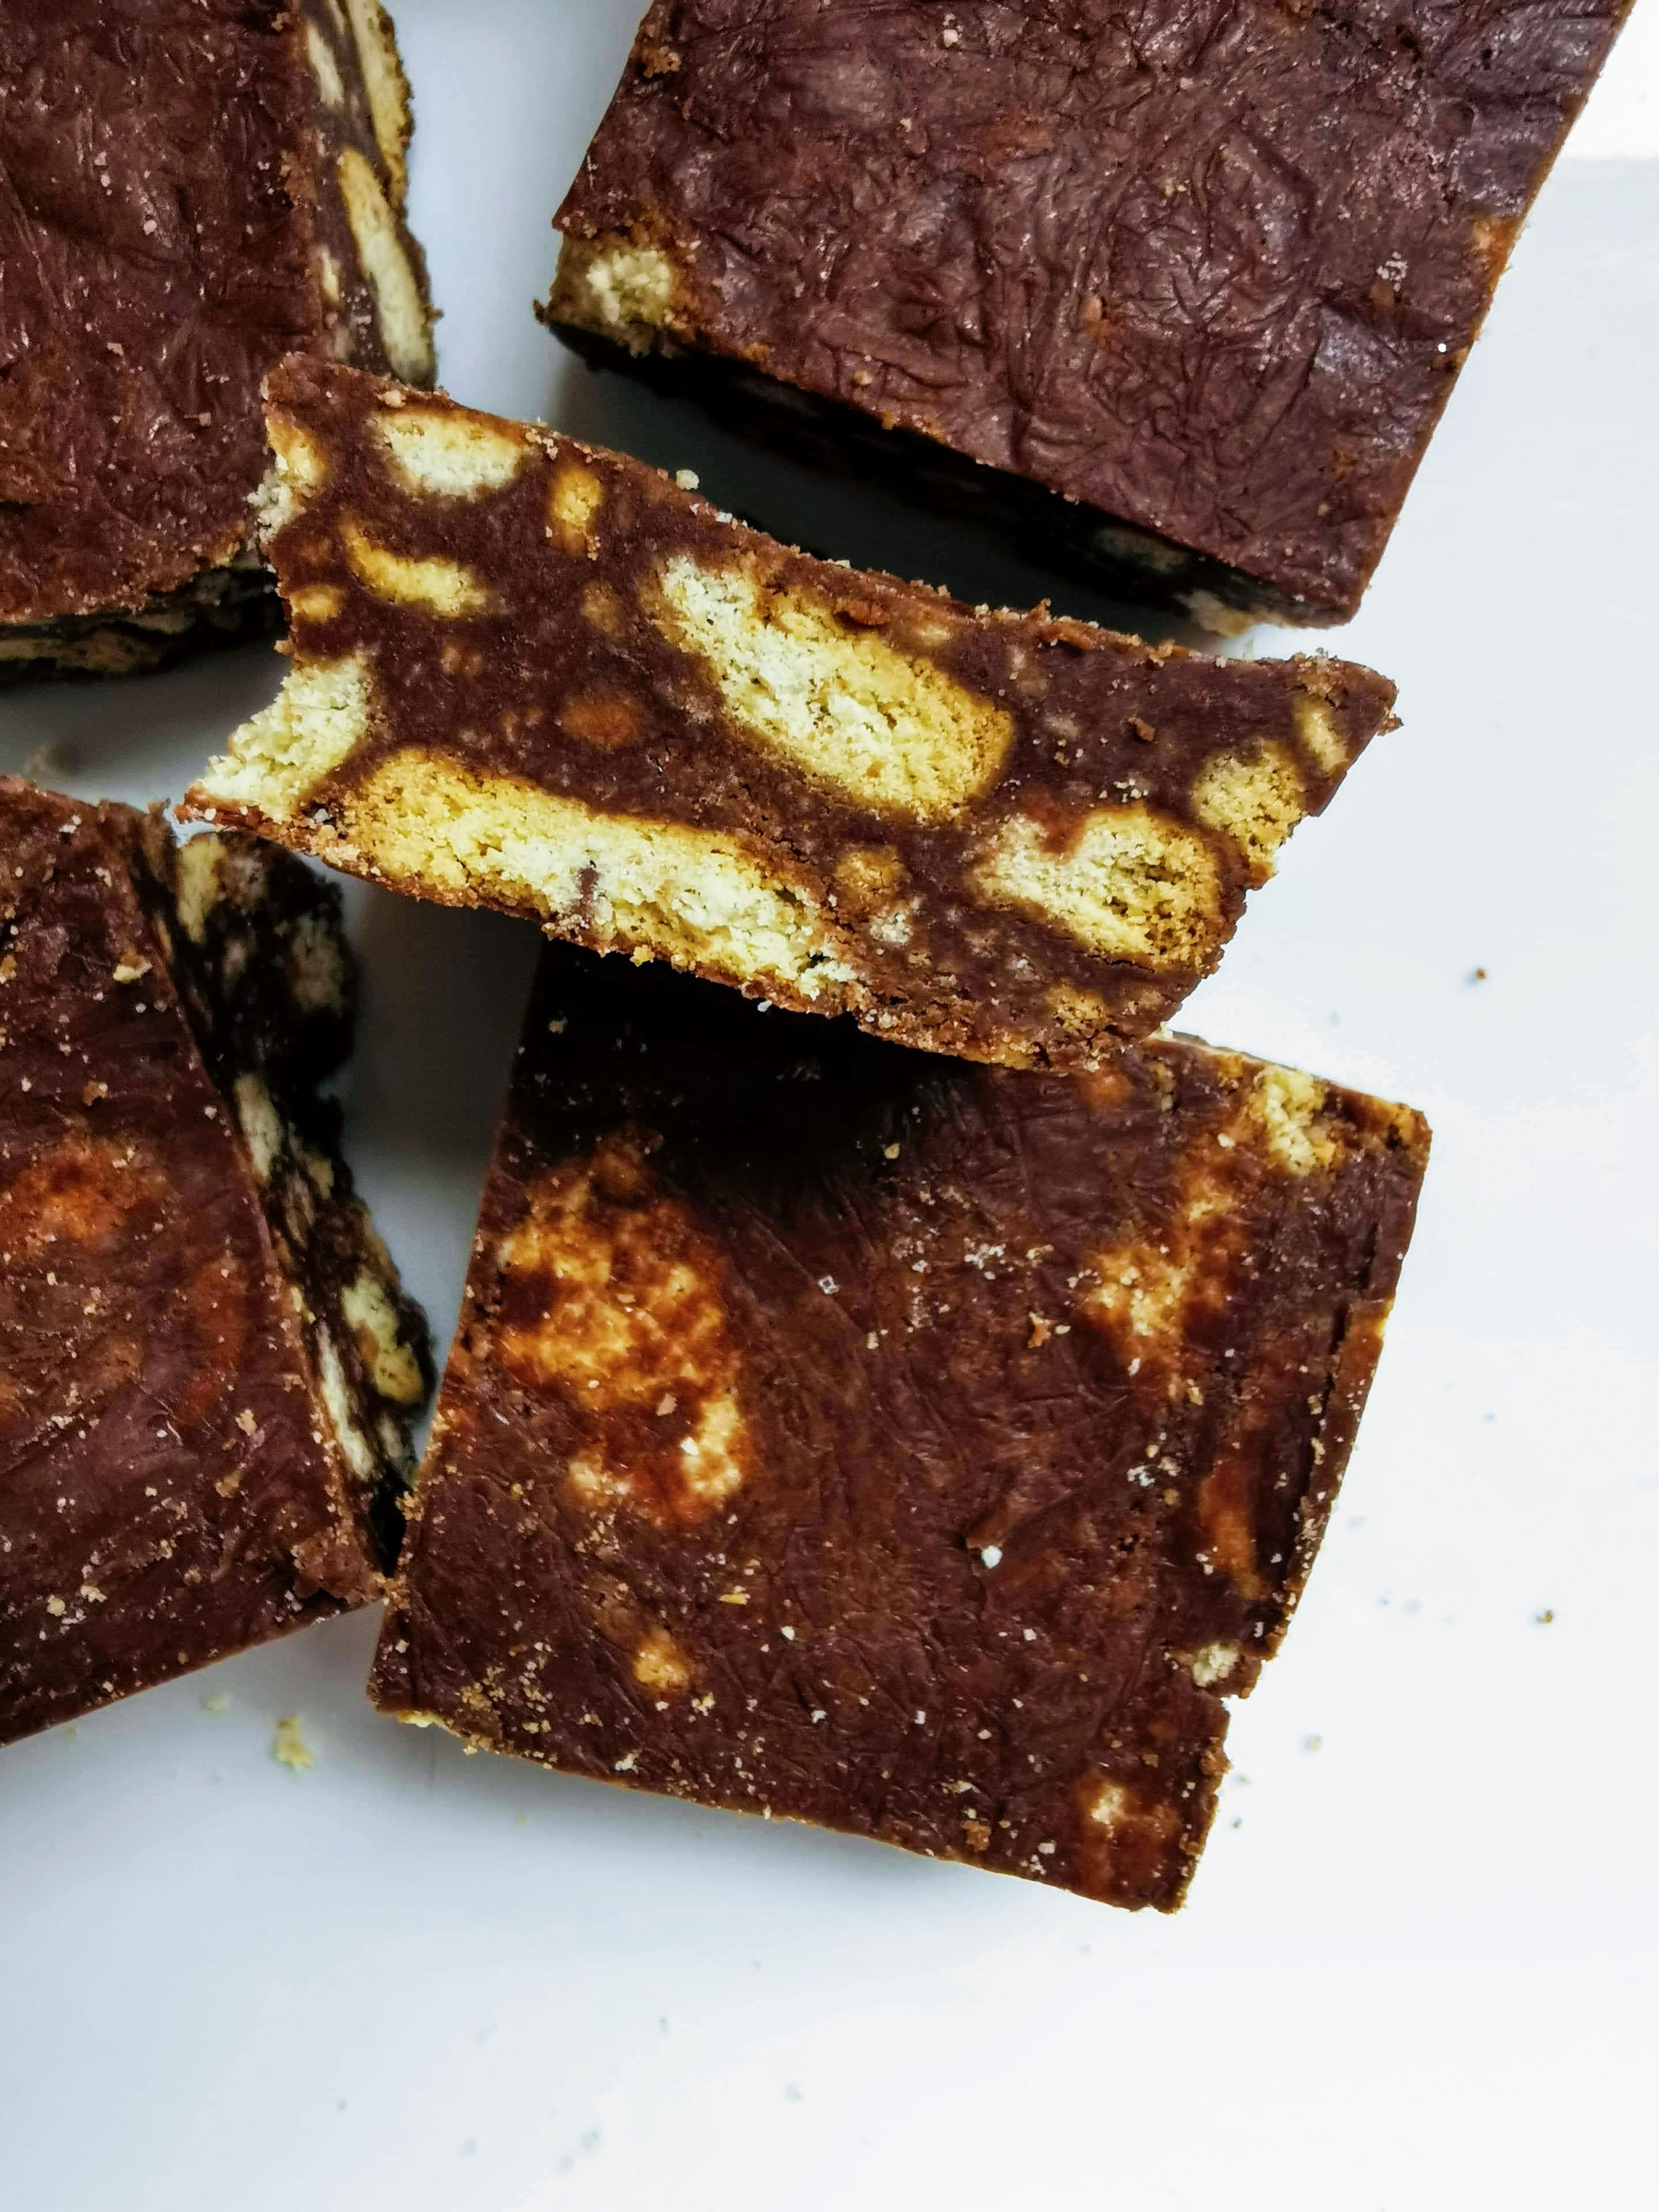
Tiffin is a lil bit of a special one. One of my favourite things about Tiffin is the name, so I’ll try and use the word ‘Tiffin’ as many times as I can in this post.
Tiffin takes 10 mins to make and you don’t even have to bake it. Wow. What more could you need.
Ingredients
300g digestive biscuits
50g butter
200g chocolate – I use one dark, one milk chocolate
3 tablespoons golden syrup
Pinch of salt
Tiffin Method
Line a baking dish with tinfoil, mine is 27cm by 15cm. Any size will do, the bigger it is the thinner your Tiffin will be.
Use your hands to crush the digestives into a bowl. You want some bigger pieces and some sand consistency. Set this aside.
Melt the butter, chocolate and golden syrup. I use a microwave, taking it out every 15 seconds ish to give it a mix, this will make sure the chocolate mixture doesn’t burn. You can also use a bain marie (in a bowl set over a pan of simmering water) for this step.
Pour the chocolate mixture over the digestives, add the salt and mix this all together.
Once the biscuits are coated in chocolate, tip this into your lined baking dish. Using the back of a spoon, press the mixture down firmly so that you end up with a compacted slab of tiffin. If you press down with the spoon and move it quickly back and forth over the top of your tiffin, you’ll get a shiny top!
Whack it in the fridge, it will take about 2 hours to set completely. Once your tiffin is set, cut into squares or eat the whole slab in one go.