Hey Joe,
Last week I wanted to be a French Pastry Chef – I still would like to be a French Pastry Chef – so I made Profiteroles! I’ve never been profiteroles’ number one fan, but I am now. I think I have seen profiterole light and I’m not looking back. I told Celestine that this post would be up a week ago (sorry Cel, hope you can make these as a post exam celebration pastry).
Joe I’ve decided that you need to get a set of weighing scales. French Pastry Chefs don’t measure things in mugs. If you wanna make these get some scales plz because we are making PASTRY and you have to be precise with PASTRY. I found you some on Argos. They are £6. Bargain.

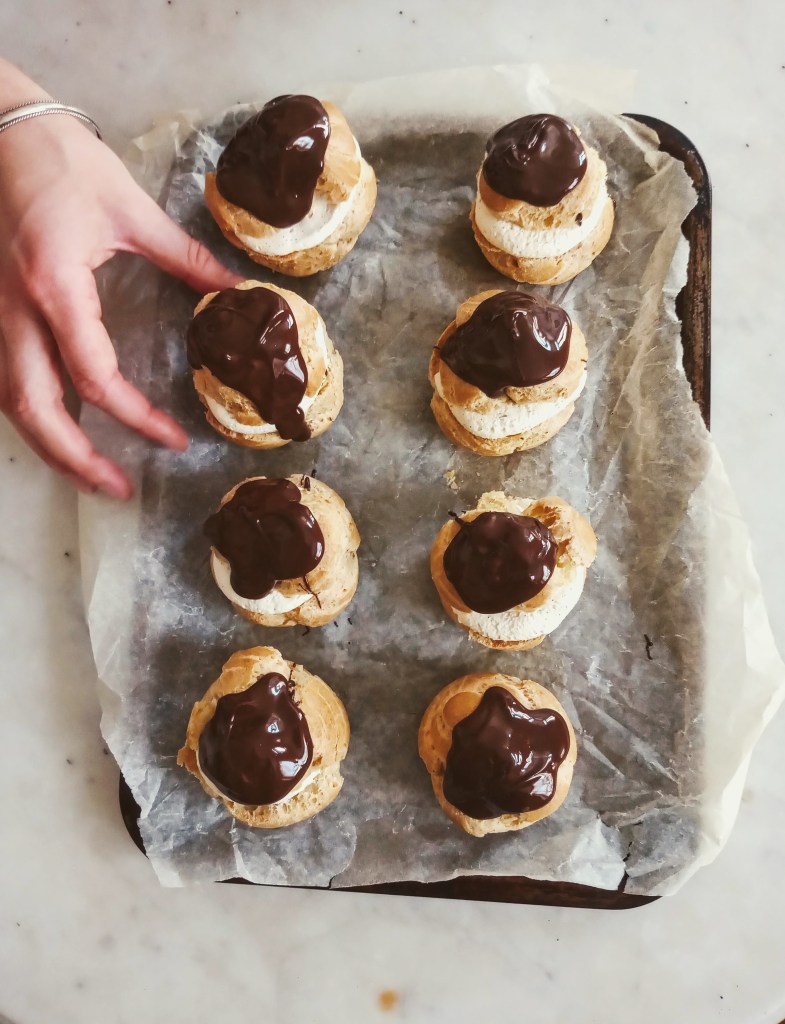
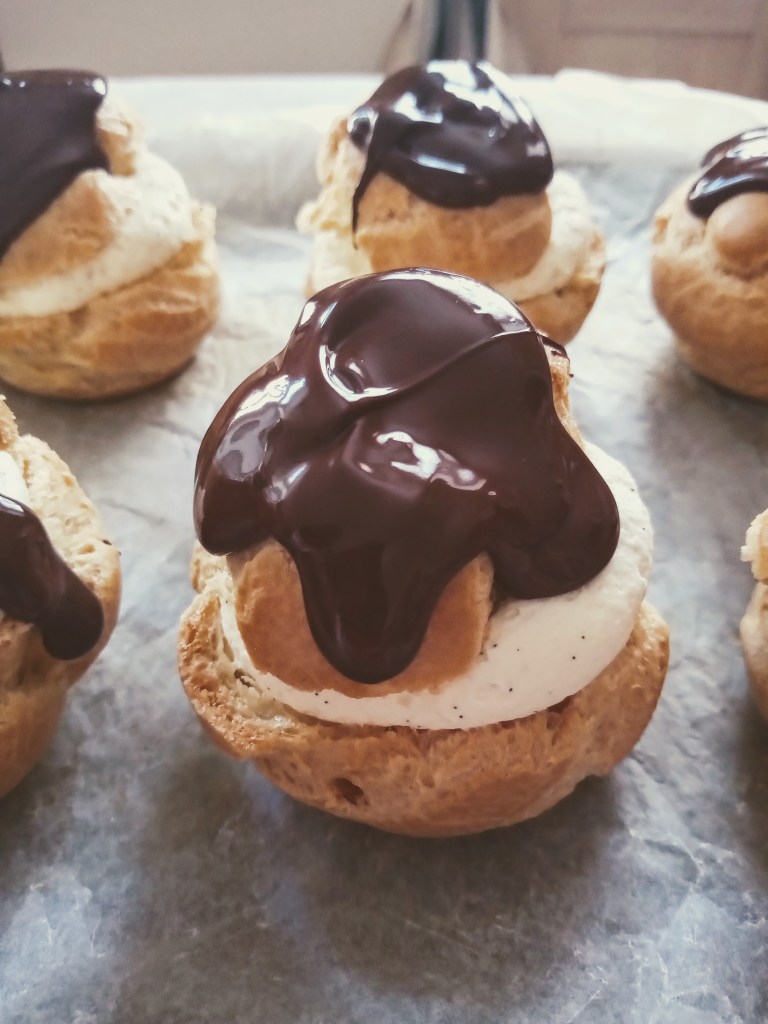
There are three components to a profiterole and to be honest they are all pretty easy. It just needs patience. First thing is making choux pastry. It’s the only pastry that is cooked off on the hob before it goes in the oven, pretty cool. The way it puffs up when it bakes is magic. It’s the result of steam from the water that you’ve cooked into the pastry dough when it was on the hob – very cool. The second component is chantilly cream. Lol. That is French Pastry Chef words for whipped cream and vanilla. Last bit is the chocolate ganache on the top, which you can make in under 5 mins.
(Can’t take credit for this, it’s Paul Hollywood’s recipe, just in my words)
You will need a piping bag and a 2cm round plain round tip nozzle for this. A bit annoying, but worth it.
Ingredients
Choux Pastry
- 65g plain flour
- pinch of salt
- 50g unsalted butter
- 2 eggs
Chantilly Cream Filling
You can mess with the measurements with this. It depends how sweet you want the cream and how much cream you want in each choux bun.
- 200ml double cream
- 1 tablespoon caster sugar
- 1 teaspoon vanilla extract (or the paste from one vanilla pod, that’s what I used to get the specs of vanilla in the cream. Pods are really expensive though)
Chocolate Ganache
- 100g dark chocolate
- 150 ml double cream
- 1 tablespoon caster sugar
Method
Pre heat the oven to 200, line 2 baking trays with greaseproof paper. Rub a bit of butter in the corners of the trays to stick the paper down.
Sift the flour onto a sheet of greaseproof paper and set aside.
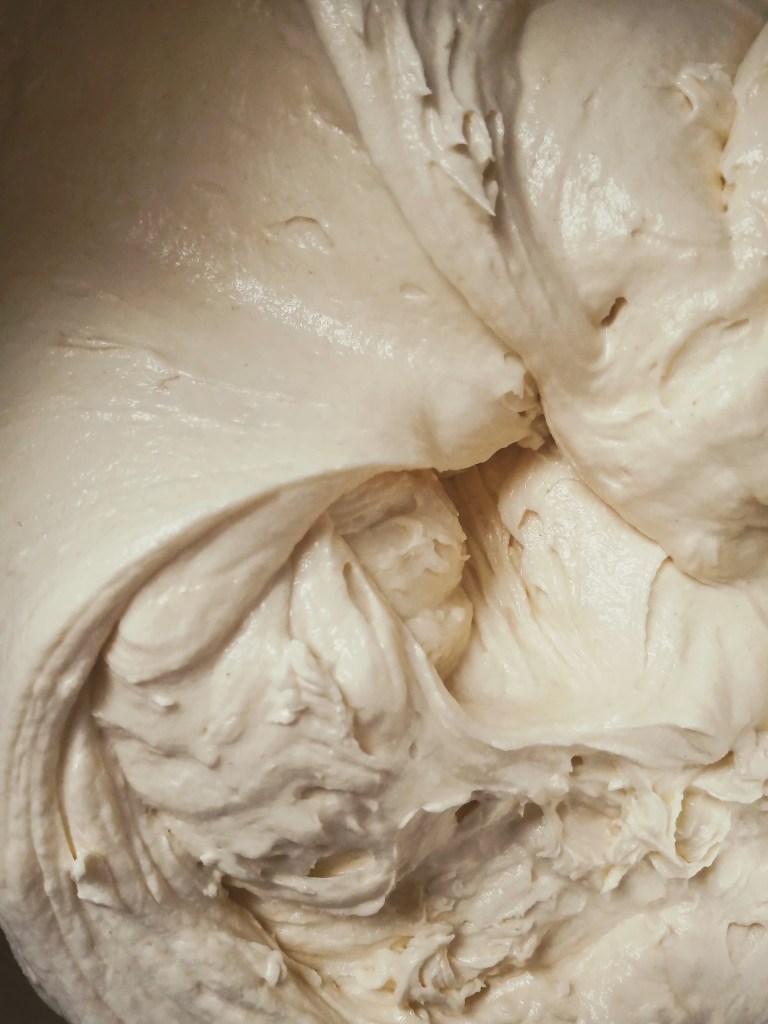
Add the cubed butter and 120ml water to a heavy based saucepan. Melt the butter gently over a medium heat – don’t let the mixture come to a boil and start evaporating. Once the butter is completely melted, increase the heat to full and bring quickly to the boil. Once boiling, tip all the flour into the saucepan in one go. Remove from the heat and beat rapidly (RAPID, like, go for it) with a wooden spoon. The mixture will begin to ball together and come away from the sides of the saucepan.

Put the pan back on the hob, with a low heat. You want to keep beating the dough (not as rapidly, you can calm down now) for about 2-3 minutes. You are trying to cook the dough off a bit. You will see a sort of brownish skin start to form over the bottom of the pan – that’s good, you’re cooking off some of the moisture. After 2-3 mins of beating, tip the dough out into a clean bowl and leave to cool until tepid (not boiling hot).
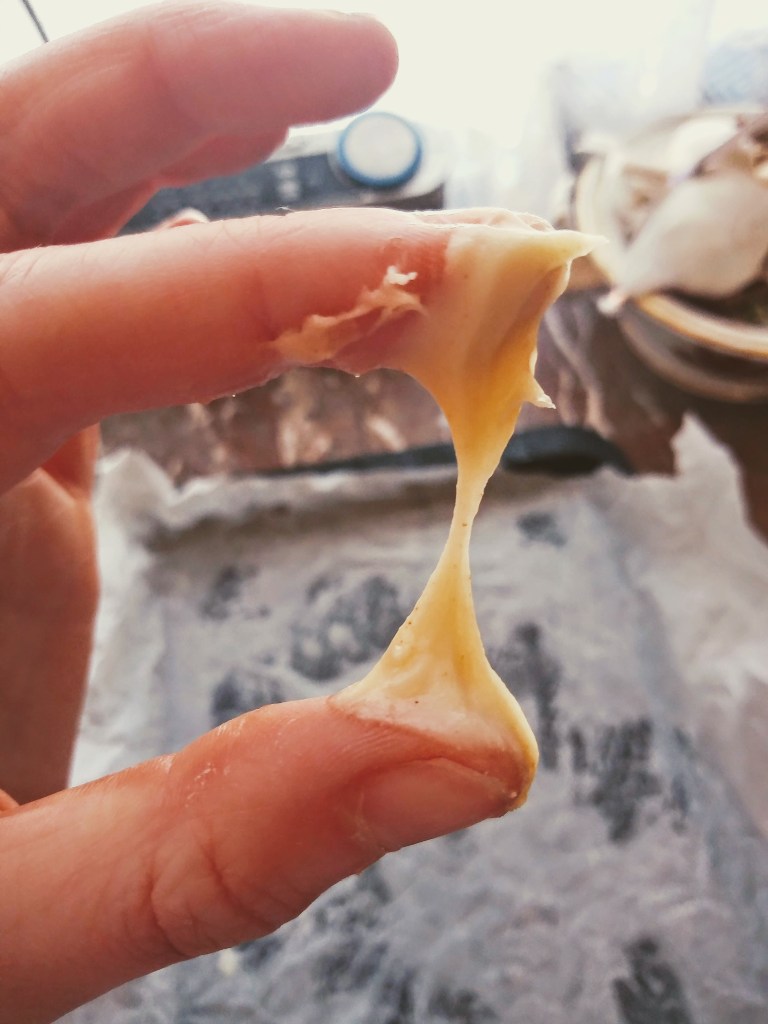
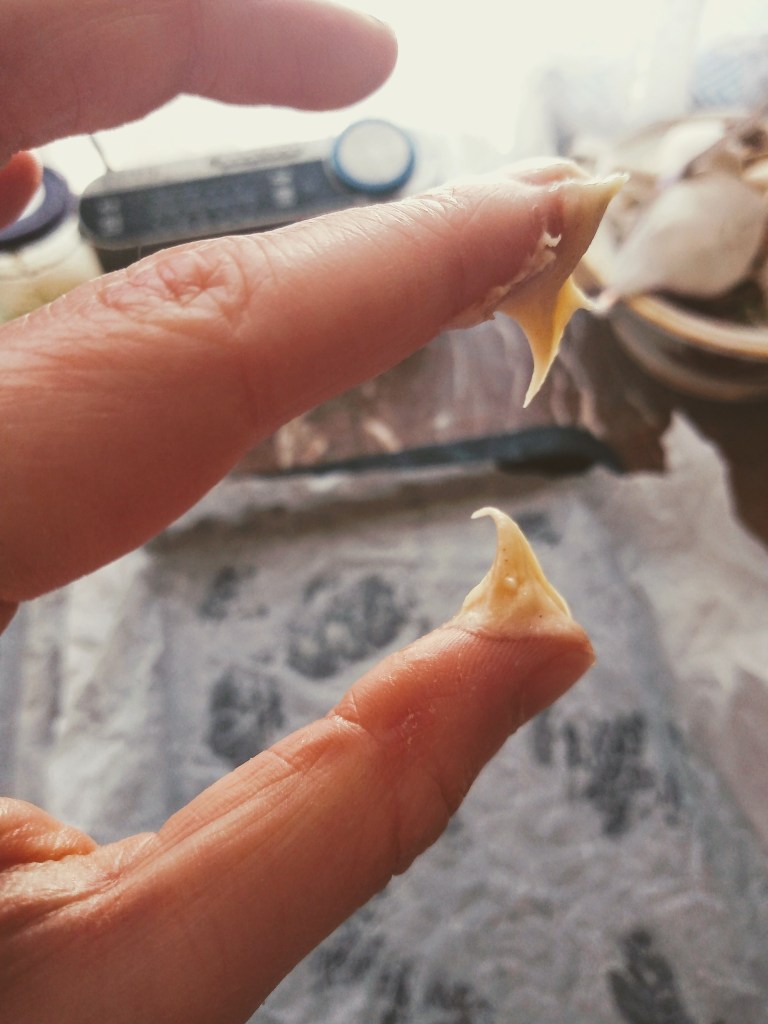
Once the dough is cooled a bit, beat the eggs in a separate bowl until combined. Gradually add the beaten egg to the dough, bit by bit, beating well after each addition (use a wooden spoon or electric whizers). You might not need all the egg, because too much egg will spoil the dough and they wont puff…v sad. The dough has had enough egg when it is shiny, paste-like and falls from a spoon when shaken gently. You can use this test to see if you have added enough egg:

Spoon the pastry dough into a piping bag, fitted with a plain round tip that is about 2cm wide. Pipe disks about 4 cm apart on your baking trays. You can do this by keeping your piping bag in a fixed place for each choux bun, and just squeezing until you have the width you want. I made mine quite big, about 5cm wide. Keep in mind the smaller they are the less time they need in the oven.

Using a damp finger, gently flatten the little spike of dough from the piping bag on each disk of dough. Sprinkle a bit of water with your fingers on the tray – not the dough – and put in the oven for 15 mins. After 15 mins, without opening the oven door, reduce the temperature to 170 and bake for a further 10 mins, or until golden-brown and crisp.
Take out the oven and carefully make a steam hole in the side of each choux bun with a skewer. This will allow them to dry out inside. Return to the oven for another 5 mins or until the pastry is completely crisp. Remove from the oven and allow to cool.


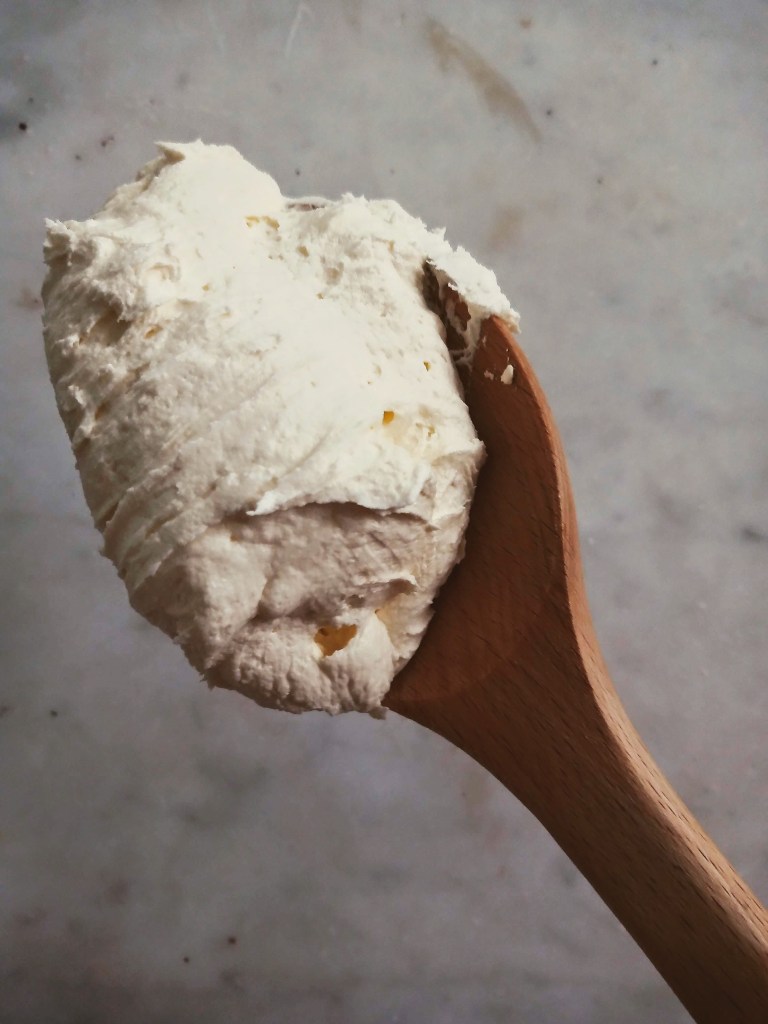
Once the pastry is cool make the filling and topping. For the Chantilly cream, whip the cream, sugar and vanilla (paste or essence) until just stiff.

For the ganache, break up the chocolate into small pieces and put in a bowl, set aside. Heat the cream and sugar in a heavy based saucepan until it begins to simmer, you can swirl it every now and then so it doesn’t catch on the sides too much. As soon as it reaches a simmer, remove the cream from the heat and pour over the chocolate. Whisk the cream and chocolate together, you will see the chocolate melt into the cream and a smooth ganache magically appear!
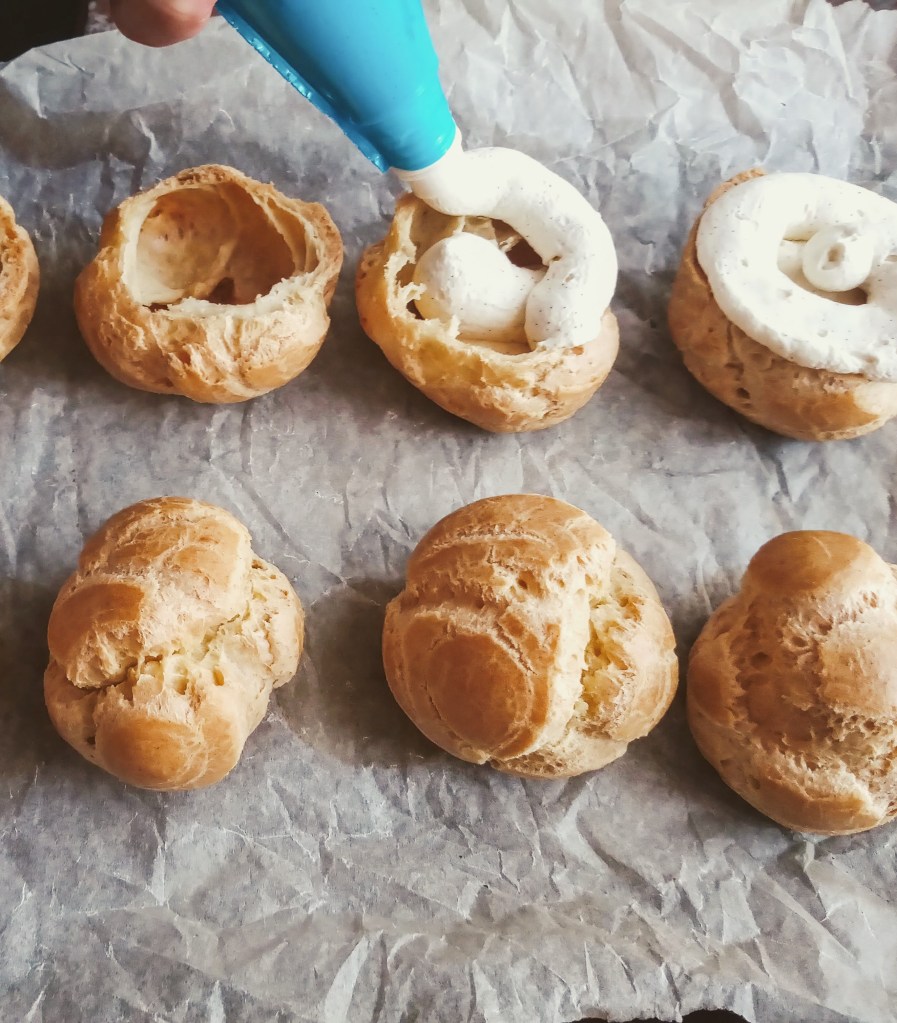

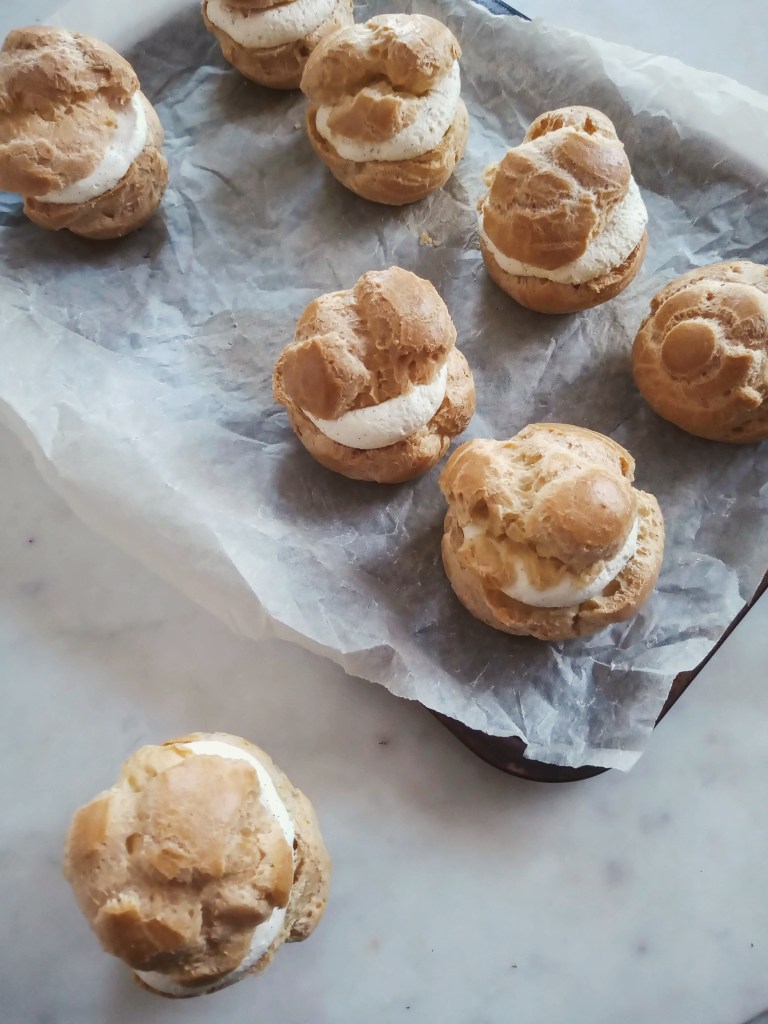
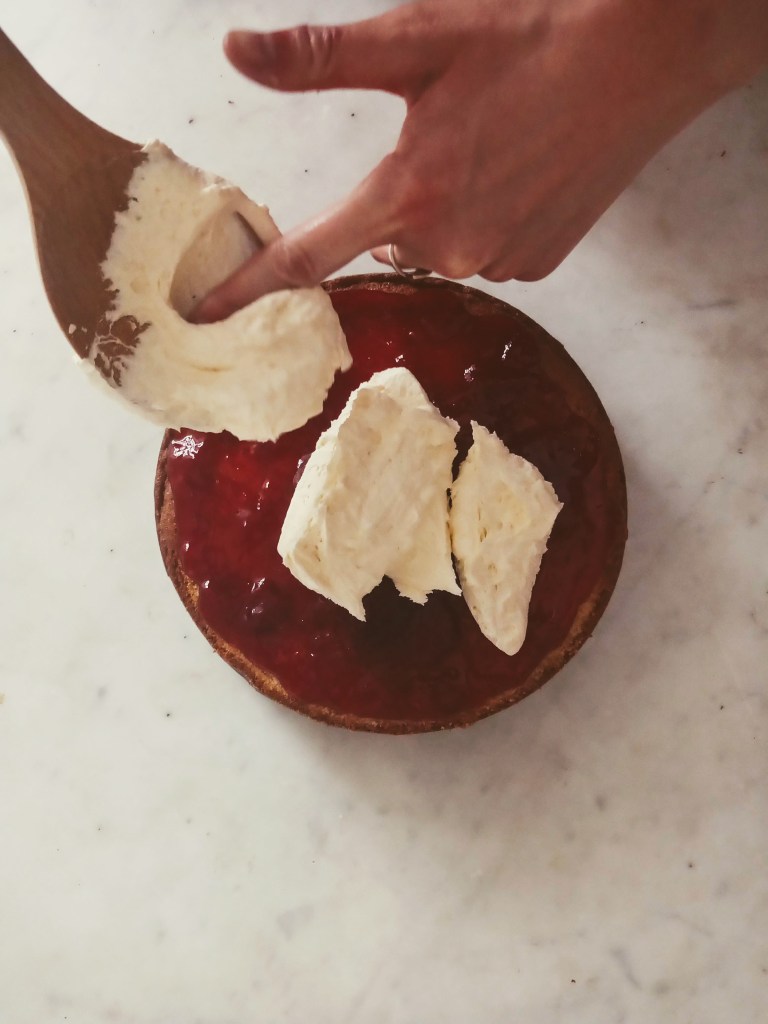
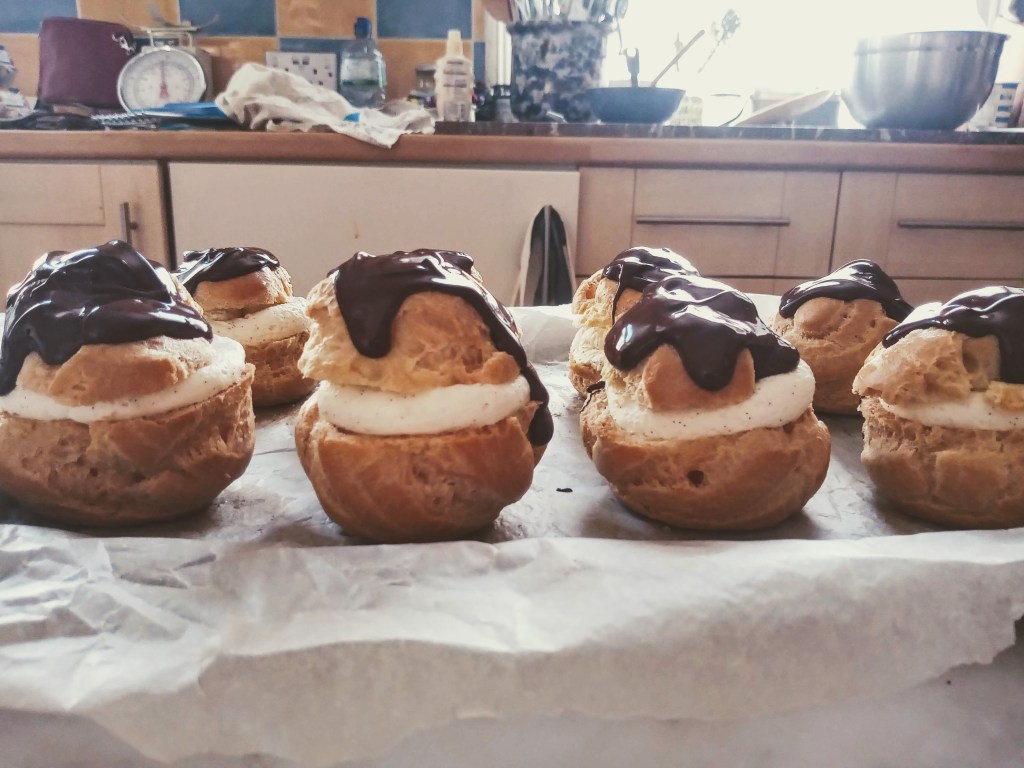
Cut the top of each choux bun. If there are bits of soft dough inside the bun when you cut the top off just remove them. Use a piping bag or a spoon to fill the hollow choux buns with cream. Put the lil choux tops on and spoon a generous amount of chocolate ganache on top.

Now…..eat!!!!!!! And see the choux light.

Enjoy the profiteroles. Love Caitlin xxx