Dollar Dollar Millionaire’s Shortbread

Uncategorized

Yo Joe,

This one will be your fav I think. These are BANGING. They are so good. I’ve eaten so many that I think I might turn into a millionaire’s shortbread. Caitlin, the millionaire (shortbread). Honestly just make these, you won’t turn into a millionaire, but you will be as happy as one, maybe even happier ?

Joe, as you read this, and even if you are not Joe, I want you to say ‘buttery biscuit base’ out loud. Go on, say it now. Ok now, repeat ‘buttery biscuit base’ out loud three times. ‘Buttery biscuit base. Buttery biscuit base. Buttery biscuit base’. Cool. Now repeat that three times again but drop the ‘tt’ in ‘buttery’. Now repeat that, but quickly. Great, and now you are a rapper!

so beautiful.

Ingredients

Buttery Biscuit Base

  • 225g plain flour
  • 175g butter, cubed and cold
  • 75g caster sugar

Caramel

  • 150g butter
  • 100g golden syrup
  • 1 x 379g can evaporated milk or condensed milk (they do the same thing, evaporated milk is condensed milk without the sugar)

Chocolate Top

  • 350g chocolate, a mix of dark and milk (I think I used closer to 400g chocolate, but that sounds like a lot)

Method

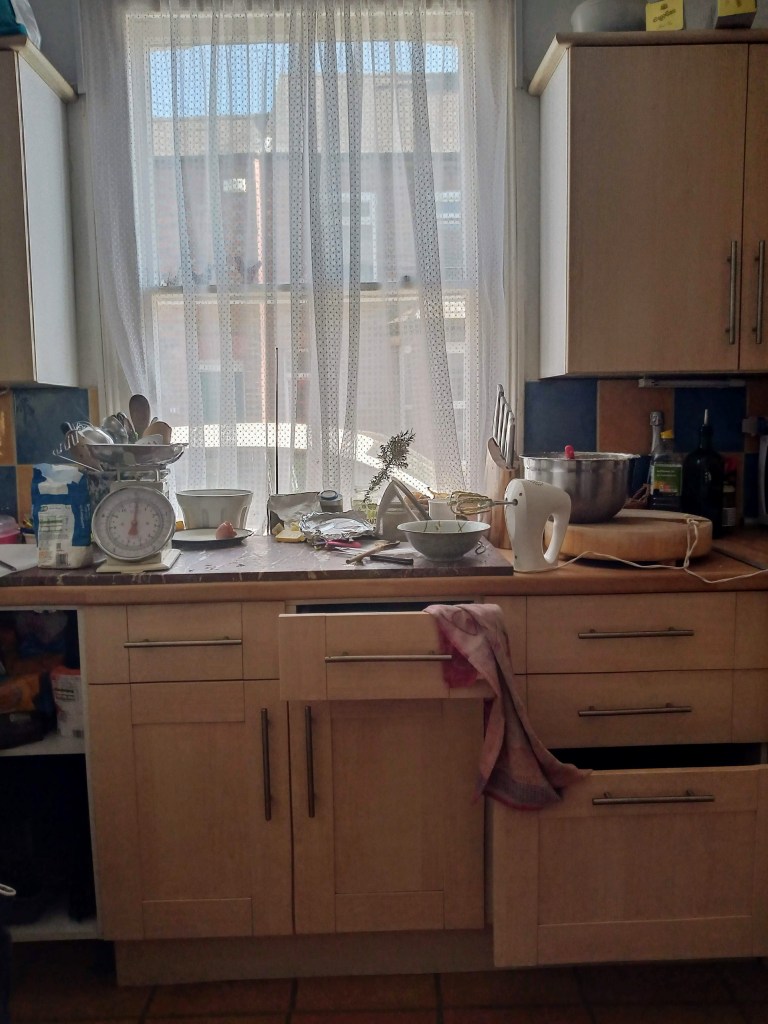
Pre heat the oven to 180. Line a square tin with greaseproof paper. I used a 23cm square tin, but a smaller one would work.

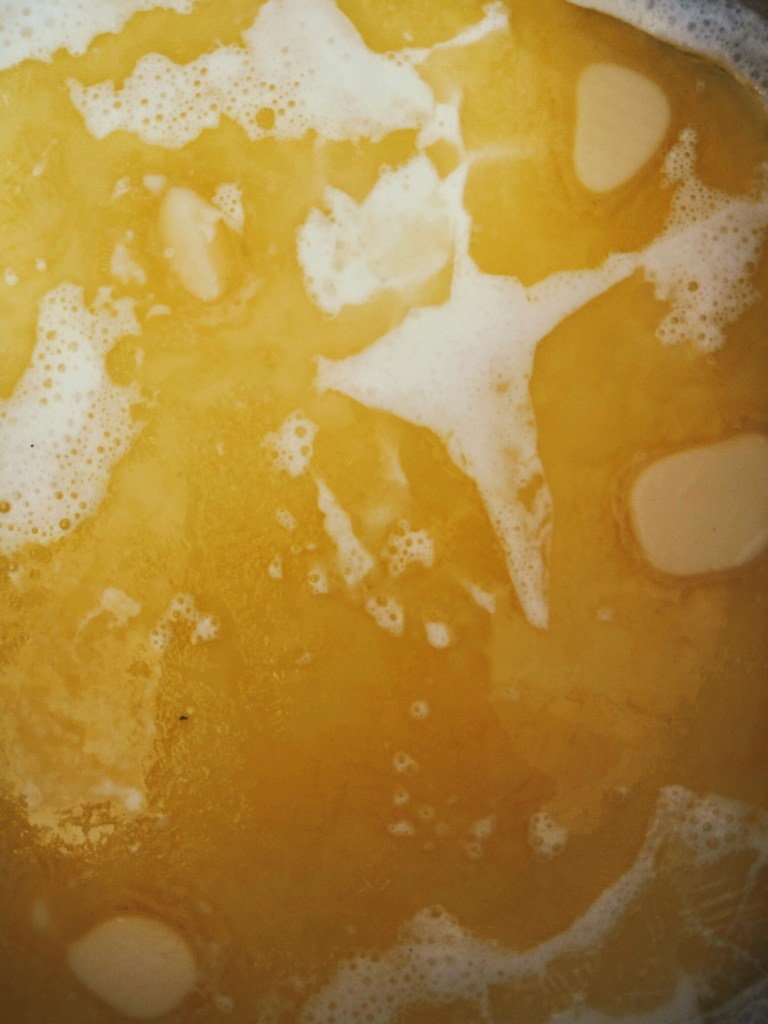
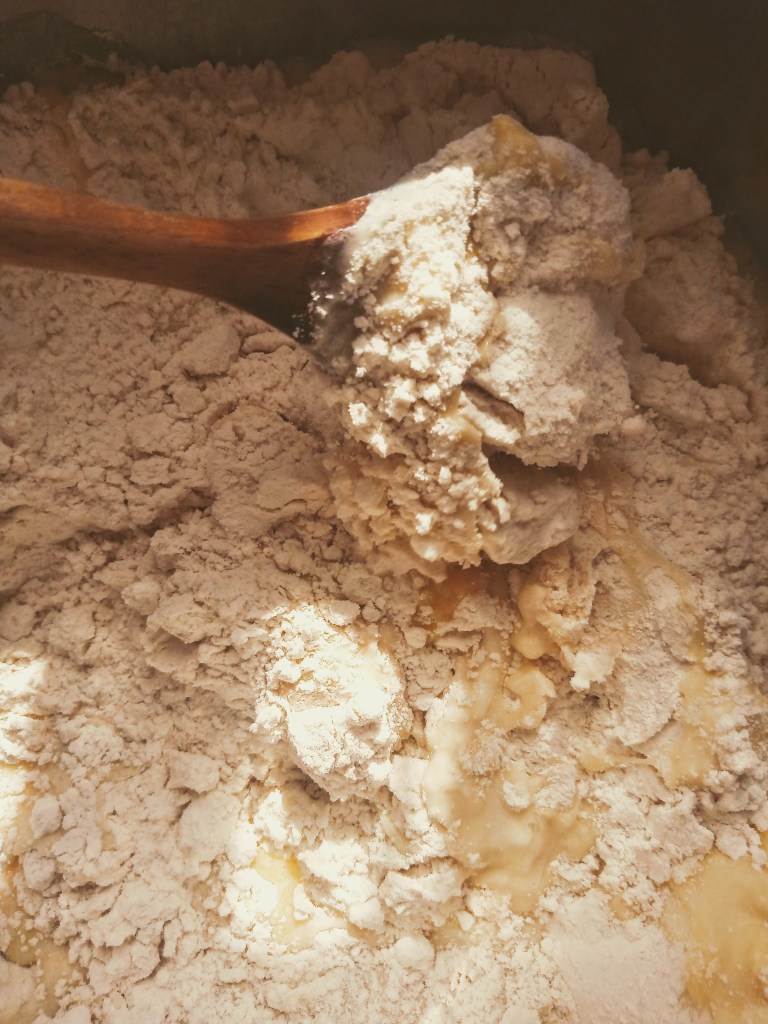
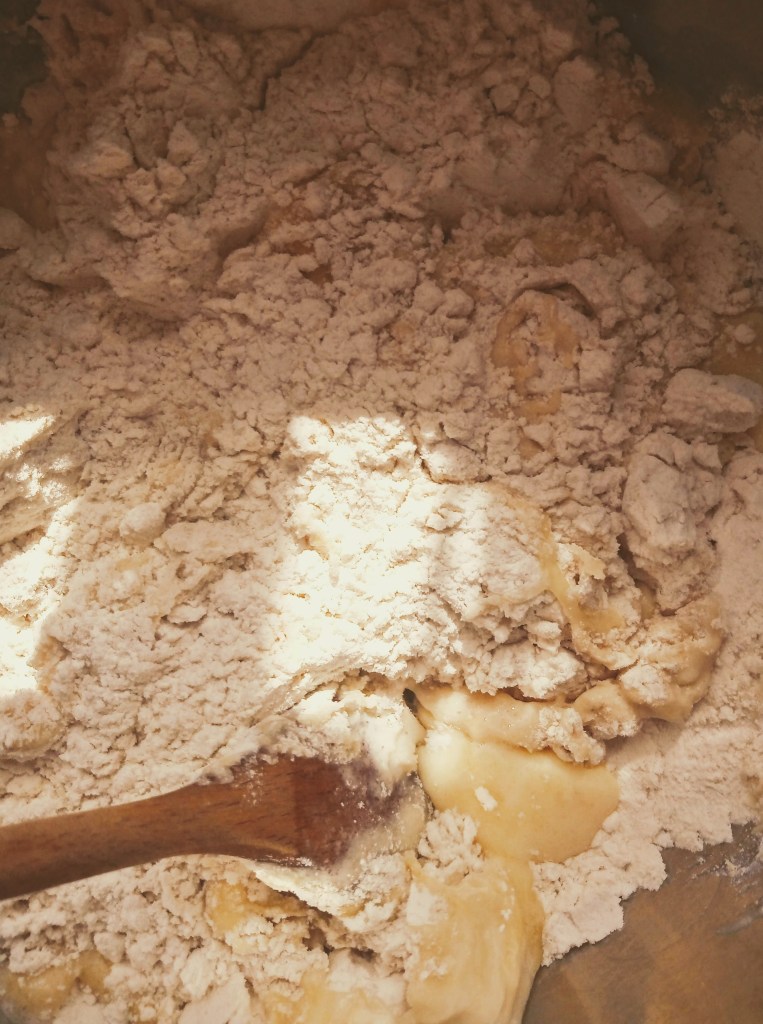
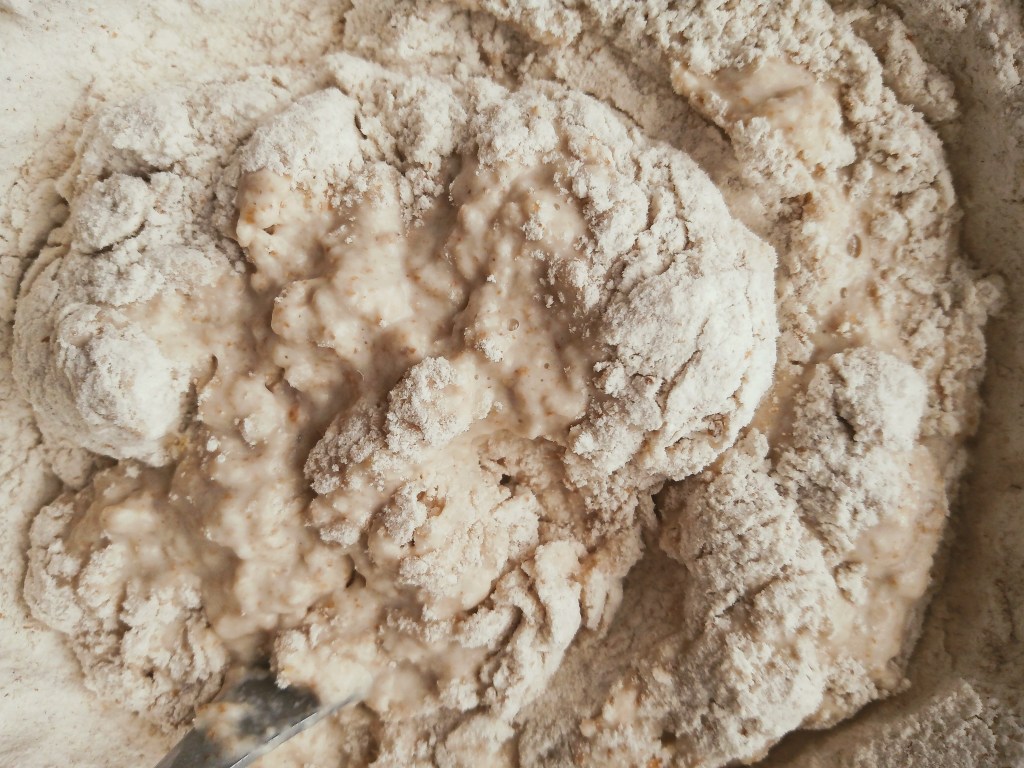
For the shortbread, rub together the flour, sugar and cubed butter in a bowl until the mixture resembles bread crumbs. Once there are no more large lumps of butter scrunch the mixture together so it forms a dough. Try not to kneed the dough, just bring the crumbs together.

Put the dough into the lined tin and squash it down with your knuckles to cover the base of the tin. Use the back of a metal spoon to smooth and level out the dough. Prick the dough all over with a fork, making lots of little holes.

Bake in the oven for 30 mins or until the top is lightly golden brown. Set it aside to cool.

Me looking at my newborn

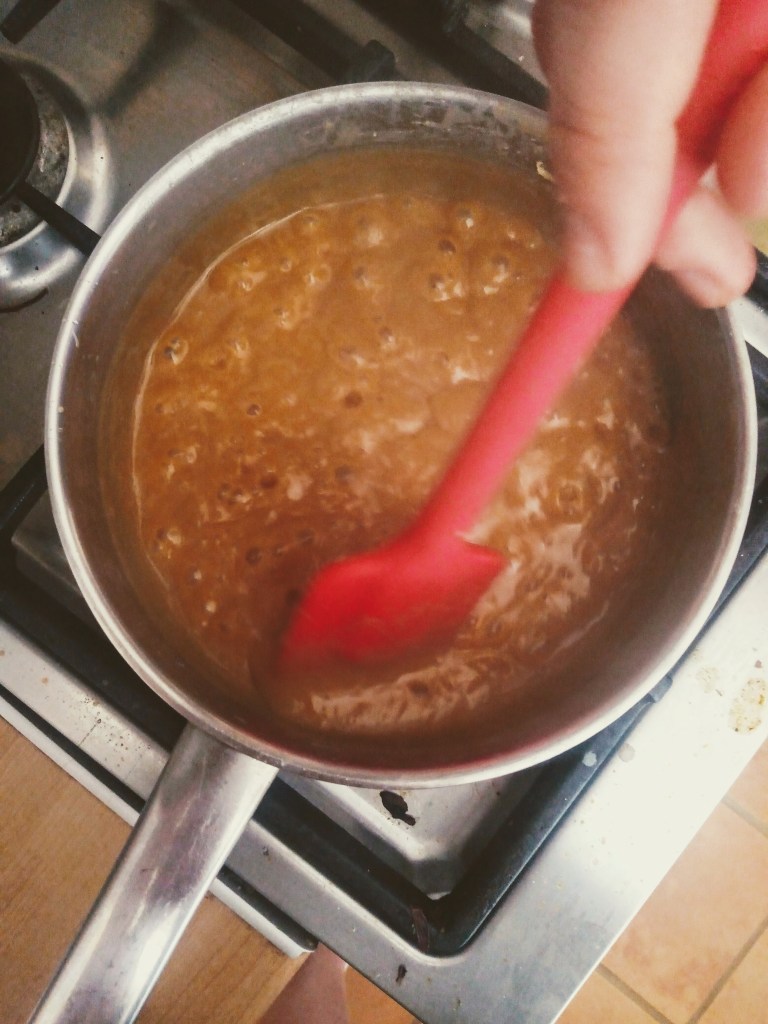
Once the shortbread base is cool, make the caramel. Put all your caramel ingredients into a saucepan and heat on a medium heat, stirring occasionally, until all the butter is melted and the mixture is smooth.

Increase the heat so the mixture comes to a boil. Keep stirring the mixture as it starts to thicken and become golden brown. This may take about 10 mins, don’t worry if it feels like it isn’t thickening, it will get there just keep heating and stirring. Once the mixture has thickened, and looks a golden brown colour, take off the heat.

I call this one – Action Shot

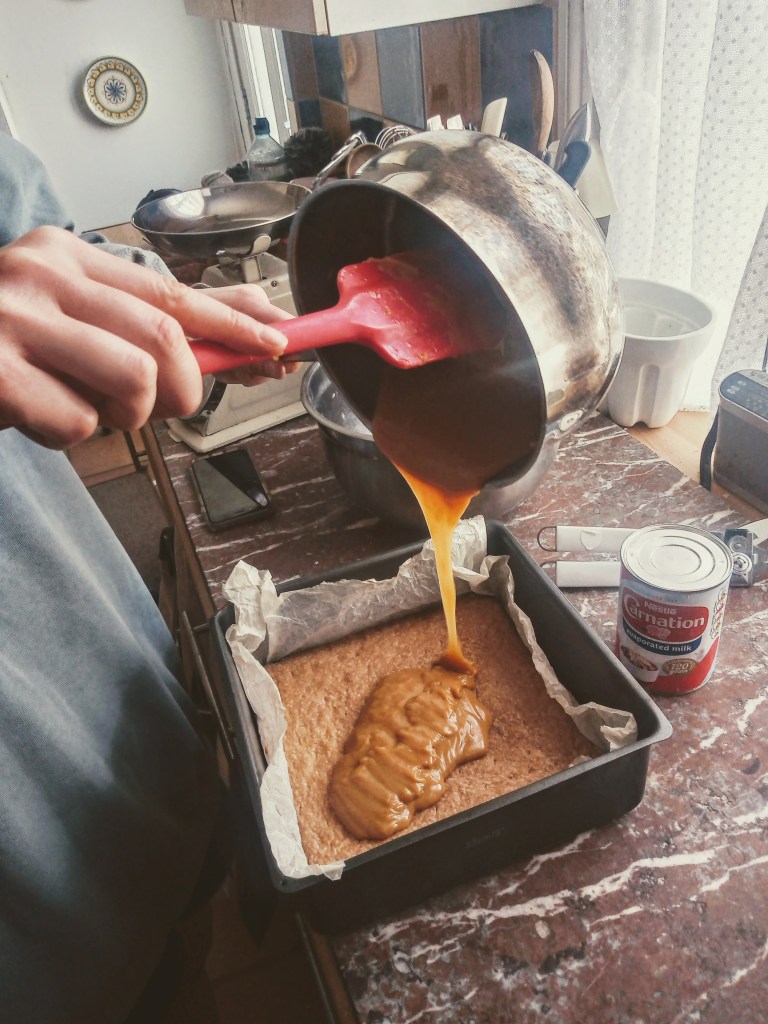
Allow the caramel to cool for 2 mins before pouring over the shortbread base. Smooth the caramel out with the back of a metal spoon and place in the fridge to cool and set.

today’s Visual Art

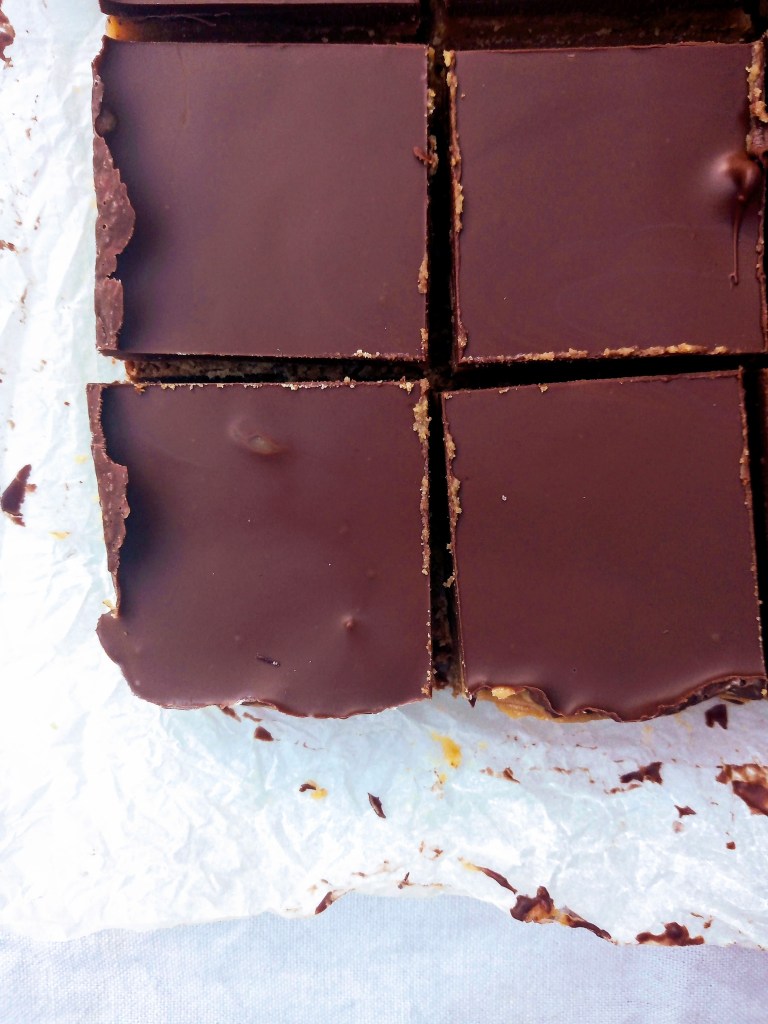
Once the caramel is cooled and set, melt your chocolate. Pour the melted chocolate over the set caramel, pushing the melted chocolate to the corners of the tin. Shake the tin to smooth out and level the chocolate. Put it back in the fridge to set.

Lol. It’s a lake of chocolate

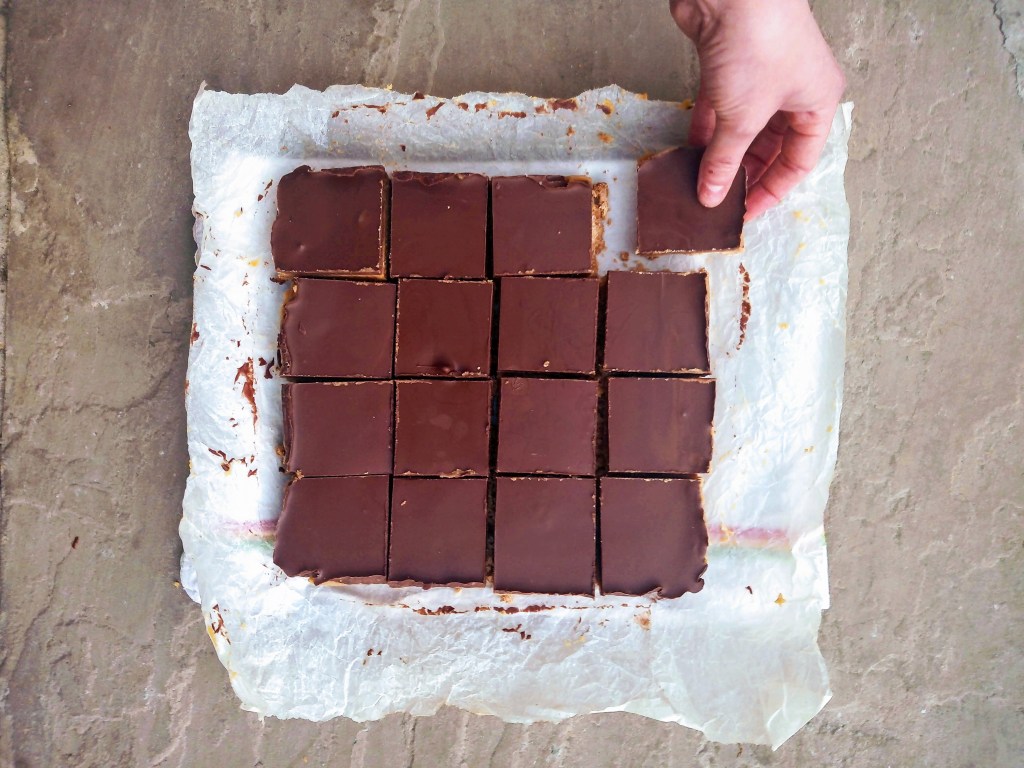
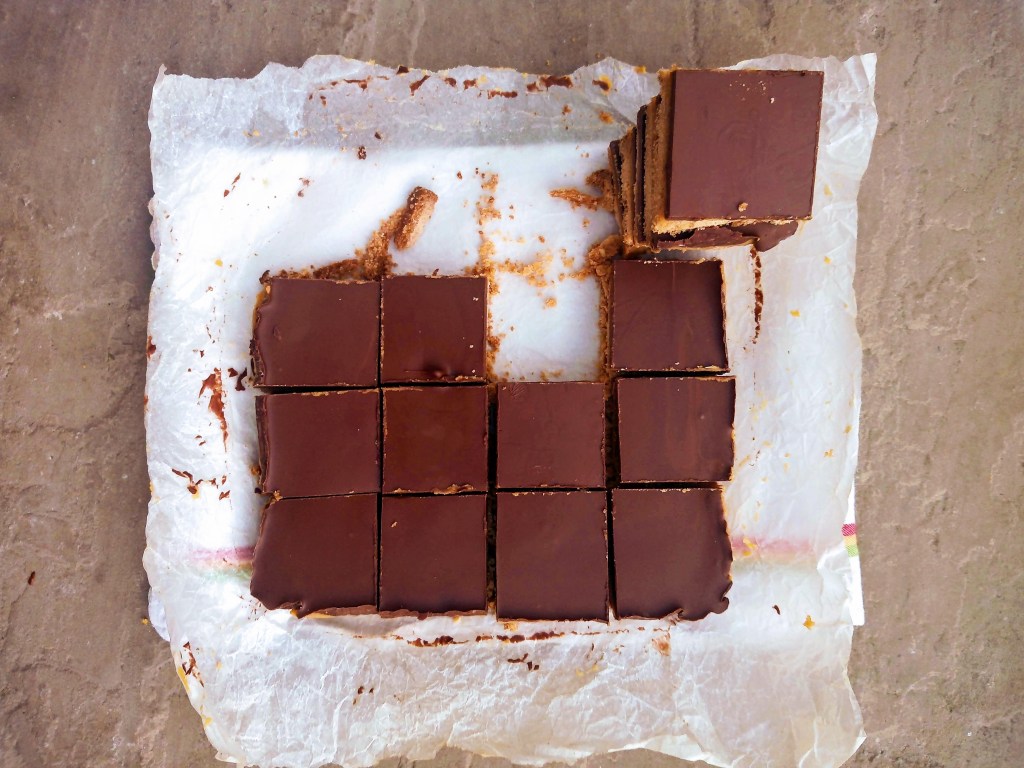
Once the chocolate is set, take it out of the fridge and cut it into squares (or MASSIVE slabs).

Caitlin xoxox

Rhubarb and Cardamon Polenta Cake

Uncategorized

Hey Joe

It’s rhubarb season!! I made a new recipe. This one took a couple tries but I got there in the end. I was pretty sad that my rhubarb didn’t come out of the oven bright pink – I thought it would dye the cake batter a pink/red colour. So I found out that the reason it didn’t come out bright pink is because there are two types of rhubarb. The first is called Forced rhubarb and it’s grown indoors. Forced rhubarb comes out at the end of Jan and is bright pink. But the stuff that you can get now (the stuff I’m working with) is grown outdoors and has less of a pink colour, it’s more green and comes out sort of transparent when you cook it… some rhubarb facts for you. Bet you feel enlightened.

This is a flourless cake and has a lot of fruit in it so it’s very moist and needs quite a long bake. It’s got a really nice sweet/sour thing going on – I’m proud of this one.

lil bit of Visual Art

Ingredients

  • 400g rhubarb
  • 200g ground almonds
  • 100g polenta
  • 200g butter, softened
  • 150g caster sugar, plus 1/2 a tablespoon for a topper
  • 3 eggs
  • 1/2 teaspoon vanilla extract
  • 1 teaspoon ground cardamon
  • 1 teaspoon baking powder (don’t forget to put this in, like I did)

I made a cardamon sugar syrup that I topped the cake with. I’ll give you the ingredients for it but the cake is perfect without if. I just wanted to play with sugar and cardamon.

Cardamon Sugar Syrup

  • 1 tablespoon sugar
  • 6 cardamon pods, crushed
  • 5 tablespoons water
Wow I am a Visial Artist
This is what sugar and cardamon looks like

Method

Pre heat the oven to 180 and line your fav cake tin with greaseproof paper (I used a 20cm round tin). Rip a big square of greaseproof paper and scrunch it up, it will be much easier to squash into your tin.

Roughly chop the rhubarb into thumb sized chunks (from the top of your thumb to under the knuckle). Set this aside. Measure out your ground almonds and polenta and set this aside.

Beat the butter and sugar until light and fluffy. Add the vanilla extract and ground cardamon and give it another mix.

One by one add the eggs, scraping the sides of the bowl with a spatula and beating the mixture in between each addition. Add a tablespoon of the almonds/polenta with each egg to stop the mixture curdling.

A pictoral diagram of one of the eggs being added
mmmmm smoooth

Fold in the rest of the amonds and polenta, the baking powder and 250g of the chopped rhubarb (the other 150g is to top the cake with). The less mixing you do here the better, you put in loads of air when you beat the eggs so you don’t wanna loose it here.

Spread the cake batter into the cake tin and top with the rhubarb you kept back. Sprinkle about half a tablespoon of sugar over the top of the cake before putting it in the oven.

Bake for an hour and 20 mins, or until a skewer inserted into the cake comes out with no wet batter on it. I know, it’s a really long bake. Keep an eye on it at the hour mark, but this is a really hard cake to overbake so don’t worry if you think it’s taking a while.

For the sugar syrup glaze, if you want to make it – put the sugar, water and crushed cardamon pods in a pan and bring to the boil on a medium heat. Swirl the pan, but don’t put a spoon in it (it can do strange things to the syrup). Once boiling, let it boil for a min before turning the heat down so the mixture is at a simmer. Let this simmer for 5/6 mins, or until the syrup has reduced and become very slightly golden (you want about a tablespoon and a half of liquid). Spoon this over the cake while it it still warm, it can be done when the cake is on its plate or while it’s still in the tin.

Enjoy the cake boii, miss you! Caitlin X

Making Buns, Hun – Hot Cross Buns

Uncategorized

Happy Easter Joe!!

I made hot cross buns. I won’t lie to you they take a long time to make haha but it’s worth it. These are my one and only buns. Mum gave me an old baking book yesterday (the inside page – ‘To Daddy, looking forward to some parties, love Joe’ in mum’s hand writing). In the book it said before the Reformation all dough was sliced with a cross before it went in the oven to ward off any evil spirits that might stop the dough rising… fact of the day for you.

Ingredients

Dough

  • 300ml full-fat or semi skimmed milk
  • 50g butter
  • 500g strong bread flour
  • 1 teaspoon salt
  • 75g caster sugar
  • 1 tablespoon sunflower oil
  • 7g sachet yeast
  • 1 egg
  • 75g sultanas
  • 50g raisins
  • Zest of 1 orange
  • 1 teaspoon cinnamon
  • 1/2 teaspoon nutmeg

The Cross

  • 75g plain flour
  • 5 tablespoons water

The Glaze

The glaze is normally made from warmed apricot jam but there was none in the cupboard so I made a new glaze

  • 3 tablespoons icing sugar
  • 2 tablespoons golden syrup
  • 3/4 tablespoons boiling water

Method

Bring the milk to the boil then take off the heat and add the butter, swirl the pan to let the butter melt. Leave it to cool down to a comfortable warm temp (so you can put your finger in the mixture).

Visual art
some more Visual Art

Mix the flour, salt, sugar and yeast in a large bowl. Make a well in the centre and pour the milk/butter mixture into the well, mix with a wooden spoon. Then bring everything together with your hands.

flour and butter: about 30 mins entertainment…

Tip the mixture onto a lightly floured surface and have at it for 8 mins until the dough is smooth and elastic. It’s a sweet dough so you need to work it quite well because the sugar and milk and butter make it hard for the yeast to do it’s ting – ward off those evil spirits with your kneading! Once you’ve kneaded it put the dough in a lightly oiled bowl and cover the bowl with oiled cling film. Leave the bowl in a warm place for the dough to prove for 1 hour or until the dough has doubled in size.

hello lil dough of egg

Once the dough has had its first prove add the sultanas, raisins, orange zest, cinnamon and nutmeg. Knead these into the dough. Leave the dough to prove again for an hour or until doubled in size (with more oiled cling film over the bowl).

After the second prove divide the dough into 15 even pieces (you can eye ball this – I ended up with some lil buns and some big buns – variety in your life is they way to go). Roll each piece into a smooth ball on a lightly floured work surface. Put the buns on baking trays that have been lined with greaseproof paper. Make sure you leave enough space between the buns to let them rise. Cover (but don’t wrap) the trays with olied cling film or with a tea towel. Set the buns aside for an hour for the final prove (almost there lol).

About 20 mins before the buns have finished their third and final prove, preheat the oven to 220. Mix the flour with the water to make the paste for the cross. Add one tablespoon of water at a time, you might not use all of the water. You want a flour paste that you can pipe, not flour water. Spoon the paste into a piping bag with a small nozzle (or sandwich bag, cut the tip off the bag once it has been filled with the paste and you will have a piping bag). Pipe a line along each row of buns, then repeat in the other direction to make the crosses.

Bake the buns for 20 mins.

lil Top gs out the oven

When the buns are out the oven mix together the boiling water (again one table spoon at a time to get the right consistency), icing sugar and golden syrup. Brush this over the buns while they are still warm, or you can use your fingers as a pastry bush.

That’s it!! Enjoy your peng peng buns, Caitlin XXX

Black Treacle Ginger Cake

Uncategorized

Yo Joe

The ginger cake that I make was found by fifteen year old me in a baking book by Sainsbury’s. Sainsbury’s is a blessed place without the addition of a baking book but I think this book took Sainsbury’s to new heights. This is the only ginger cake I will ever make because it is the best ginger cake. I know you know how good it is, but our readers may want to hear some reviwes – ‘Outstanding’ (dad), ‘Top cake’ (dad), ‘Really good’ (mum), ‘Leng’ (You (Joe)). Anna and Kanhai are fans too. I think its safe to say this is a cake that I will pass onto my kids, grandchildren, cats. I reckon I could make this cake with my eyes closed, a good thing because the pages of the recipe are stuck together with 6 years worth of cake batter splatter, drips of black treacle and smears of butter. A sign of a good recipe.

Yep. I am a photographer

Ingredients

  • 225g self-raising flour
  • 2 teaspoons ground ginger
  • 1/2 teaspoon ground cinnamon
  • 1 teaspoon of bicarbonate of soda
  • 100g unsalted butter, from the fridge
  • 100g golden syrup
  • 100g black treacle. For the syrups 100g is about 3 and a half tablespoons
  • 100g light brown soft sugar
  • 50g diced stem ginger plus 2 tablespoons of ginger syrup from the jar
  • 2 eggs
  • 200ml semi-skimmed milk
  • 100g icing sugar

Method

Preheat your oven to 180. Grease your cake tin with butter (I used a 22cm ring tin. This cake also works in a 20cm squar tin or a 20 x 10cm loaf tin). This is a sticky cake so shake a light coating of flour around the inside of your tin to help the cake come out.

Using the tips of your fingers rub together the flour, ginger, cinnamon, bicarbonate of soda and butter until it resembles bread crumbes. You can also do this by putting theses ingredients in a food processor. Set this mixture aside.

In a saucepan, put the black treacle, golden syrup, sugar and diced stem ginger. Heat gently until all the sugar has disolved (the mixture isnt grainy anymore), then cook for a further minuet on high heat and remove. The syrup will bubble up, don’t worry about this, it takes a long time to burn this mixture so no risk of that. Set the pan aside.

Beat together the eggs and milk then pour into the flour mixture. Give this a little stir before adding the syrup mixture that has had time to cool a bit. Combine all the mixtures together quite quickly to avoid the syrup mixture hardening too much (I always get a bit of hard caramel on the bottom of my bowl). This batter does well with as little mixing as possible to avoid it sinking in the oven so once everything is combine get it in the tin.

Bake for 45 mins.

Once out of the oven allow the cake to cool for 10 mins in the tin while you make the syrup. Sive the icing sugar into a bowl and stir in the ginger syrup and 2 tablespoons of boiling water.

Take the cake out of the tin and put on a wier rack or plate. Peirce the cake all over with a skewer and pour over the syrup…mmmm nice.

have a sweet sweet cake, Caitlin xxxx

Garlic Rosemary Focaccia Botany and Hello!

Uncategorized

Dear Joe

Wheeeyy Cake On My Face is published!! This is a lil bit of an experiment, I’ve never written a blog before so lets see how this goes. Thought I would write it to you, Joe, because it feels very strange not knowing who you’re writing to, could be one person or could be 100…wow.

Yesterday I made Focaccia.

My focaccia garden boii

I love Mum’s fascination with weeds growing out of cracks in pavements, walls and at the side of ring roads. It’s also pretty amazing that she seems to know the name of all the weeds she finds. Yesterday we were on a walk together, I was ahead, I heard ‘Caito. Come try this’, mum handed me a small green leaf she had just picked, ‘what is it?’, ‘Garlic Mustard’. We walked on, eating some leaves that really did taste of garlic and mustard. She still uses that flower encyclopedia we got her for Christmas a couple years ago when she doesn’t know the name of a plant she finds. I’m not great at matching up names of plants with what they look like but I still love looking at weeds and flowers, their colour, smell and texture.

In tribute to mum’s impressive knowladge of flowers and my impressive ability to eat bread I decided to make a focaccia garden. I’d never made focaccia before but it’s my new fav bread, it’s one of the fastest breads to make and has been hailed ‘the most delicious bread’ by Celestine. You can top it with any flavour and any design so you can use this recipe to make your own focaccia creation…garden…allotment…jungle?

Ingredients

Dough

  • 400 g strong white bread flour, plus extra for dusting
  • 100 g wholemeal bread flour, fine ground semolina or strong white bread flour
  • 1/2 tablespoon salt
  • 7 g dried yeast
  • 1/2 tablespoon golden caster sugar
  • 300 ml lukewarm water
  • olive oil (as much as you want to put on your bread)

Topping

You can use whatever veg and herbs you have in your kitchen, but you need garlic. Here is what I used:

  • 1 red onion
  • 2 peppers, one red, one yellow
  • 1 handful of cherry tomatoes
  • 3 spring onions
  • handful of parsley
  • 3 cloves of garlic
  • 3 sprigs of rosemary
  • black sesame seeds

Method

Mix the flours and salt in a large bowl and make a well in the middle like you are about to make pancakes. In a seperate bowl add the yeast and sugar into the lukewarm water and mix with a fork. Leave the yeast and water for a few mins until it sarts to foam. When you can see some foam on top of the water slowly pour it into the well you made in the flour mixture. Mix this with a fork.

Once the mixture comes together tip it onto a worksurface and get your hands involved. Knead vigorously for about 8 mins. You might want to add a little bit of flour onto the worksurface so the dough doesn’t stick, but try to use as little as possible. You want to end up with a smooth, springy dough.

Lightly oil a large bowl and pop the dough in it. Dust the top of the dough with flour and cover with a tea towel. Leave the bowl in a warm place (like in the 25 degree sun were having at the min) to prove for about half a hour. You want your dough to have doubled in size.

I’m loving my dough
With a lil bit of work…
Your dough can look like a boiled egg too

While the dough proves preheat the oven to 220 and prep your toppings.

Once the dough has risen, punch it to deflate the dough then spread it out onto a baking tray. Press your fingers down in the dough like your playing the piano to make lots of dips and wells in the dough. Arrange your toppings on the dough. Scatter some chopped garlic and rosemary, sprinkle some salt and drizzle a good amount of olive oil on the dough to finish.

Lay a tea towel over the dough and prove for another 20 mins. Then, bake for 20 mins or until golden on top and soft in the middle. If you can’t tell if the bread is done, tap it, if it sounds hollow its ready to come out.

Enjoy your focaccia and the sun, Caitlin xxxxxx